
Build a Garden Kneeler Bench with Storage for $30
Plywood, foam, outdoor fabric, and three hours — the dual-purpose garden tool that ends the knee complaints before the season is halfway through
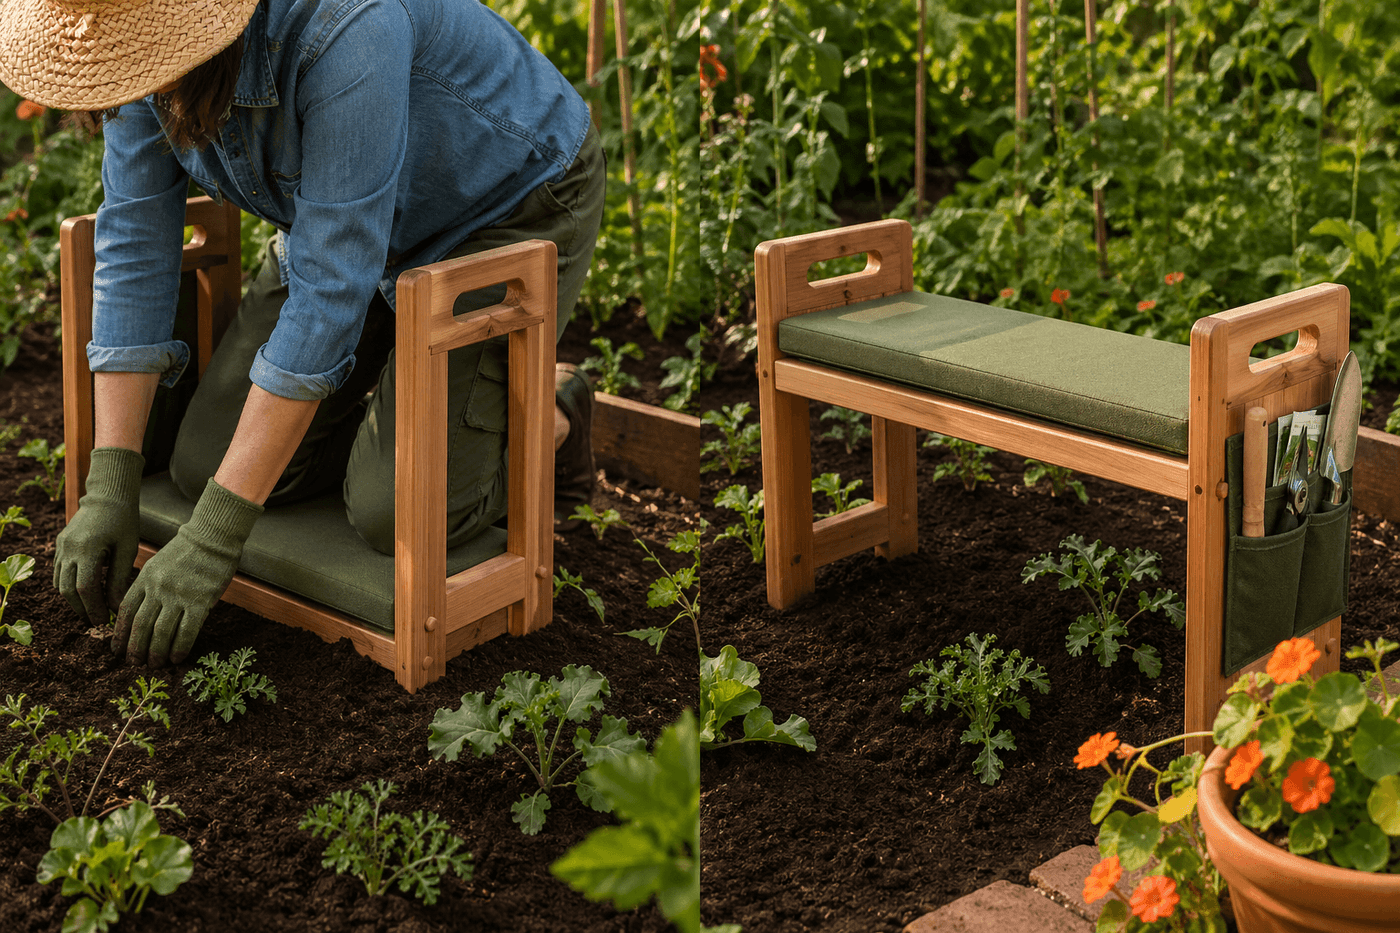
A garden kneeler bench is one of those tools that gardeners who don't own one regard as a nice-to-have and gardeners who do own one regard as completely non-negotiable — because the difference between spending a morning in the garden on bare knees and spending it on two inches of padded foam is the difference between finishing the day feeling accomplished and finishing it feeling like you need to lie down. The design is elegantly dual-purpose: padded top surface faces down for kneeling, whole thing flips over and the sturdy side handles become legs for a proper sitting bench, all while the canvas tool storage pockets hanging between the handles keep your trowel and pruners traveling with you down the bed rather than left behind three rows ago. The build costs about $30 in materials, takes three hours, and produces a piece of garden equipment that commercial versions sell for $60 to $80 with less storage and flimsier construction. Build it once and use it every single gardening season for the rest of your life.
What You Need
- Plywood, ½" thickness, cut to 20×10" — for the kneeling platform; ½-inch plywood provides enough rigidity for a kneeling surface without the weight that makes the finished kneeler difficult to carry and flip throughout a gardening session (~$8–10 for a half-sheet that also yields the handle pieces)
- 2×4 lumber, 8-foot length, qty 1 — for the four handle uprights that serve as push-up grips when kneeling and legs when the bench is flipped; cut into four pieces at 10 inches each (~$4–5)
- 2×2 lumber or 1×3, short lengths — for the cross braces that connect the handle uprights and provide the structural frame that holds the canvas storage pockets (~$3–4)
- Foam padding, 2" thickness, cut to 20×10" — upholstery foam or craft foam in the 2-inch thickness; thinner foam compresses too quickly under kneeling weight and loses its cushioning benefit within a single gardening session (~$6–8 for a piece sized to the platform)
- Outdoor fabric or waterproof canvas, ½ yard — for wrapping the foam-topped platform; outdoor fabric resists moisture, cleans easily, and handles the abrasion of regular use on garden surfaces without deteriorating (~$5–8 per half yard)
- Canvas or heavy duck cloth, ½ yard — for the tool storage pockets that hang between the handle frames on each long side; heavier weight canvas holds the shape of the pocket under tool weight without sagging (~$4–6)
- Exterior screws, 2" and 1¼" — for all frame joints; pre-drill every fastener location to prevent splitting in the 2×4 handle pieces
- Staple gun with ½" staples — for securing the outdoor fabric wrap around the foam-topped platform; staples driven into the plywood underside hold the fabric taut without visible fasteners on the kneeling surface
- Heavy-duty sewing needle and upholstery thread, or sewing machine — for stitching the canvas storage pockets
How to Build It
- Cut all lumber pieces before beginning any assembly — the plywood platform at 20×10 inches, four 2×4 handle uprights at 10 inches each, and four cross brace pieces at 16 inches each from the 2×2 or 1×3 stock. Having all pieces cut and sized before assembly begins means the build flows without interruption and any dimension errors are caught before they're committed to a joint that requires disassembly to correct.
- Build the two handle frames by attaching two 10-inch 2×4 uprights to a 16-inch cross brace at the top and another at the bottom, pre-drilling and driving 2-inch exterior screws through the cross braces into the upright ends. The spacing between the two uprights on each frame should match the width of the plywood platform — 20 inches outside-to-outside — so the platform sits flush between the frames when assembled. Build both frames before attaching either one to the platform so you can confirm they're identical before the full structure is committed.
- Attach the plywood platform between the two handle frames by standing both frames parallel and setting the platform between them at the midpoint of the upright height, then driving 1¼-inch screws through the upright faces into the platform edges. The platform should sit at a height that — when the kneeler is in bench position with handles down — places the seating surface at a comfortable height for sitting, approximately 14 to 16 inches from the ground. This midpoint attachment is the dimension that determines comfort in both orientations, so measure and mark it carefully before driving any screws.
- Sand the entire assembled frame thoroughly with 120-grit paper, paying particular attention to the handle surfaces where hands will grip during push-ups from the kneeling position and where the tool storage pockets will rub against the frame during use. Smooth handle surfaces are the ergonomic detail that makes the kneeler genuinely comfortable to use repeatedly through a morning of gardening rather than leaving rough spots that become noticeable after the third or fourth push-up.
- Attach the foam padding to the top face of the plywood platform by applying a thin, even coat of contact cement or spray adhesive to both surfaces, allowing both to become tacky before pressing the foam firmly onto the platform face. Foam that is only stapled rather than adhered shifts and bunches under kneeling pressure and must be repositioned repeatedly during use; adhesive-bonded foam stays flat and centered through an entire gardening session without any attention.
- Wrap the foam-topped platform with outdoor fabric by cutting the fabric several inches larger than the platform on all sides, centering the platform foam-side-down on the wrong side of the fabric, and pulling the fabric taut over the plywood edges before stapling it to the underside every two inches around the full perimeter. Work opposite sides alternately — front and back, then left and right — rather than stapling around the perimeter continuously, which allows even tension to build across the fabric surface and produces a smooth, wrinkle-free kneeling face.
- Sew two canvas storage pockets by cutting two rectangles of canvas approximately 14×8 inches each, folding the top edge down one inch and stitching it as a finished hem, then folding the remaining three sides inward and stitching them together to form a pocket approximately 14 inches wide and 6 inches deep. The pocket opening should be at the top with a clean hemmed edge; the three closed sides form the bottom and sides of the pocket that holds tools in place while the kneeler is moved and flipped.
- Attach one canvas pocket to the cross brace on each long side of the kneeler frame by threading the pocket's hemmed top edge over the upper cross brace so the pocket hangs between the two uprights with the opening accessible from outside the frame. Secure the pocket top to the cross brace with several screws driven through the canvas hem into the brace face, or hand-stitch the hem directly to the brace surface. The finished pocket should hang freely between the uprights with enough depth to hold a hand trowel, a pair of pruners, and several seed packets without the tools touching the ground when the kneeler is in either position.
Occupational therapists who recommend adaptive gardening tools for clients with mobility limitations always specify that the handle height on a garden kneeler should place the grip at hip height when the user is in a kneeling position — which for most adults means the handles need to extend 8 to 10 inches above the kneeling platform surface rather than the 6-inch height of many commercial versions. The additional handle height transforms the push-up from kneeling from a struggle that requires significant upper body strength to a controlled, comfortable movement that even gardeners with limited strength or joint pain can complete without discomfort. If you or anyone who will use this kneeler has any difficulty with kneeling or rising, adding two inches to the handle upright length at the cutting stage costs nothing and makes the finished kneeler meaningfully more accessible and comfortable to use throughout a full gardening session.














