
Build a Dollar Store Bamboo Garden Trellis for $4
Ten bamboo stakes, a length of twine, and twenty minutes — the climbing plant support that costs $4 and does everything a $25 metal version does
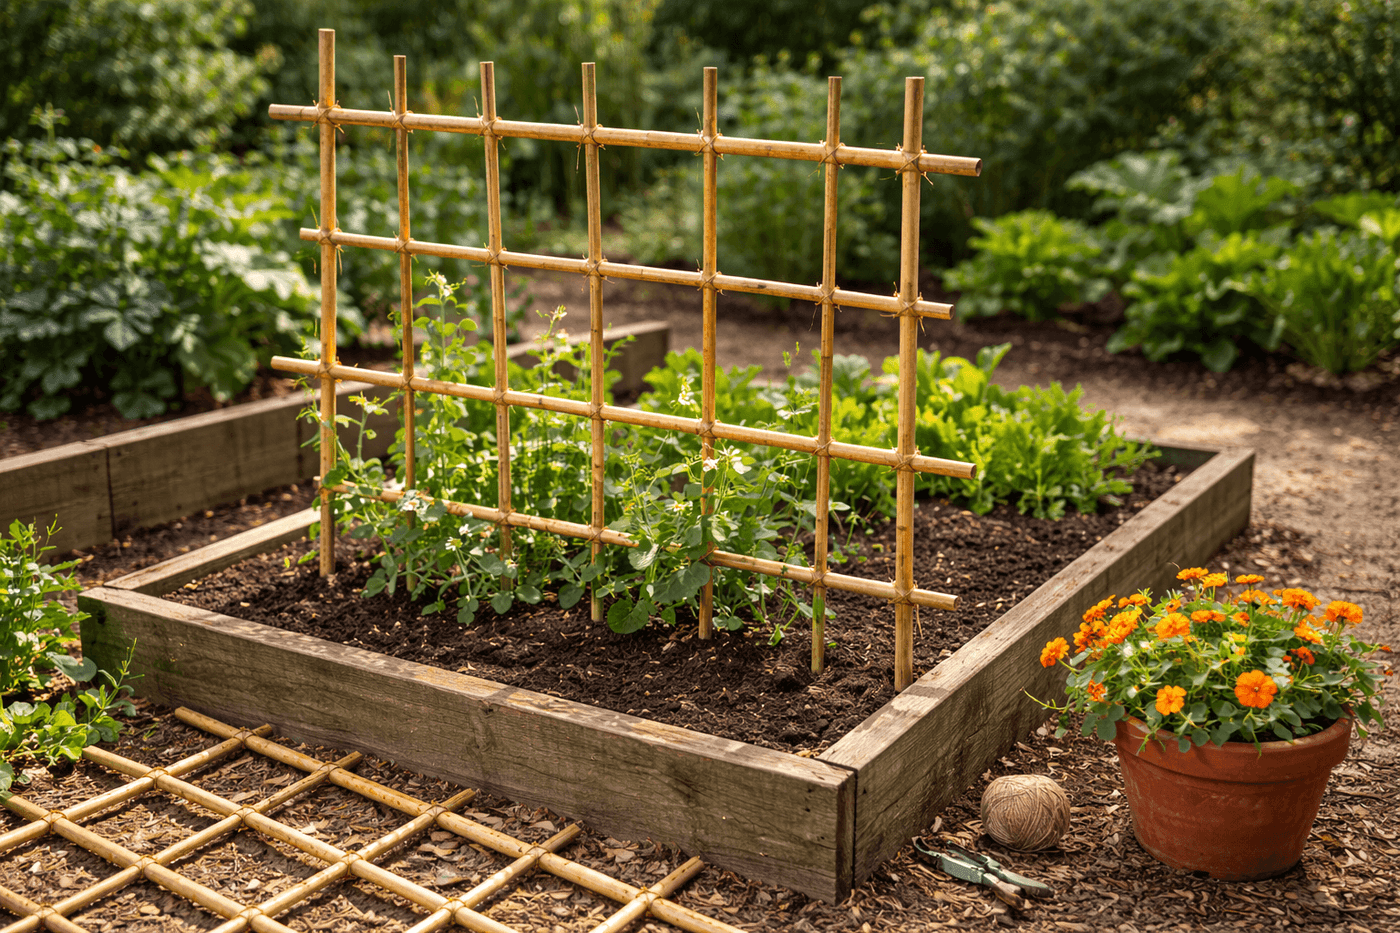
Climbing vegetables and flowers are among the most productive and beautiful plants in the garden, and they all share a single fundamental requirement: something to climb. Metal and wooden trellises from garden centers solve this problem at prices that range from mildly annoying to genuinely shocking for what is ultimately a grid of material with some structural support — and a bundle of bamboo stakes from the dollar store plus a length of jute twine solves exactly the same problem for $4, in about twenty minutes, with a result that looks perfectly at home in any garden style from cottage to formal kitchen garden. The natural bamboo weathers to a warm golden tone over the season, blends visually into garden plantings in a way that bright green or powder-coated metal never does, and stores flat against the garage wall over winter without taking up any meaningful space. Make three or four of these in an afternoon and your entire vegetable garden has the climbing support it needs for the cost of a single store-bought trellis.
What You Need
- Bamboo garden stakes, 4–6 foot length, qty 10–12 — available at dollar stores in bundles; longer stakes produce a taller finished trellis with more climbing surface for vigorous vines like cucumbers and pole beans (~$1–2 for a bundle of 10)
- Natural jute twine or garden twine — for lashing intersections with the X-wrap technique that holds bamboo joints firmly without slipping; natural fiber twine grips bamboo better than synthetic and decomposes at the end of the season without leaving microplastic debris in the soil (~$1–2 for a ball)
- Zip ties, heavy duty, optional — faster than twine wrapping for high-intersection-count trellises when speed matters more than aesthetics; UV-stabilized outdoor zip ties hold through a full season without brittling and breaking (~$1–2 for a pack)
- Scissors or pruning snips — for cutting twine lengths and trimming zip tie tails
- Measuring tape — for spacing stakes consistently at 10–12 inch intervals before lashing any joints; eyeballed spacing produces a trellis that looks assembled rather than constructed
- Rubber mallet or sturdy stick — for pushing the vertical stake bases firmly into soil without splitting the bamboo tips; direct hammer blows on bamboo tops split the cane at the impact point and weaken the top section of the stake
How to Build It
- Lay three bamboo stakes vertically on a flat surface — a lawn or patio works well — spacing them exactly twelve inches apart and aligning the bottom ends evenly. These three vertical stakes are the structural uprights of the trellis; consistent spacing between them is what makes the finished grid look intentional rather than improvised, and measuring now costs thirty seconds while correcting uneven spacing after lashing is time-consuming and frustrating.
- Place horizontal stakes across the three vertical ones at ten to twelve inch intervals, starting eight inches from the bottom end of the verticals — the bottom eight inches will be driven into soil and don't need a horizontal cross piece. Position each horizontal stake perpendicular to the verticals and confirm it's square to the layout before lashing any intersections; a trellis that starts square at the first horizontal row and finishes crooked at the top is the result of not checking perpendicularity at the foundation row.
- Lash each intersection with jute twine using an X-wrap technique — cut a twelve-inch length of twine per intersection, center it on the joint, wrap diagonally in both directions twice each, pull firmly, and tie off with a square knot at the back of the intersection. The X-wrap grips the two bamboo canes against each other through diagonal tension rather than relying on knot strength alone, which is why twine-lashed bamboo joints hold heavy vine weight reliably through a full season of growth and weather.
- Work across all intersections systematically from bottom to top rather than randomly — completing one horizontal row fully before moving to the next ensures consistent joint tension throughout the trellis and prevents the structural inconsistency that occurs when some joints are wrapped tight and others are wrapped loose across the same horizontal span.
- Build an A-frame version by constructing two identical ladder panels using the same technique and leaning them together at the top, lashing the apex joint with several wraps of twine before spreading the bases to your desired angle. The A-frame format is more stable than a flat panel in exposed garden positions and creates a structure that climbing vines can access from both sides, effectively doubling the planting capacity of the same footprint of garden space.
- Carry the finished trellis to its garden position before pushing any stakes into the soil — a lashed bamboo trellis is lightweight and easy to carry flat, but awkward to reposition once the vertical stakes are in the ground. Confirm the placement gives the climbing plants behind it clear access to the lowest horizontal rung, and that the trellis orientation runs across the prevailing wind direction rather than parallel to it, which dramatically reduces the lateral force that vine-covered trellises experience in summer storms.
- Install the trellis by pushing the three vertical stake bases into the soil to a depth of at least eight inches — deeper in loose or sandy soil — using a rubber mallet against a small block of wood placed on top of each stake rather than striking the bamboo directly. Eight inches of soil engagement is the minimum depth that keeps a vine-loaded trellis from rocking and tipping under wind pressure; stakes driven only three or four inches sink progressively through the season as the soil softens around them with repeated watering.
- Guide the first climbing stems toward the lowest horizontal rung with a loose loop of soft twine once the trellis is installed — most climbing vegetables and flowers find the trellis independently within a few days, but a single guided stem gives the plant its initial direction and dramatically accelerates how quickly the first tendrils find the bamboo and begin the climbing behavior that makes the trellis earn its place in the garden.
Market gardeners who use bamboo stake trellises at commercial scale always soak their stakes in water for twenty-four hours before lashing and installing them — dry bamboo shrinks slightly as it weathers through the first weeks outdoors, and stakes lashed dry develop loose, wobbly joints at every intersection as that shrinkage occurs under the twine. Stakes soaked before assembly are already at their expanded hydrated dimension, so the twine wraps remain tight as the bamboo dries in place and the joints never loosen. The soak costs nothing and takes zero active effort — it is the single preparation step that separates a bamboo trellis that stays tight and sturdy through the full season from one that needs re-lashing at every intersection by midsummer.














