
Build a Bamboo and Log Bee Hotel for $8
Tin cans, bamboo tubes, and a drilled wood block — the garden addition that earns its keep in pollination all season long
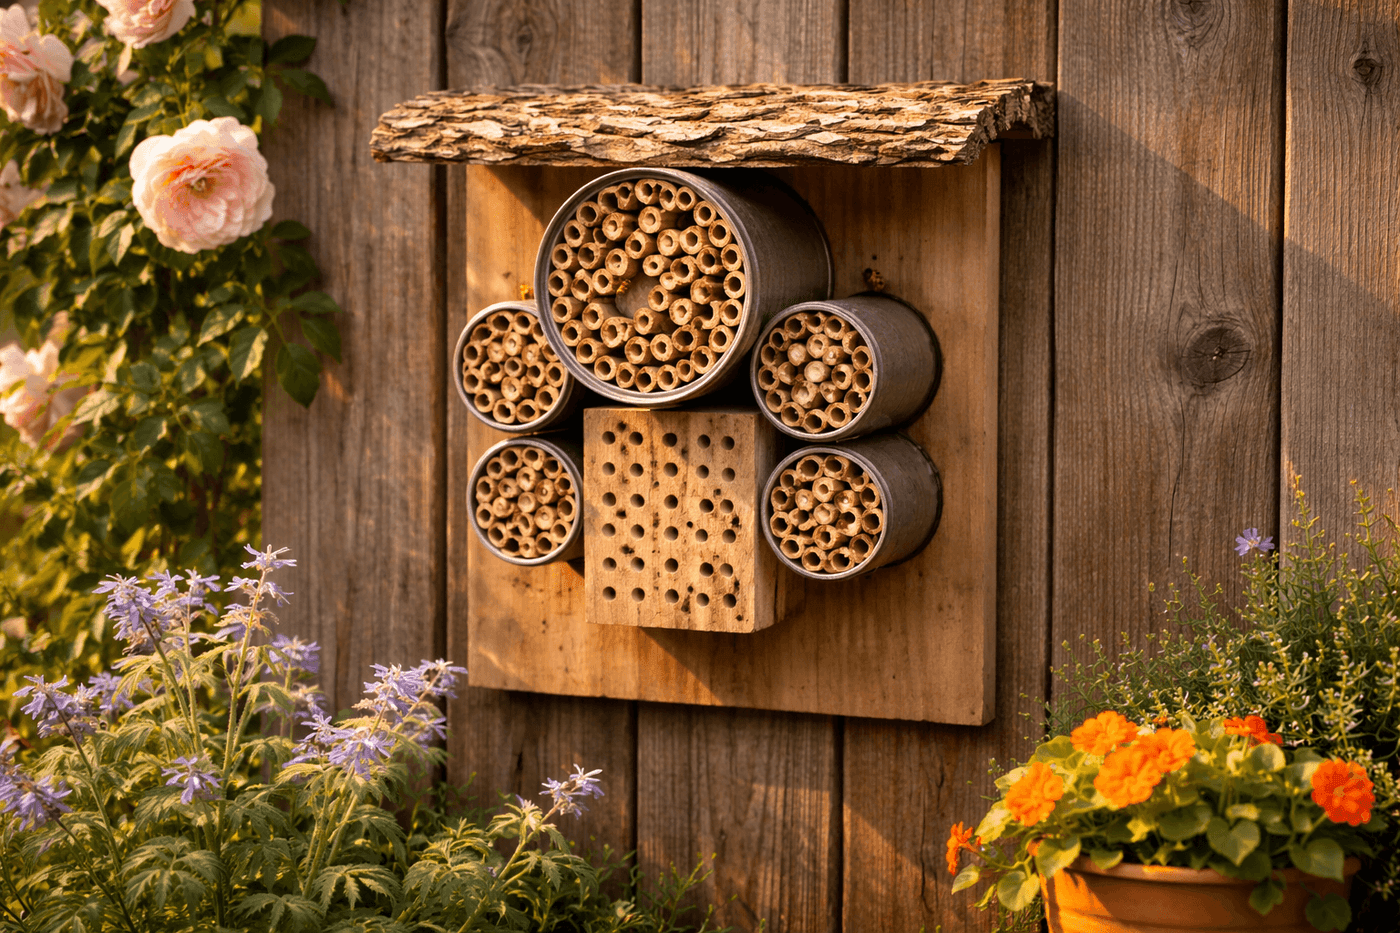
Honeybees get all the attention, but the solitary bees doing the majority of garden pollination work — mason bees, leafcutter bees, and dozens of other species — nest alone in hollow stems, wood cavities, and drilled holes rather than in hives, and they are extraordinarily easy to support with the right structure in the right location. A bee hotel built from tin cans, dried bamboo tubes, and a drilled scrap wood block gives these insects exactly the nesting habitat they are looking for, costs about $8 in materials, and takes about an hour to assemble from things you likely already have in your garage and recycling bin. The return on that investment is not abstract or theoretical — it is measurable in visibly more abundant pollination across your vegetable beds, fruit trees, and flowering plants every season the hotel is occupied. Building a bee hotel is not a craft project dressed up as conservation. It is genuine habitat provision for the insects that make everything else in your garden work, and it costs less than a bag of potting soil.
What You Need
- Tin cans in two or three sizes — a large can (28 oz or larger) as the primary housing and two to three smaller cans (15 oz) for satellite nesting units; wash and remove all labels before use (free from recycling)
- Dried bamboo canes — cut to uniform lengths matching the depth of your largest can; internal diameter of 6–10mm is ideal for mason bees, which are the most common and beneficial early-season solitary bee guests (~$4–6 for a bundle from a garden center, or free if you have bamboo growing nearby)
- Scrap wood block, hardwood preferred — for drilling nesting holes; a piece of untreated hardwood at least 4 inches thick gives you enough depth for effective nesting chambers (free from offcuts)
- Drill with bits in 6mm, 8mm, and 10mm — for drilling nesting holes in the wood block at varying diameters that accommodate different solitary bee species
- Cedar or exterior-grade scrap board — for the backing plate that mounts to the fence and holds the can cluster together (~free from offcuts)
- Piece of bark, cedar shingle, or scrap wood — for the roof overhang that keeps rain from entering tube and hole openings directly
- Exterior screws and a drill — for mounting the backing board to the fence and attaching the roof overhang
- Twine or wire — for securing the tin can cluster to the backing board so individual cans cannot shift or fall in wind
- Hand saw or miter saw — for cutting bamboo canes to uniform length
How to Build It
- Cut bamboo canes to a uniform length that matches the interior depth of your largest tin can — typically 5 to 6 inches for a standard large can. Cut each cane just beyond a node so the closed node end sits at the back of the can and the open end faces outward; bamboo tubes open at both ends do not provide the protected rear chamber that solitary bees require for successful egg development, and this single construction detail is what separates a bee hotel that gets occupied from one that sits empty all season.
- Sand the cut end of every bamboo tube lightly with 120-grit sandpaper to remove any splintering around the opening — rough or splintered tube entrances damage the wings of bees entering and exiting the nesting chamber, which deters occupation and injures the very insects the hotel is meant to support.
- Drill nesting holes in your scrap wood block using bits in three sizes — 6mm, 8mm, and 10mm — drilling to a depth of at least 4 inches and stopping at least half an inch from the back face so the rear chamber remains closed. Space holes approximately ¾ inch apart across the block face in a grid pattern, and drill all holes perfectly horizontal rather than angled downward — angled holes allow moisture to pool in the nesting chamber and promote the mold that kills bee eggs before they can develop.
- Pack the bamboo tubes tightly into the largest tin can with the open ends all facing outward and flush with the can rim — pack them as densely as possible so no tube can shift or rotate, which would expose the closed node ends to the front. A loosely packed can allows tubes to shift in wind, and tubes that rotate to present a node end rather than an open tube end to approaching bees immediately lose their occupancy value.
- Arrange the smaller cans filled with drilled wood blocks around the large bamboo-filled can on the backing board, clustering them into a compact grouping that leaves no large gaps between cans where debris accumulates and moisture collects. Secure the entire cluster to the backing board by wrapping heavy gauge wire or twine firmly around the full assembly and screwing the wire ends into the backing board — individual cans that are not secured together as a unit will shift independently in wind and eventually fall.
- Attach the roof overhang to the backing board above the can cluster — a piece of bark, a cedar shingle, or a flat scrap board angled slightly forward so rain runs off the front edge rather than dripping into the tube openings. The roof overhang is the structural detail most decorative bee hotels omit, and it is the single most important factor in whether the nesting materials stay dry enough to remain habitable through a full season of rain.
- Mount the finished bee hotel on a south or southeast-facing fence, wall, or post at approximately eye level — between 4 and 6 feet from the ground. South-facing placement gives the hotel morning sun that warms the nesting chambers early in the day, which is critical for mason bee egg development; a shaded or north-facing hotel may attract occasional exploration visits but almost never achieves the consistent occupancy of a properly oriented installation.
- Replace the bamboo tubes and clean the drilled wood block each autumn after the nesting season ends — remove the old tubes, which carry parasites and mold from the previous season, and replace with fresh-cut bamboo before spring. Clean the drilled wood block holes with a pipe cleaner and allow them to dry completely before the following season. Annual replacement of nesting materials is what keeps a bee hotel healthy and consistently occupied year after year rather than becoming a parasite reservoir that harms more bees than it helps.
Conservation entomologists who design solitary bee habitat always plant a dedicated forage strip within 300 feet of the bee hotel rather than relying on general garden plantings — a concentrated row or cluster of sequential-blooming native flowers that provides pollen and nectar from the first mason bee emergence in early spring through the last leafcutter bee activity in late summer ensures the hotel's residents have reliable food within easy foraging distance throughout the entire nesting season. Borage, phacelia, and native asters planted in succession cover the full bee activity window and require almost no maintenance once established. A bee hotel without nearby forage is shelter without a grocery store — the structure provides a home, but the planting is what makes the neighborhood genuinely liveable.














