Turn Vintage Handkerchiefs into Pillow Covers for $4
Two thrift store handkerchiefs, a pillow form, and an afternoon — the accent pillow that looks like a deliberate antique find
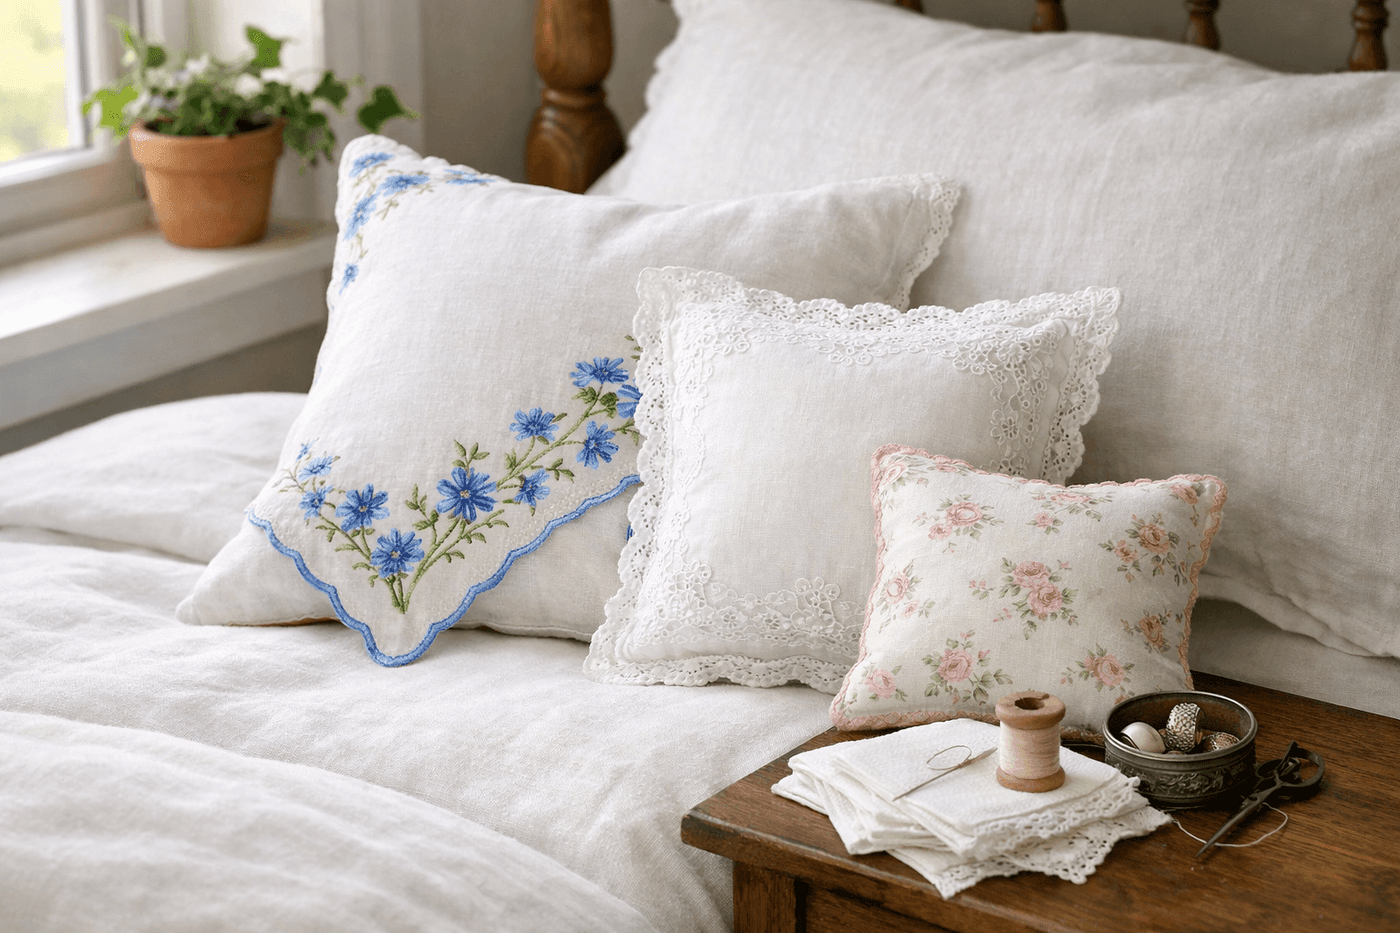
Vintage handkerchiefs occupy a specific category of thrift store find — the kind that is beautiful, clearly well-made, and completely without an obvious modern use in a world where nobody carries a cloth handkerchief anymore. Turning them into accent pillows solves that problem elegantly: the embroidered corners, lace edges, and delicate printed designs that make handkerchiefs so appealing become the decorative feature of a pillow that costs $3 to $5 total and looks like something sourced from a carefully curated vintage shop for considerably more. The sewing involved is minimal — three straight seams, a turned opening, and a few hand stitches to close — and the result is a one-of-a-kind accent piece that brings the kind of soft, layered, quietly personal character to a guest room or reading nook that mass-produced pillows cannot replicate regardless of price. Thrift stores price handkerchiefs at pennies; the finished pillow is worth considerably more than the sum of its parts, in every meaningful sense.
What You Need
- Vintage handkerchiefs, qty 2 per pillow — look for pairs with complementary embroidery, lace edging, or printed designs; matching pairs create a more polished pillow while deliberately mismatched pairs create the eclectic, collected quality that makes vintage styling so appealing. Thrift stores, estate sales, and antique markets are the best sources (~$0.25–$1 each)
- Pillow form, 10×10" or 12×12" — sized to match or slightly exceed the handkerchief dimensions; a pillow form one inch larger than the finished cover produces a full, plump pillow that holds its shape, while an undersized form produces a flat, floppy result that looks unfinished (~$4–8 for a standard pillow form)
- Coordinating fabric for backing, ¼ yard — if using a single handkerchief as the front only; soft cotton, linen, or muslin in white, cream, or a color pulled from the handkerchief's embroidery creates a backing that complements without competing (~$3–5 per quarter yard)
- Thread in white or cream — matching the handkerchief fabric weight; a standard all-purpose cotton thread handles the light seaming this project requires without pulling or puckering the delicate handkerchief fabric
- Sewing machine — for the three straight seam sides; the project can be completed entirely by hand but machine seams on the three closed sides are faster, stronger, and more durable under regular pillow use
- Hand sewing needle — for the slip stitch closing of the fourth side after the pillow form is inserted
- Straight pins — for holding the two handkerchiefs or handkerchief and backing together precisely before sewing
- Iron and ironing board — for pressing seams crisp after turning right-side out; pressed seams on a small vintage pillow make the difference between a result that looks handmade and one that looks hand-crafted
How to Make Them
- Wash all handkerchiefs before sewing — vintage linens often carry decades of storage odors and occasional surface soiling that a gentle machine wash on delicate cycle removes completely. Wash in cool water with a mild detergent and lay flat to dry rather than machine drying, which can shrink and distort the delicate edging and embroidery that makes the handkerchiefs worth using. Press each handkerchief flat with a warm iron before cutting or sewing.
- Assess the handkerchief dimensions against your chosen pillow form before cutting anything — a standard handkerchief runs 12 to 16 inches square, and a pillow form one inch smaller than the handkerchief's finished dimensions produces a cover with comfortable ease. If your handkerchiefs are smaller than your pillow form, either choose a smaller form or plan to use a fabric backing that extends the cover dimensions beyond the handkerchief edge.
- Position the two handkerchiefs right-sides together — decorative face to decorative face — so the finished outside surfaces face each other before sewing. For a pillow with a fabric back, position the handkerchief right-side up and lay the backing fabric right-side down on top of it, aligning all edges. This right-sides-together placement is the step that new sewers most often get backwards, resulting in a pillow cover with the seams on the outside and the decorative surfaces facing inward.
- Pin the layers together every three to four inches around all four sides before sewing, placing pins perpendicular to the seam line so they can be removed easily as the machine foot approaches. Handkerchief fabric is lightweight and slips easily during sewing without pins to anchor it — a cover that shifts during sewing produces a slightly torqued finished pillow where the two sides don't align squarely, which is visible when the pillow is in use.
- Sew three sides of the pinned cover using a straight stitch and a ¼-inch seam allowance — the hem or decorative edge of a handkerchief is already finished, so the seam allowance simply catches the finished edge without requiring any additional finishing on the raw fabric. Backstitch at the beginning and end of each seam to prevent the stitching from pulling out at the corners under pillow use pressure. Leave one full side completely open for turning and inserting the form.
- Clip the seam allowance diagonally at all four corners — cutting close to but not through the stitch line — before turning right-side out. Unclipped corners produce the lumpy, rounded corner profile that makes a small pillow look homemade; clipped corners turn right-side out to crisp, square points that give the finished pillow a tailored, considered appearance regardless of the simplicity of the construction.
- Turn the cover right-side out through the open side, pushing the corners out fully with a blunt pencil or chopstick and pressing the entire cover flat with a warm iron before inserting the form. Pressing at this stage sets the seam lines precisely at the pillow edge and makes the finished cover look professionally constructed — an unpressed cover that goes onto the form with soft, unset seams never quite looks as crisp regardless of how carefully it was sewn.
- Insert the pillow form through the open side, folding it slightly to fit through the opening without stretching or distorting the pressed seam edges, then work it into all four corners until the form sits squarely within the cover with no bunching or shifting. Close the opening with a slip stitch — small, even stitches that catch just a few threads of each folded edge alternately so the closing seam is nearly invisible on the finished pillow surface — and press the closed edge flat before displaying.
Interior stylists who work with vintage textiles always display handkerchief pillows with the embroidered or most decorative corner positioned on the diagonal — rotated 45 degrees from the standard horizontal orientation so the corner hangs as a diamond point at the center-bottom of the pillow face rather than sitting squared at the lower-left corner. This diagonal display orientation, called on-point positioning in textile styling, centers the focal embroidery motif on the pillow face in a way that standard square placement never achieves, and it's the positioning detail that makes a simple vintage pillow read as deliberately styled rather than casually placed. It requires no additional sewing and costs nothing to apply — simply rotate the finished pillow 45 degrees before placing it on the bed or chair and let the corner embroidery become the composition's focal point.