Trunk Coffee Table: Vintage Storage for $40
A thrift store trunk, a set of legs, and an afternoon — and your living room has a coffee table with a story and storage that no flat-pack furniture can match.
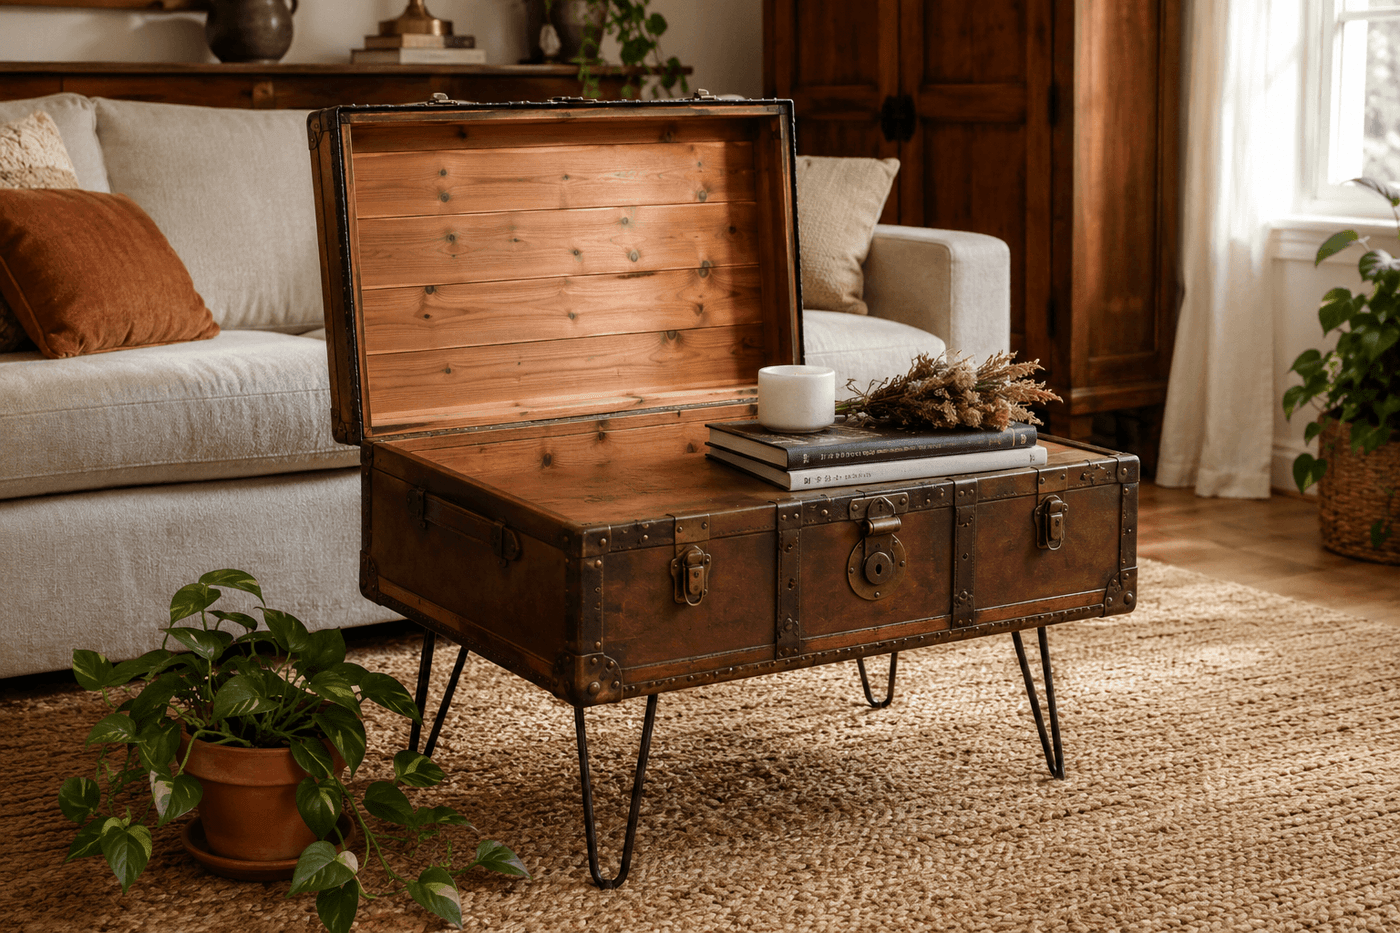
The coffee table is one of the hardest-working pieces of furniture in a living room — it holds drinks, anchors the seating arrangement, collects remotes and books, and takes up visual real estate at the center of the space where design decisions are most noticed. A vintage trunk converted with a set of legs does everything a standard coffee table does and adds something no flat-pack option can: genuine hidden storage for blankets, games, and seasonal items, and the kind of character that comes from decades of actual use rather than a factory distressing process. Thrift stores, estate sales, and attic finds turn up steamer trunks, travel chests, and wooden boxes in every condition from pristine to beautifully worn, and the conversion from trunk to coffee table is straightforward enough to complete in an afternoon — clean and condition or paint the exterior, attach a simple base frame inside the bottom for leg mounting, screw on furniture legs or locking casters to reach the correct 18-inch coffee table height, and line the interior with fabric or cedar for a finished look that makes opening the lid feel intentional rather than utilitarian. The total cost runs $25–60 depending on what you pay for the trunk and the legs, and the result anchors a living room with the kind of considered, one-of-a-kind presence that makes the room feel curated rather than assembled from a catalog.
What You'll Need
- Vintage trunk — steamer trunks, travel chests, and flat-top wooden trunks all work; flat-top lids are more practical as coffee tables than domed lids, which don't provide a usable surface; target a trunk 36–48 inches long and 18–24 inches wide for comfortable coffee table proportions (~$10–30 at thrift stores and estate sales)
- Furniture legs — choose based on aesthetic:
- Hairpin legs, 6–8 inch — modern industrial look; widely available online in sets of four (~$20–30/set)
- Tapered wood legs, 6 inch — mid-century modern feel; available at hardware stores and online (~$15–25/set)
- Locking casters, 3 inch — industrial look plus mobility; useful for heavy trunks that will be moved regularly (~$12–18/set of four)
- 1x4 lumber, 8 feet — for building the interior base frame that legs attach to; the frame distributes leg load across the trunk bottom rather than concentrating it at four small mounting points (~$5–6)
- Wood screws, 1¼" and 2" — for assembling the base frame and attaching legs; confirm screw length won't penetrate through the trunk bottom to the exterior
- Leather conditioner or wood furniture wax — for preserving and enriching original patina on leather or wood trunk exteriors without stripping character (~$6–10)
- Chalk paint or milk paint — for painting the exterior if a fresh finish is preferred over preserved patina; matte black reads as modern, soft sage as cottage, warm white as classic (~$10–15 per quart)
- Interior lining — choose one:
- Cedar tongue-and-groove planks — most finished look; naturally repels moths for blanket storage (~$15–20 for a small bundle)
- Fabric and batting — glued or stapled to interior walls; upholstered look in any color or pattern (~$8–12)
- Contact paper in linen or wood grain — fastest and most budget-friendly option; peel-and-stick application takes 20 minutes (~$5–8)
- Replacement hardware — matching hinges, hasps, and corner hardware if originals are broken or rusted; vintage-style hardware available online maintains the trunk's character (~$8–15)
- Glass top — optional; custom-cut tempered glass to trunk lid dimensions from a local glass shop provides a smooth, drink-safe surface while displaying the trunk top below (~$30–50 cut to size)
- Rubber bumpers — four small adhesive bumpers for the underside of the glass top to prevent sliding and protect the trunk lid surface (~$2–3)
How to Transform It
- Assess the trunk thoroughly before any cleaning or modification — open the lid and check hinge function, examine the bottom for soft spots or rot that would compromise structural integrity under furniture leg load, test corner and band hardware for stability, and smell the interior for mildew that requires treatment before closing with stored items. A trunk with soft bottom boards needs those boards reinforced or replaced before leg installation; a base frame screwed into soft wood pulls free under normal use weight.
- Clean the exterior completely before deciding whether to preserve or paint — vacuum the interior, wipe all surfaces with a barely damp cloth, and allow to dry fully with the lid open in a ventilated space for at least 24 hours. Mildewed interiors require a light solution of white vinegar and water wiped on all interior surfaces and allowed to dry completely before any lining is applied; sealing mildew under fabric or cedar transfers the odor permanently to whatever is stored inside.
- Repair all hardware before any finishing work — replace broken hinges with matching vintage-style hardware, tighten loose rivets with a hammer and backing block, and address any broken wood slats or leather strapping with appropriate adhesive and clamping before the trunk carries any weight. Repairing hardware after finishing means risking damage to fresh paint or conditioned surfaces; doing it first means finishing over clean, fully functional hardware that will outlast the aesthetic treatment.
- Finish the exterior based on your chosen direction — for preserved patina, apply leather conditioner to all leather surfaces in circular motions and buff to a soft sheen, then apply paste wax to any wood surfaces and buff; for a painted finish, sand lightly with 120-grit, apply one coat of chalk or milk paint with a wide brush, allow to dry fully, and apply a second coat for even coverage. Chalk and milk paints adhere to most trunk surfaces without primer and dry to a beautiful flat finish that enhances rather than obscures the trunk's underlying texture and hardware detail.
- Build the interior base frame by cutting 1x4 lumber into a rectangle that fits inside the trunk bottom with one inch of clearance on all sides — this frame sits inside the trunk and is what the legs attach to, distributing their load across the full frame perimeter rather than through four small holes in the trunk bottom. Screw the frame corners together and confirm it sits flat inside the trunk before proceeding to leg attachment.
- Attach the legs to the base frame before placing the frame inside the trunk — working with the frame on a flat surface is dramatically easier than reaching inside a trunk to mount legs, and confirms the leg placement and spacing is correct before the frame is committed to position. Mount legs at each corner of the base frame following the leg hardware instructions, confirm all four legs are at identical heights by setting the frame on a flat surface and checking for wobble, and shim any leg that doesn't contact the surface evenly before the frame goes into the trunk.
- Set the base frame with legs attached inside the trunk bottom, confirm it sits centered and flat, and secure it to the trunk bottom from above using 1¼-inch screws driven through the frame into the trunk floor — confirm screw length won't penetrate through the exterior bottom before driving. The frame-to-trunk connection keeps the base from shifting when the trunk is moved and when leg load is applied during use; an unsecured frame rocks under load and eventually damages the trunk bottom.
- Line the interior walls and bottom with your chosen material once the base frame is secured — cut cedar planks or contact paper to fit each interior wall and the bottom panel, working around the base frame perimeter. For fabric lining, cut pieces with two inches of excess on all sides, apply fabric adhesive to the interior wall, press the fabric smoothly from center to edges to eliminate bubbles, and fold the excess over the top edge of the interior wall and secure with a staple gun for a tailored, upholstered finish that stays in place through years of use.
- Place the finished trunk coffee table in position, set rubber bumpers on the four corners of the lid if adding a glass top, and set the glass in place — glass should overhang the trunk lid edge by no more than one inch on each side, which keeps it visually proportional and prevents it from tipping if sat on accidentally. Step back and assess the height: coffee tables read as comfortable when the surface sits within two inches of adjacent sofa seat height, and if the current leg height misses that mark, swapping to a longer or shorter leg set is the straightforward correction.
Interior stylists and furniture upcyclers who convert vintage trunks for residential interiors consistently address one proportioning issue that determines whether the finished piece reads as a considered design choice or an awkward repurposing: the relationship between trunk width and leg height. A trunk that is deep front-to-back relative to its height on legs reads as a storage box sitting on stilts rather than a piece of furniture — the visual rule used by professional upcyclers is that leg height should not exceed one-third of the trunk's own height, which keeps the trunk visually dominant and the legs subordinate. A trunk 14 inches tall is therefore best served by legs no taller than 4–5 inches, bringing total height to 18–19 inches at the correct coffee table range without making the legs the primary visual feature of the conversion. Trunks that are naturally shallow — 10–12 inches tall — can be raised on taller legs within this ratio and still read as intentional furniture; very deep trunks often need only casters rather than legs to reach the correct height while maintaining the correct visual proportion between trunk body and base.