
Refrigerator Pickles: Garden Cucumbers in 20 Minutes
No canning equipment, no special techniques, no previous experience — just sliced cucumbers, a hot brine, and 48 hours of patience before the best pickles you have ever eaten.
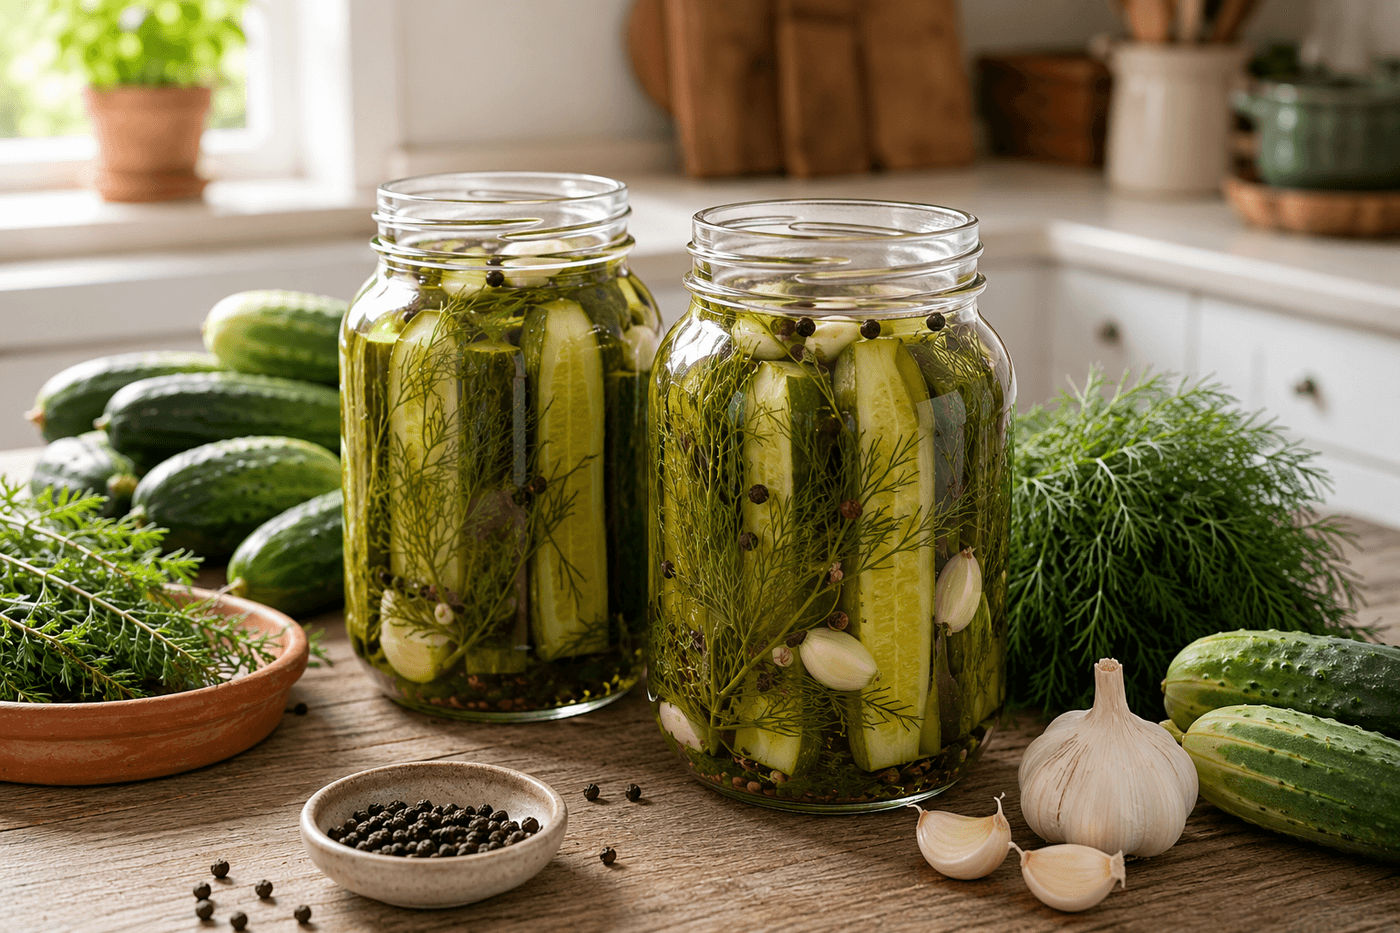
Refrigerator pickles occupy a category of home food projects where the effort-to-reward ratio is so dramatically skewed toward reward that the first batch genuinely makes you wonder why you ever bought pickles at a store. Twenty minutes of active work, pantry staples that cost almost nothing, no canning equipment and no special knowledge, and 48 hours later the crispest and most garlicky pickles imaginable are sitting in the refrigerator available for snacking, sandwich building, and the kind of standing-at-the-open-fridge eating that marks a genuinely successful homemade food project. The refrigerator pickle works because the vinegar brine both preserves and flavors the cucumber simultaneously — the acid environment prevents spoilage while the garlic, dill, and peppercorns infuse into the cucumber flesh over those 48 hours in a way that no commercial pickle can replicate because commercial processes are optimized for shelf stability rather than maximum flavor penetration. These keep for up to a month in the refrigerator, which means a weekly batch of two jars keeps a family continuously supplied through the full cucumber season without any pressure to eat them faster than they naturally disappear — which, based on universal refrigerator pickle experience, is not a concern that actually materializes.
What You'll Need
- Cucumbers, 4–6 medium — garden cucumbers of any variety work; pickling cucumbers (Kirby) produce the crunchiest result because their thinner skin and drier flesh absorb brine without softening; English cucumbers slice beautifully but produce a slightly softer pickle; slice into ¼-inch coins for the fastest flavor penetration or spears for a more dramatic jar appearance
- White vinegar, 1 cup per jar — standard 5% acidity white vinegar is the correct base; apple cider vinegar produces a slightly sweeter, more complex flavor but a cloudier brine; rice vinegar produces a milder, less acidic pickle that some people prefer for snacking; do not dilute below a 1:1 vinegar-to-water ratio, which is the minimum acidity for reliable short-term refrigerator preservation
- Water, 1 cup per jar — filtered or tap water; hard water with high mineral content can produce a slightly cloudy brine without affecting flavor or safety
- Kosher or pickling salt, 1 tablespoon per jar — do not substitute iodized table salt, which contains anti-caking agents that cloud the brine and can produce an off-flavor in pickles; Diamond Crystal or Morton Kosher salt are the standard choices
- Sugar, 1 teaspoon per jar — balances the acidity without making the pickle sweet; omit entirely for a sharper, more traditional dill pickle or increase to 1 tablespoon for a bread-and-butter style pickle that leans sweet
- Aromatics per jar — the flavor foundation:
- Garlic cloves, 3–4 smashed — smashing rather than slicing produces a more assertive garlic flavor that infuses the full jar
- Fresh dill, 2–3 large sprigs — the defining flavor of a classic dill pickle; dried dill works in a pinch at 1 teaspoon per jar but produces noticeably less vibrant flavor
- Black peppercorns, 1 teaspoon
- Red pepper flakes, ¼ teaspoon — optional for heat
- Mustard seeds, ½ teaspoon — optional but adds the characteristic deli pickle complexity
- Wide-mouth quart mason jars with lids — wide-mouth jars make packing cucumber spears significantly easier than regular-mouth jars; quart size holds one full batch; clean thoroughly with hot soapy water before use — sterilization is not required for refrigerator pickles that will never be shelf-stable (~$2–4 per jar if not already owned)
- Small saucepan — for heating the brine to dissolve the salt and sugar before pouring; a hot brine poured over cucumbers speeds the initial flavor penetration compared to a cold brine
How to Make Them
- Slice the cucumbers to your preferred shape — ¼-inch coins for snacking and sandwich use, or spears cut to the height of the jar for a dramatic visual presentation and a satisfying hand-held eating experience. For the crunchiest possible pickle, slice off and discard a thin round from both ends of each cucumber before cutting — the blossom end contains enzymes that accelerate softening in the finished pickle, and removing it is the single most impactful step for maintaining crunch through the full storage period.
- Prepare the aromatics while the brine comes to a simmer — smash the garlic cloves with the flat of a knife blade to release their oils before adding to the jar, rinse the fresh dill sprigs, and measure the dry spices into a small prep bowl. Having all aromatics ready before the hot brine is prepared allows the full assembly to happen quickly while the brine is still hot enough to begin the flavor extraction process immediately.
- Combine the vinegar, water, salt, and sugar in a small saucepan and bring to a simmer over medium heat, stirring until the salt and sugar are completely dissolved — approximately 3–4 minutes. The brine does not need to reach a full boil; a simmer is sufficient to dissolve the solids and produce a hot brine that will begin softening the cucumber surface slightly on contact, which accelerates flavor penetration without making the pickle soft.
- Layer the aromatics into the clean jar before the cucumbers — place the smashed garlic cloves and dill sprigs at the bottom and sides of the jar where they will be visible through the glass and make contact with the maximum number of cucumber surfaces during the infusion period. The mustard seeds, peppercorns, and red pepper flakes go in with the garlic and dill rather than on top of the cucumbers, which distributes them throughout the jar rather than concentrating them at the top.
- Pack the sliced cucumbers tightly into the jar — a tightly packed jar maximizes the cucumber surface area in contact with the brine and prevents cucumbers from floating above the brine line during storage, which causes the exposed portions to soften and discolor rather than pickling properly. For spears, stand them vertically around the jar perimeter and fill the center with additional spears; for coins, layer them in horizontal stacks with a slight lean so they interlock rather than stacking perfectly flat.
- Pour the hot brine slowly over the packed cucumbers until every piece is fully submerged and the brine reaches the jar shoulder — leave approximately ½ inch of headspace at the top before sealing. If any cucumber floats above the brine line, press it gently below the surface with a clean fork or add a small folded piece of parchment paper wedged against the jar wall as a floating weight that holds the cucumbers submerged without contaminating the brine.
- Allow the jar to cool to room temperature with the lid set loosely on top rather than sealed tightly — sealing a hot jar traps steam that condenses and dilutes the brine slightly while also creating a vacuum seal that is unnecessary and potentially misleading for a refrigerator pickle that is not shelf-stable regardless of how the lid seals. Once completely cool to the touch, seal the lid firmly and refrigerate.
- Wait 48 hours before the first taste — this is the minimum infusion time that produces a properly flavored pickle; 24-hour pickles are technically edible but noticeably less developed in flavor and garlic penetration than the 48-hour version. The pickles reach their peak flavor at approximately 72–96 hours and maintain that peak for up to four weeks in the refrigerator, after which they remain safe but the texture begins to soften noticeably beyond the crunch that defines a good refrigerator pickle.
Pickle makers and fermentation specialists who develop recipes for artisan food producers use one cucumber preparation technique that produces a noticeably crunchier finished pickle than standard slice-and-brine: toss the sliced cucumbers with 1 tablespoon of kosher salt per pound of cucumbers and allow them to sit in a colander for 1–2 hours before rinsing and packing into jars. This pre-salting draws excess moisture out of the cucumber flesh through osmosis — the same water that would otherwise dilute the brine and soften the pickle from the inside during refrigerator storage. Artisan pickle producers who use this pre-salting step describe the texture difference as the cucumber going from a vegetable that is being pickled to one that has been pickled — the structural integrity of the finished cucumber cell walls is noticeably firmer because the pre-salting process removes the intracellular water that softens the pickle from within before the brine ever enters the jar. The pre-salting step adds two hours of passive waiting time to the process but zero additional active work, and the crunch difference in the finished pickle is immediately apparent to anyone who has eaten both versions side by side.














