
DIY Projects

Recent Content

Wooden Dish Rack: The Dowel Angle That Drains Right

Wooden Dish Rack: The Dowel Angle That Drains Right

Build a slatted wood dish rack for $18—the dowel tilt angle is what actually drains water into the tray instead of pooling on your counter.

Install a Fireplace Draft Stopper in 20 Minutes for $25

Install a Fireplace Draft Stopper in 20 Minutes for $25

Stop your chimney from sucking heat right out of the house—an inflatable draft stopper seals it in 20 minutes for about $25.

The Shower Rod Trick That Fakes a Walk-In Closet

The Shower Rod Trick That Fakes a Walk-In Closet

Steal spare closet space with a second shower-curtain rod—zero holes, zero fuss, and your full deposit stays safe.

Pool Noodle Knife Block: The Slice Depth That Stops Wobble

Pool Noodle Knife Block: The Slice Depth That Stops Wobble

Turn a $1 pool noodle into a safe knife block—the slice depth is what keeps blades from wobbling loose or slicing through the foam.

Build a Wooden Pie Carrier in 2 Hours for $25

Build a Wooden Pie Carrier in 2 Hours for $25

Never smash a pie in the car again! Build a snug wooden pie carrier in 2 hours for $25—perfect timing for fall potlucks.

logo
  • Home Improvement
  • DIY Projects
  • Interior Design
  • Gardening & Outdoor
  • Real Estate
  • Home Improvement
  • DIY Projects
  • Interior Design
  • Gardening & Outdoor
  • Real Estate
  • ​

Refrigerator Pickles: Better Than the Jar Version

Store-bought pickles are canned and processed for shelf stability, which flattens their flavor over time — refrigerator pickling skips that entirely, and the one ratio you actually need to get right is the vinegar-to-water balance in the brine.
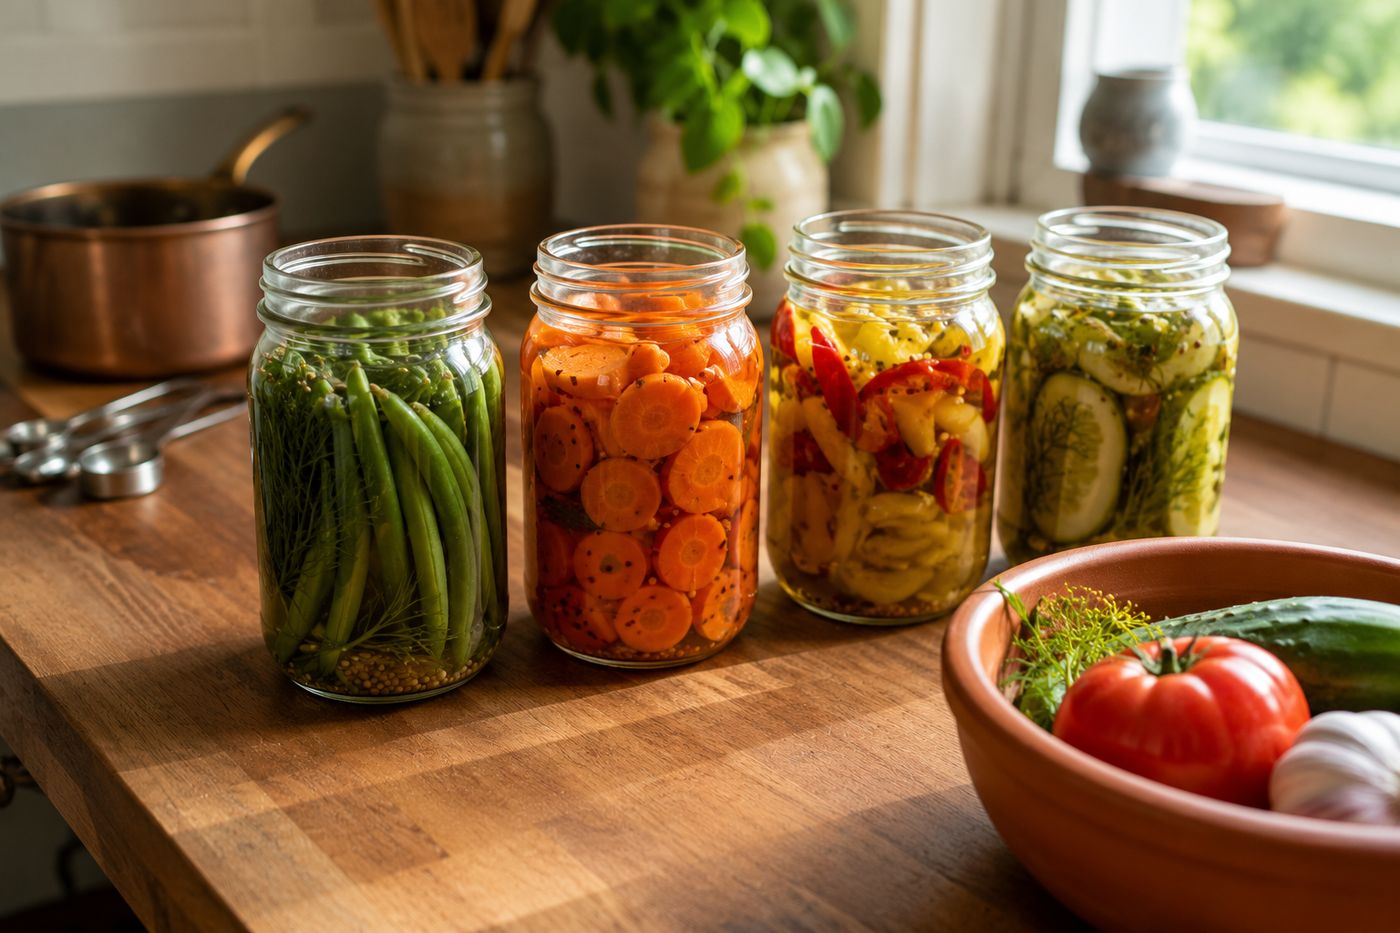
Four jars of colorful refrigerator pickled vegetables including dilly beans, spicy carrots, and bread-and-butter peppers, on a kitchen counter
DIY Projects

Canned, shelf-stable pickles are processed at high heat for long-term storage, and that processing step softens texture and mutes flavor compared to a brine that never gets heated to canning temperatures at all — refrigerator pickling skips that step entirely, which is the actual reason a same-day batch tastes noticeably crisper and brighter than anything from a store jar. The one thing that determines whether the brine actually works, though, is getting the vinegar-to-water ratio right: equal parts white vinegar and water, with salt and sugar dissolved in per cup of liquid, is acidic enough to preserve the vegetables safely in the fridge for weeks while still tasting balanced rather than harshly sour. Get that ratio wrong in either direction and the pickles either taste flat and under-preserved or aggressively vinegary. Once that base brine is dialed in, it's a completely neutral canvas — dill and garlic, red pepper flakes and cumin, turmeric and mustard seed, whatever aromatics you want, layered into each jar individually. The whole batch costs about $6 beyond the vegetables themselves and takes about 30 minutes.

What You'll Need

  • Fresh vegetables (green beans, carrots, peppers, or your garden surplus) — free from the garden, or about $6-8 if purchased
  • White vinegar — about $3
  • Salt and sugar — already on hand
  • Aromatics per jar (fresh dill, garlic, red pepper flakes, cumin seed, turmeric, mustard seed) — about $3 total
  • Clean glass jars with lids, one per flavor variety
  • Small saucepan, for heating the brine
  • Cutting board and knife

How to Do It

  1. Prep your vegetables according to type — quickly blanch green beans, slice carrots into spears, halve small peppers — so each vegetable is sized appropriately for how quickly it needs to absorb brine.
  2. Pack each clean jar with your prepped vegetables, leaving a little headspace at the top rather than jamming the jar completely full.
  3. Add your chosen aromatics to each jar individually before pouring in brine — dill and garlic for one, red pepper flakes and cumin for another, turmeric and mustard seed for a third, or any combination you like.
  4. Combine equal parts white vinegar and water in a saucepan, adding a tablespoon of salt and a teaspoon of sugar per cup of total liquid — this ratio is the one detail that determines whether the brine preserves and tastes balanced, so measure it rather than eyeballing it.
  5. Heat the brine just until the salt and sugar fully dissolve, without needing to bring it to a hard boil.
  6. Pour the hot brine over the packed vegetables in each jar, filling to cover the vegetables completely.
  7. Let the jars cool to room temperature on the counter before sealing and moving to the refrigerator.
  8. Wait a full 48 hours before tasting, since the vegetables need that time to actually absorb the brine's flavor and acidity; they'll keep well in the fridge for up to two months.
DESIGNER TIP

Home cooks who refrigerator pickle regularly often reuse the leftover brine from a finished jar as a quick marinade or salad dressing base rather than discarding it, since it's already infused with whatever aromatics were in that jar and still has plenty of acidity and flavor left even after the vegetables themselves are gone. It's a small habit that gets a second use out of a brine you'd otherwise just pour down the drain.


Related Content

DIY Projects

28 October 2026

Post

Wooden Dish Rack: The Dowel Angle That Drains Right

Build a slatted wood dish rack for $18—the dowel tilt angle is what actually drains water into the tray instead of pooling on your counter....

DIY Projects

27 October 2026

Post

Pool Noodle Knife Block: The Slice Depth That Stops Wobble

Turn a $1 pool noodle into a safe knife block—the slice depth is what keeps blades from wobbling loose or slicing through the foam....

DIY Projects

27 October 2026

Post

Build a Wooden Pie Carrier in 2 Hours for $25

Never smash a pie in the car again! Build a snug wooden pie carrier in 2 hours for $25—perfect timing for fall potlucks....

DIY Projects

26 October 2026

Post

Make Herb-Infused Honey in 30 Minutes for $12

Turn raw honey into a cold-season secret weapon—infuse it with thyme and ginger in 30 minutes for about $12, no fancy gear needed....

DIY Projects

25 October 2026

Post

Make Homemade Fire Cider in 20 Minutes for $15

Steep this spicy apple cider vinegar tonic now so it's ready to fight off fall colds in 4 weeks—20 minutes, $15, zero cooking skills....

DIY Projects

23 October 2026

Post

Build a Freestanding Coat Rack in 2 Hours for $35

Sick of coats piled on chairs? Build a sturdy freestanding coat rack in 2 hours for $35 — no wall drilling, just solid joinery....

DIY Projects

22 October 2026

Post

Window Frame to Pet Gate: The Hinge Set That Holds

Turn an old wooden window frame into a swinging pet gate for $22 — the hinge mortise depth is what keeps it from sagging open over time....

DIY Projects

22 October 2026

Post

Make Spiced Homemade Applesauce in 1 Hour for $12

Turn a bag of fall apples into silky spiced applesauce in an hour for $12 — no peeling required if you've got the right tool....

DIY Projects

21 October 2026

Post

Floating Nightstand: The Bracket Depth That Holds Weight

Build a wall-mounted wooden nightstand for $25 — the bracket depth inside the wood is what stops it from sagging under a lamp and books....

DIY Projects

20 October 2026

Post

Foam Letter Wall Art: The Spacing Trick for $6

Turn dollar-store foam letters into custom nursery wall art for $6 — the spacing template is what keeps names looking store-bought, not crooked....

DIY Projects

19 October 2026

Post

Build a Tabletop Fire Bowl in 90 Minutes for $35

Turn a $35 metal bowl and lava rock into a tabletop fire feature perfect for crisp fall evenings and s'mores nights....

DIY Projects

16 October 2026

Post

Build a Pet Food Storage Bin in 1 Hour for $30

Stop losing the war against stale kibble and pantry moths—build an airtight pet food bin in an hour for $30....

DIY Projects

15 October 2026

Post

Whittling a Wooden Spoon

Try meditative spoon whittling for under $15—cutting with the grain (not against it) is the one rule that keeps your blank from splitting mid-carve....

DIY Projects

14 October 2026

Post

Wooden Pet Ramp: The Cleat Spacing That Stops Slips

Build a wooden pet ramp for $20 — the traction cleat spacing is what keeps your dog's paws from sliding on the incline....

DIY Projects

13 October 2026

Post

Build a Compost Sifter Box in 1 Hour for $18

Turn chunky compost into fine garden gold! Build a simple hardware-cloth sifter box in an hour for $18—no more rock-and-stick surprises....
Terms and ConditionsDo Not Sell or Share My Personal InformationPrivacy PolicyPrivacy NoticeAccessibility NoticeUnsubscribe
Copyright © 2026 DIY HomeBoost












