
Paper Cup Popsicles: 8 Freezer Pops for $3
Small paper cups, wooden sticks, a square of foil — and the popsicle mold you bought three summers ago can stay in the back of that cabinet.
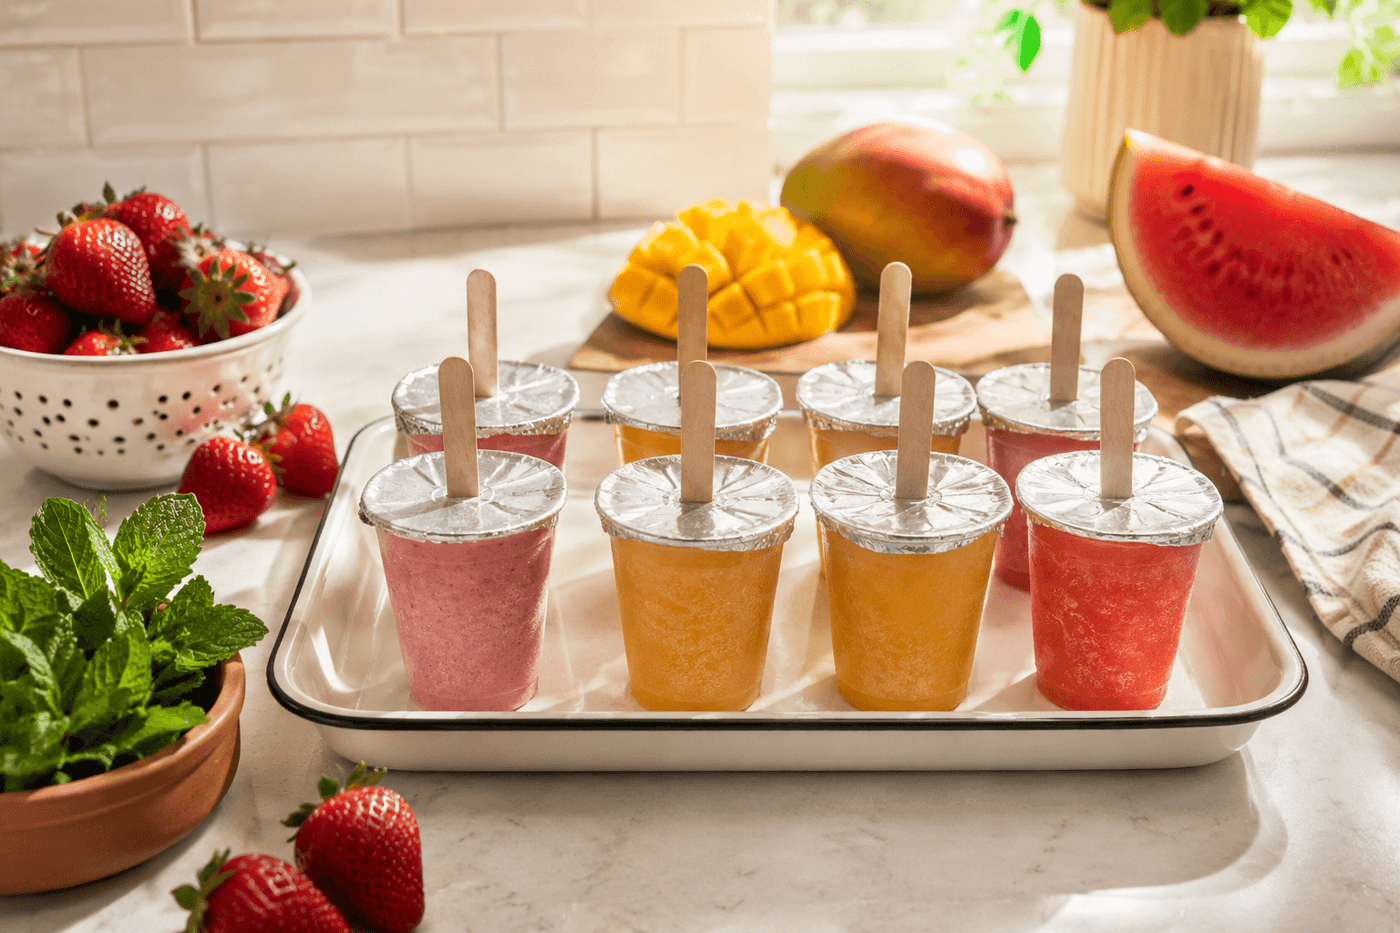
The official popsicle mold is one of those kitchen purchases that sounds like a great idea in June and spends most of July and August at the back of a cabinet because unmolding frozen pops is somehow always more frustrating than it should be — running them under warm water, losing sticks, breaking the pop clean in half right at the moment of maximum anticipation. The paper cup method has none of those problems. Small cups from the dollar store filled with whatever fruit combination you love, topped with a foil square that holds the wooden stick perfectly centered while everything freezes, and peeled away cleanly four hours later to reveal a perfectly formed popsicle that has never once broken or stuck or caused any frustration whatsoever. Eight popsicles cost about $3 in fruit and juice and take fifteen minutes of active work, the cups and sticks run about $2 for a sleeve that makes dozens of batches, and the three flavors that earn the most consistent requests — strawberry lemonade, mango coconut, and watermelon mint — all come together from ingredients that are already in the kitchen or at the bottom of the grocery list. This is the summer weekly ritual that costs almost nothing and that children lose their minds over in the best possible way.
What You'll Need
- Small paper cups, 3–5 oz — the standard cold-drink size available at any dollar store or grocery; wax-coated cups peel more cleanly than uncoated ones; a sleeve of 100 costs $1–2 and makes dozens of popsicle batches
- Wooden craft sticks — standard popsicle stick size; dollar stores carry boxes of 150+ for $1–2; do not substitute plastic spoons, which conduct cold and make the pop uncomfortable to hold
- Aluminum foil — cut into 4-inch squares, one per cup; the foil cover is what holds the stick upright and centered during freezing without any additional support structure
- Blender or food processor — for pureeing fresh fruit into smooth, even-textured pops; chunky fruit pieces freeze unevenly and create weak spots where pops break
- Fine mesh strainer — optional, for straining seeds from strawberry or watermelon puree for a smoother texture
- Baking sheet or shallow tray — for holding filled cups upright in the freezer during the four-hour freeze; cups without a tray tip and spill before the contents are solid
- Measuring cup with pour spout — for filling cups neatly without dripping; a standard 2-cup measuring cup fits the job perfectly
- Fruit and juice — three proven flavor combinations:
- Strawberry lemonade: 1 cup fresh strawberries blended with ½ cup lemonade and 1 tbsp honey
- Mango coconut: 1 cup fresh or frozen mango blended with ½ cup coconut milk and a squeeze of lime
- Watermelon mint: 2 cups seedless watermelon blended with 4–5 fresh mint leaves and 1 tbsp lime juice
How to Make Them
- Blend your chosen fruit and liquid combination until completely smooth — taste before pouring and adjust sweetness now, because freezing mutes sweetness significantly and a mixture that tastes perfectly balanced at room temperature will taste noticeably less sweet as a frozen pop. Add an extra tablespoon of honey or sugar if the blended mixture tastes just right before freezing; if it tastes slightly too sweet at room temperature, it will taste just right frozen.
- Arrange small paper cups on a baking sheet or shallow tray before filling — setting up the tray first means both hands are free for pouring and you are not trying to transfer filled, liquid-topped cups to the freezer one at a time, which is exactly the sequence of events that ends in a spilled cup and a sticky freezer shelf.
- Fill each cup to about three-quarters full using a measuring cup with a pour spout — leaving a quarter inch of headspace at the top is important because fruit puree expands slightly as it freezes and a cup filled to the brim overflows during freezing, gluing the foil to the cup in a way that makes clean peeling impossible. Fill all cups of one flavor before moving to the next if making multiple flavors on the same tray.
- Cover each cup with a small square of aluminum foil pressed snugly over the rim and down the sides — the foil should grip the cup sides firmly enough to stay in place without being held, which is what allows it to support the wooden stick in a centered, upright position without any additional structure. Loose foil that sits flat rather than gripping the cup sides allows the stick to lean during freezing and produces a popsicle with a handle that exits at an awkward angle.
- Insert a wooden craft stick through the center of the foil cover, pushing straight down until it reaches approximately halfway into the cup contents — deep enough to be fully anchored in the frozen pop, but not so deep that it touches the cup bottom, which prevents it from being held comfortably once the cup is peeled away. The foil holds the stick perfectly vertical without any further attention; this is the specific step that makes the paper cup method so much more reliable than any mold with a stick slot that never quite keeps the stick straight.
- Freeze the full tray for a minimum of four hours — six hours for a fully solid pop with no soft center that breaks when bitten. Do not attempt to speed the process by turning the freezer to its coldest setting, which freezes the outer layer rapidly while leaving the center liquid and produces a pop that appears solid but collapses inward the moment the cup is peeled. Standard freezer temperature freezes the pop evenly from outside to center at the rate that produces the best texture.
- Unmold by peeling the paper cup away from the frozen pop starting at the rim and tearing downward in strips — the cup peels cleanly away from the frozen surface in seconds with no warm water bath, no twisting, no broken pops, and no frustration. This is the moment that converts every person who has struggled with silicone popsicle molds into a permanent paper cup convert, because the difference in ease is so complete it feels almost unreasonable.
- Store unmolded pops by wrapping individually in plastic wrap or small zip-lock bags and returning to the freezer if not eating immediately — unmolded pops stored directly against each other in the freezer stick together within hours and break when separated. Individually wrapped pops keep perfectly for up to two weeks, which means a single fifteen-minute batch session on Sunday keeps the freezer stocked for the entire week ahead.
Pastry chefs and frozen dessert specialists who develop fruit-based frozen treats for restaurant menus use one technique that transforms a good fruit popsicle into an extraordinary one: layer two contrasting flavors in each cup rather than filling with a single mixture. Pour the first flavor to half the cup depth and freeze for 45 minutes until just firm enough to hold a second layer without the colors bleeding into each other — then pour the second contrasting flavor to the three-quarter fill line and insert the stick through the foil before returning to the freezer for the full four-hour freeze. Strawberry lemonade layered beneath mango coconut, or watermelon beneath a thin coconut cream layer, produces a pop that reveals two distinct color bands when the cup is peeled — visually striking, more complex in flavor, and the kind of result that makes people assume significantly more effort and skill went into the batch than a single pour requires. Restaurant pastry teams call this the "sunset layer" technique, and it costs exactly nothing beyond an extra 45-minute partial freeze step.














