No-Sew Pillow Covers: Dollar Store Fix, $3
Two cloth napkins, a pillow insert, and five minutes — and your outdoor seating looks like you actually planned the color scheme this summer.
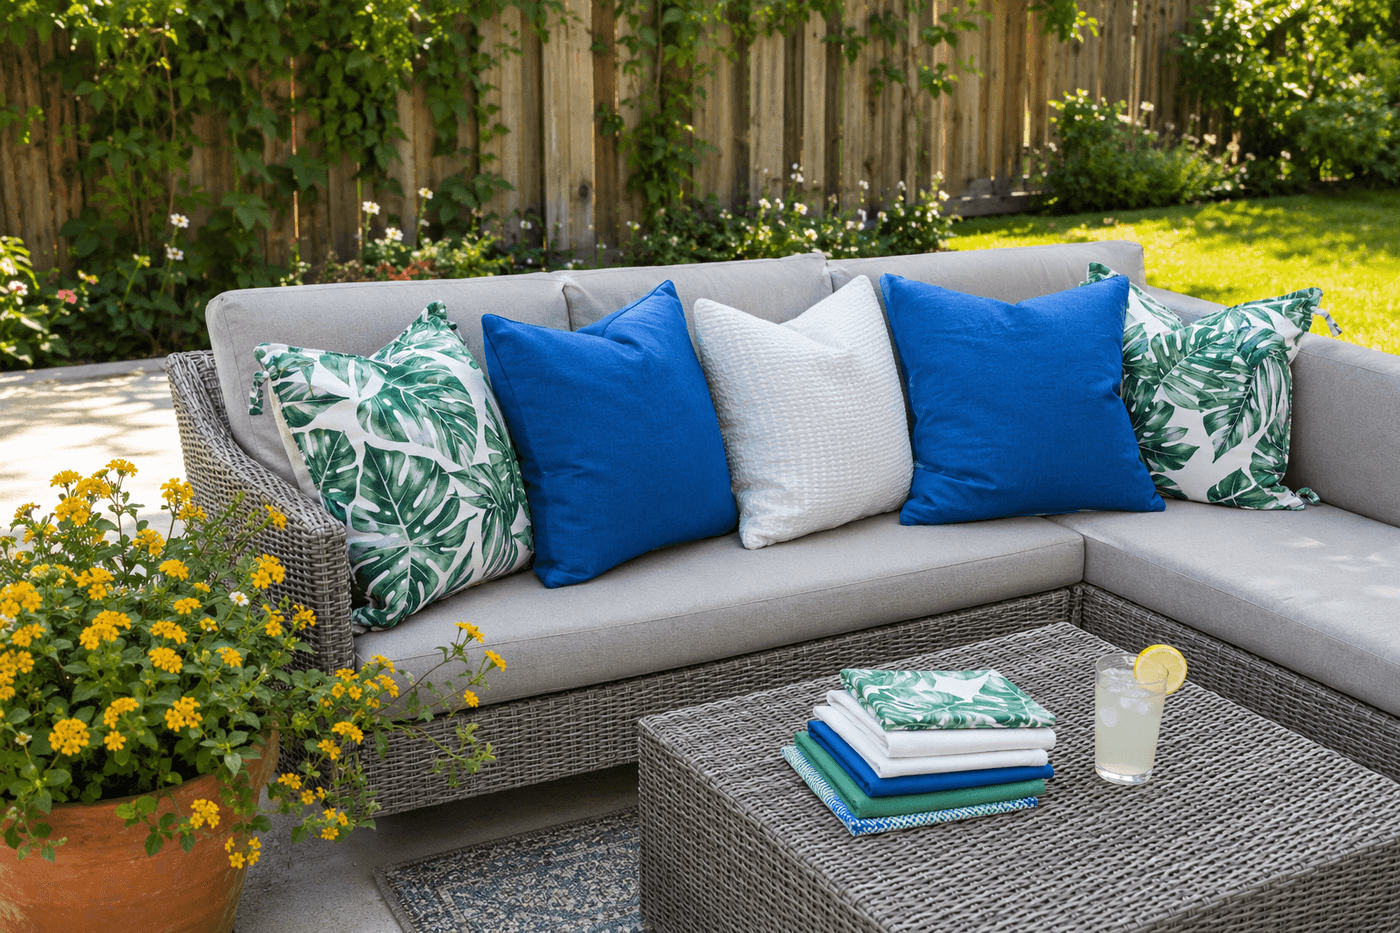
Outdoor throw pillow covers at home goods stores run $15–25 each — which means refreshing a patio sectional with six new pillows costs $90–150 before a single plant is purchased or a single string light is hung. Dollar store cloth napkins at two for a dollar solve this problem completely, and the no-sew wrapping technique requires nothing beyond the napkins, the existing pillow inserts, and about five minutes per pillow. Two napkins laid together with the pillow centered and the corners folded and knotted produces a cover with a decorative tied detail at the back that looks intentional rather than improvised, and a set of six coordinating covers made from a mix of tropical prints and bold solids reads as a designed color story rather than a random assortment of whatever was on sale. The seasonal swap potential is the feature that makes this approach genuinely smarter than buying dedicated outdoor covers at full price: when fall arrives, the summer napkins come off, get washed and stored, and a new set of warm-toned napkins goes on in fifteen minutes for another $3. This is patio refresh math that actually works in the budget's favor.
What You'll Need
- Dollar store cloth napkins — look for 100% cotton or cotton-blend napkins in the largest size available; standard 18"x18" napkins work for 14"–16" pillow inserts; two napkins per pillow cover (~$0.50–1.00 each, or 2 for $1)
- OR dollar store fabric placemats — larger than napkins and work better for 18"x18" or larger pillow inserts; two placemats glued or sewn along three sides create a proper envelope cover; check that the placemat fabric is flexible enough to wrap around a filled pillow insert without stiffness
- Pillow inserts — existing outdoor pillow inserts work perfectly; standard outdoor inserts are 16"x16", 18"x18", or 20"x20"; if purchasing new, polyester fiberfill inserts dry faster than down alternatives for outdoor use (~$3–5 each at dollar stores or big box stores)
- Safety pins — for the fold-and-pin method on the back of the cover; use rustproof safety pins for outdoor use; three to four pins per pillow back hold the wrapped corners securely through normal outdoor handling
- Iron-on hem tape — for a more finished no-sew placemat cover; pressed along three edges with a household iron produces a seamed envelope cover without a sewing machine; HeatnBond Hem tape is widely available at fabric and dollar stores (~$3–4 per roll covering multiple covers)
- Fabric glue — Aleene's Fabric Fusion or similar; for gluing placemat edges as an alternative to hem tape; allow full 24-hour cure before stuffing with the pillow insert to prevent the glued seam from pulling apart under the filling pressure (~$3–5 per bottle)
- Scissors — for trimming any excess fabric at corner knots on the knotted napkin method, and for cutting hem tape to length
- Iron — for pressing hem tape seams on the placemat cover method; also useful for pressing napkins flat before wrapping to eliminate fold lines that show through the finished cover
How to Make Them
Method 1: Knotted Napkin Cover (5 minutes, no tools)
- Lay two napkins wrong sides together on a flat surface, aligning edges as precisely as possible — the cleaner the alignment, the neater the finished cover looks from the front where both napkin layers are visible as the pillow face.
- Center the pillow insert on the layered napkins, positioned so equal amounts of napkin fabric extend beyond each edge of the pillow on all four sides — the diagonal distance from pillow corner to napkin corner determines how much fabric is available for knotting, and a pillow insert that is too large for the napkins leaves insufficient fabric to knot securely.
- Bring two opposite corners up and over the pillow insert, pulling them snugly against the pillow face, then tie them together in a double knot at the center of the pillow back — pull firmly enough that the knot sits flush against the pillow back rather than floating above it, which creates a lumpy back that makes the pillow uncomfortable against furniture cushions.
- Bring the remaining two opposite corners up and over, tucking them under the first knot and tying a second double knot that locks both sets of corners together at the pillow back center. Trim any excess fabric tails beyond the knot to 2–3 inches, which prevents long trailing fabric ends from appearing at the pillow sides when displayed.
- Fluff and arrange the front napkin face by smoothing it toward the pillow edges and adjusting the tension of the knots at the back until the front face sits flat and the pattern is centered — a knotted cover that looks polished from the front requires a full minute of adjustment at the back rather than a quick knot-and-done approach.
Method 2: Envelope Placemat Cover (20 minutes, iron or glue)
- Lay two placemats wrong sides together, aligning all four edges, and apply iron-on hem tape or fabric glue along three sides — leaving one short side completely open as the envelope opening through which the pillow insert will be inserted after the seams cure.
- Press hem tape seams firmly with a hot iron for the full contact time specified on the hem tape package — typically 8–10 seconds of firm pressure per section; insufficient pressing time produces seams that appear bonded but pull apart immediately when the pillow insert applies pressure from inside the cover.
- Allow fabric glue seams to cure for the full 24 hours before inserting the pillow — glue that has not fully cured is reactivated by the pressure and slight stretching of inserting a filled pillow insert and the seam separates cleanly, requiring the gluing process to be repeated from scratch on a seam that now has dried glue residue on both faces.
- Insert the pillow through the open end and center it inside the cover — the envelope opening does not require fastening for outdoor throw pillows, which are handled less frequently than indoor ones and where the natural friction of the fabric against the insert holds the cover in place through normal outdoor use.
Interior stylists and patio designers who refresh outdoor seating for editorial shoots and staging projects use one napkin selection strategy at the dollar store that produces a coordinated pillow set that reads as intentionally designed rather than randomly assembled: buy all napkins from the same display section in one shopping trip, choosing one bold print, one complementary solid, and one subtle pattern or texture in colors that share at least one common hue. A tropical leaf print in green and white, a solid cobalt blue, and a white-on-white woven texture all share the cool undertone that makes them read as a coordinated set when arranged on the same seating piece — even though they are three completely different napkin designs from three different packages. Designers call this "family color dressing," and it is the principle behind every coordinated pillow arrangement in shelter magazine outdoor photography: the pillows are never all the same pattern, but they always share a color relationship that makes the eye read them as belonging together rather than competing with each other. Apply it at the dollar store by holding potential napkin purchases next to each other before buying and asking whether they share a color rather than whether they match — sharing one color is sufficient; matching is neither necessary nor desirable.