
Mobile Cedar Planter: Hidden Wheels for $30
A cedar planter box, four swivel casters tucked out of sight, and the problem of the plant too heavy to move is permanently solved.
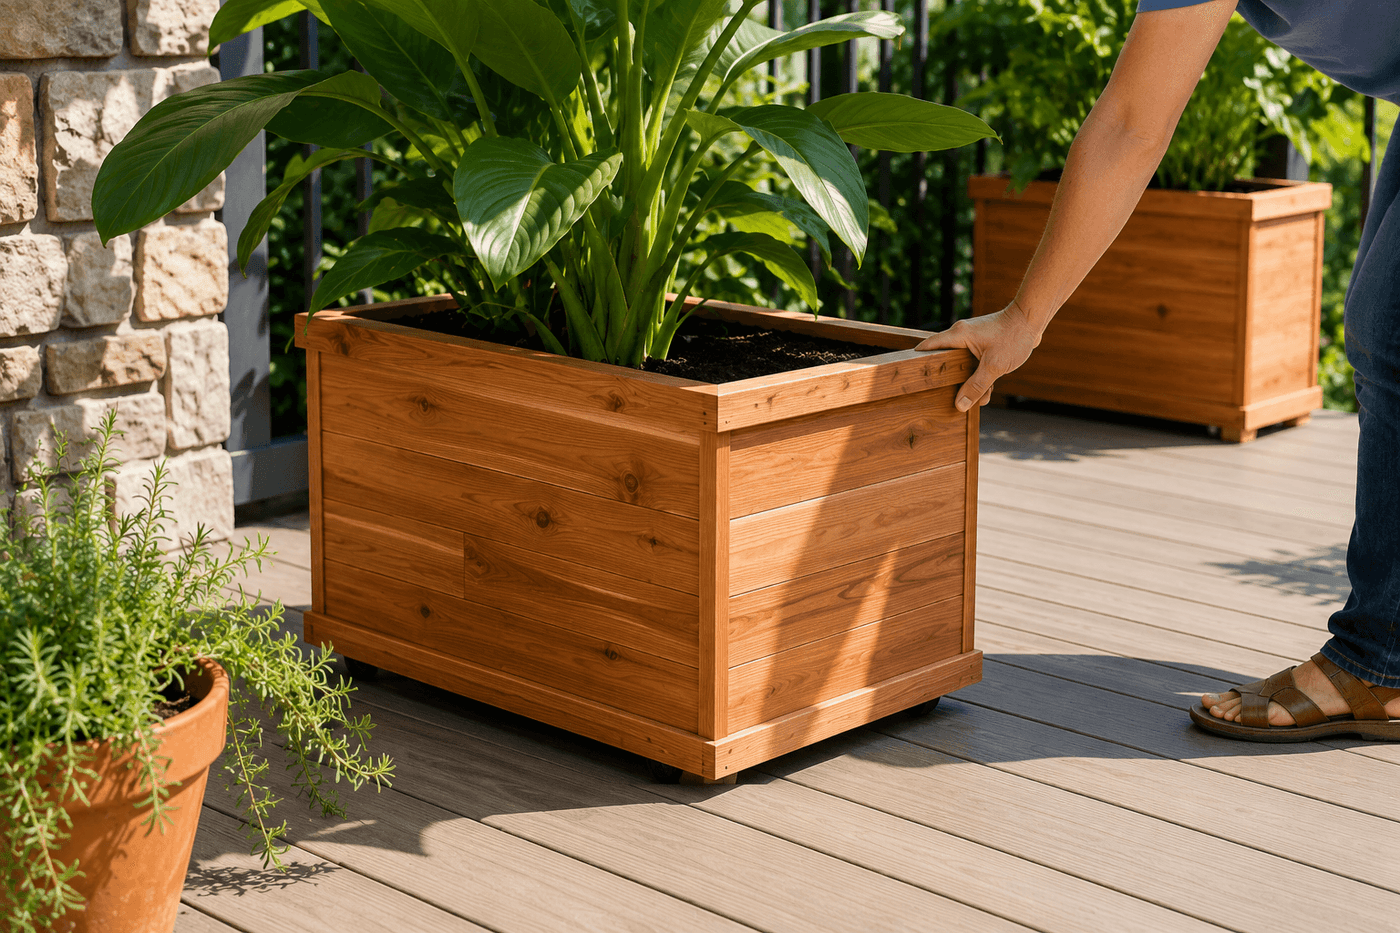
The large potted plant problem is universal and genuinely frustrating: the plant that looks perfect in that spot until the sun angle changes by midsummer, or the entertaining arrangement that requires moving everything out of the way and then back, or the corner planting that would be easy to clean under if it weighed less than forty pounds of wet soil. Four heavy-duty swivel casters mounted to the underside of a cedar planter box — recessed inward from the corners and concealed behind a decorative base trim board — solve all of these problems simultaneously without changing anything about how the planter looks from above or at eye level. The casters are invisible when the planter is in use and the whole thing rolls effortlessly on a single finger's worth of push once the locking casters are released. Cedar lumber and quality casters rated for the actual wet-soil weight of a planted planter run $25–35 total; the build takes about two hours and produces a planter that will be on your patio for a decade and that you will wonder how you managed without every time you need to redirect a plant toward the afternoon sun.
What You'll Need
- 1x10 cedar boards, 8 feet — two boards yield both 20-inch front and back panels and both 12-inch side panels from a single efficient cut sequence; cedar is the correct outdoor lumber choice for a planter that will hold moist soil continuously (~$9–11 each, two boards needed)
- 1x6 cedar boards, 4 feet — for the bottom drainage boards; two boards laid side-by-side with ¼-inch gaps cover the full interior bottom width; confirm board width matches the planter interior before cutting (~$5–6 each, two boards needed)
- 1x4 cedar board, 5 feet — for the decorative base trim that conceals the casters; ripped or routed to a consistent height that covers the caster housing from all four sides (~$4–5 for one board)
- Heavy-duty locking swivel casters, 2-inch or 3-inch wheel — four per planter; the most critical specification is weight rating — calculate the expected loaded weight by estimating soil volume (one cubic foot of wet potting mix weighs approximately 50 lbs) and add plant weight; choose casters rated for at least 1.5x the estimated total weight (~$12–18 for a set of four quality locking casters)
- Exterior wood screws, 1¼" and 2½" — 2½-inch for panel-to-panel corner joints; 1¼-inch for bottom board attachment and trim board installation; stainless or coated to prevent rust streaking on cedar
- Caster mounting screws — typically included with casters; confirm length does not penetrate through the bottom boards to the interior planting surface before driving
- Exterior wood glue — applied at all corner joints before screwing; water-resistant Titebond II or similar
- Landscape fabric — cut to line the interior bottom before adding soil; prevents fine potting mix from washing through the drainage gaps with every watering
- Danish oil or exterior sealant — two coats on all surfaces before assembly; finishing individual boards before assembly reaches every face including the interior walls that are inaccessible after construction (~$8–10)
- Sandpaper, 80- and 220-grit — for smoothing all boards before finishing; particularly the top edges of the side panels where hands will contact when moving the planter even with the casters doing the rolling work
- Circular saw or miter saw — for accurate crosscuts; consistent panel length is what determines whether the assembled planter is square or slightly racked
- Drill, impact driver, and speed square
How to Build It
- Calculate the expected loaded weight before purchasing casters — measure the interior planter volume in cubic feet (length × width × depth in feet), multiply by 50 lbs per cubic foot of wet potting mix, add an estimated plant weight, and select casters rated for at least 1.5 times that total. Under-rated casters are the single most common failure point of DIY mobile planters; a caster that is technically rated for the load but at the very edge of its capacity develops wheel wobble and axle wear within one season of being moved loaded.
- Cut all panels to final dimensions — two front and back panels at 20 inches from the 1x10 cedar, two side panels at 12 inches from the same board, and bottom boards at the interior width dimension from the 1x6 cedar. Cut all pieces from the same boards when possible so grain color and texture are consistent across the finished planter, which matters particularly if leaving cedar natural to weather without stain.
- Sand all panels through 80- and 220-grit and apply two coats of danish oil or exterior sealant to all faces before any assembly — individual flat boards are efficiently finished on all six faces in minimal time, while the same surfaces after assembly are partially inaccessible and difficult to coat evenly. Pay particular attention to the interior face of each side panel, which will be in continuous contact with moist soil and is the most moisture-vulnerable surface in the finished planter.
- Assemble the box by gluing and screwing the front and back panels between the two side panels — the front and back are captured between the sides in this configuration, producing a box where the side panels extend to the full exterior dimension on the short sides. Apply glue to the side panel end faces, clamp or hold square, confirm with diagonal measurements, and drive two 2½-inch screws through pilot holes at each corner from the side panels into the front and back panel ends.
- Attach the bottom boards from below by driving 1¼-inch screws up through the boards into the bottom edges of all four side panels — position the two bottom boards with a consistent ¼-inch gap between them for drainage, running front to back rather than side to side so the gap channels water toward the front and back of the planter rather than toward the sides where it might run along the base trim. Countersink all screw heads flush with the bottom board surface so caster mounting plates sit flat against an even surface.
- Position casters on the bottom board underside at all four corners, inset 1½–2 inches from each corner edge — the inset is what tucks the casters inside the footprint of the planter so they are hidden by the base trim board when viewed at standing eye level. Mark all four caster mounting hole positions with a pencil through the caster plate holes, confirm all four casters are parallel to each other before drilling, and drive the mounting screws through pilot holes — confirming screw length does not breach the interior planting surface before driving any screw fully.
- Install the decorative base trim by ripping or cutting the 1x4 cedar board into four pieces that frame the underside perimeter of the planter at a height that fully conceals the caster housing — the trim height needs to be at least as tall as the caster housing measured from the bottom board underside, which varies by caster model; measure your specific casters before cutting trim to height. Miter the trim corners at 45 degrees for a finished joint, or butt join with the longest pieces running front and back for a simpler assembly; attach with exterior glue and 1¼-inch finish nails driven through the trim into the bottom edge of the side panels.
- Test the rolling function with the planter empty before planting — engage and disengage all four locking casters to confirm the mechanisms work correctly, then roll the planter across the intended surface to confirm smooth movement without wheel wobble or caster binding. A caster that wobbles empty will be significantly worse under 60–80 lbs of loaded planter weight; replace any wobbling caster before planting rather than after.
- Line the interior with landscape fabric, fill with quality potting mix to within 2 inches of the rim, and plant — then engage all four locking casters before the planter is fully loaded to prevent inadvertent rolling during planting. Disengage all four locks before attempting to move the loaded planter, and move on smooth surfaces only — rolling a heavy loaded planter across gravel or an uneven threshold risks tipping the planter and damaging both the planter and the plant.
Landscape designers and interior plant stylists who specify mobile planter systems for commercial and high-end residential installations use one caster selection detail that most DIY builders overlook and that determines the long-term rolling performance of a heavy loaded planter: choose casters with polyurethane wheels rather than hard plastic or rubber wheels for any planter that will roll on deck boards, tile, concrete, or hardwood. Hard plastic caster wheels require significant force to start rolling under heavy loads, leave visible wheel marks on soft deck surfaces, and catch on deck board gaps in a way that risks tipping a loaded planter. Rubber wheels grip rather than roll on smooth tile and polished concrete. Polyurethane wheels roll smoothly on virtually any hard surface, leave no marks, and start moving under heavy loads with minimal push force because the wheel material deforms slightly to grip the surface without sticking to it. The polyurethane caster costs $2–4 more per wheel than the equivalent plastic or rubber version and is the specific upgrade that makes the difference between a mobile planter that rolls effortlessly with a single finger and one that requires a two-handed shove to get moving and leaves tracks on the deck.














