
Make Citronella Mason Jar Candles for $2 Each
Mason jars, tea lights, and citronella oil — a dozen bug-repelling patio candles that look beautiful and actually work for $15 total
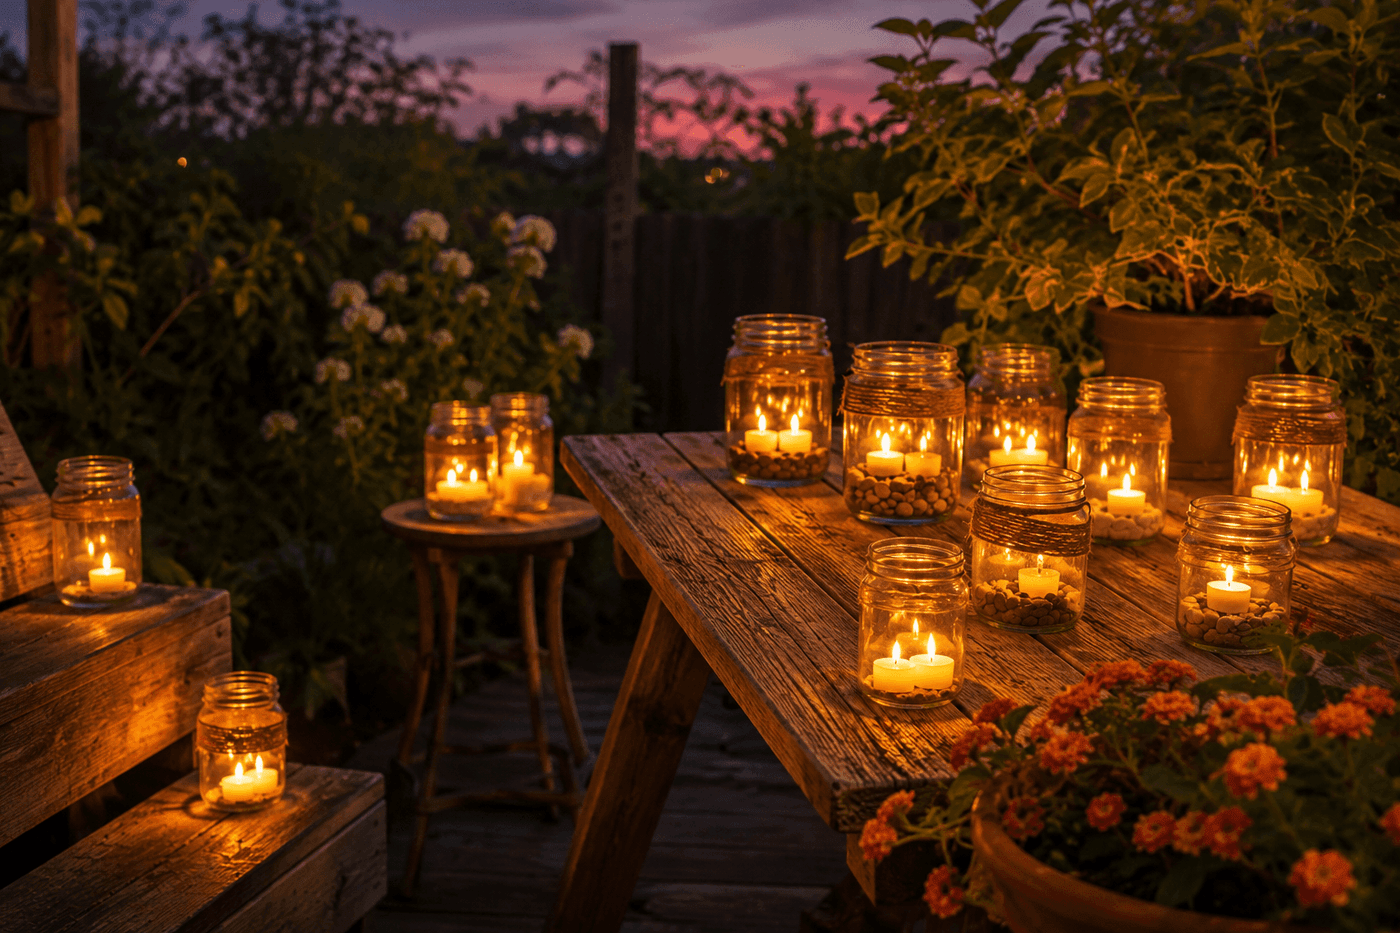
Commercial citronella candles solve the mosquito problem and the ambiance problem simultaneously, which is why they cost $15 to $25 for a single tin that burns through in a few evenings of regular summer use. The mason jar version solves both problems for about $2 per candle, lasts longer because the glass protects the tea light flames from the wind that shortens outdoor candle life dramatically, and looks considerably more beautiful than a yellow tin because the warm candlelight through glass is genuinely lovely in a way that molded wax in commercial packaging never quite achieves. Ten to fifteen drops of citronella essential oil added around — not on — the tea lights heats gently as the candles burn and releases the repelling scent continuously through the evening without the overwhelming chemical smell that commercial citronella products often produce. Make a dozen, line them along patio steps and table edges, and your outdoor summer evenings become both beautiful and noticeably more comfortable.
What You Need
- Mason jars or glass containers, qty 12 — wide-mouth quart jars provide the most stable base and the best wind protection for the candle flame; pint jars work for table settings where wind is less of a factor; recycled pasta and pickle jars are equally effective and completely free (dollar store or recycling bin, $0–1 each)
- Tea light candles, pack of 50–100 — standard unscented white tea lights; unscented is important because the citronella oil provides the scent and the repelling function, and a scented tea light underneath the oil drops can produce an unpleasant competing fragrance combination (~$3–5 for a 50-pack at dollar stores)
- Citronella essential oil — pure citronella essential oil rather than citronella fragrance oil; essential oil contains the active terpene compounds that actually repel mosquitoes, while fragrance oil smells similar but contains no repelling compounds (~$5–8 for a small bottle at grocery stores, health food stores, or online)
- Natural twine or jute cord — for wrapping jar necks as a decorative finish that gives the candle grouping a cohesive, styled look; wrap three to four times around the jar neck below the threads and tie off with a simple knot (~$2 for a small roll)
- Decorative pebbles, coarse sand, or glass stones — for filling the jar base before adding tea lights; the base material elevates the tea lights slightly, stabilizes them on the jar bottom, and adds visual texture through the glass (~$2–3 for a small bag)
- Additional mosquito-repelling essential oils, optional — lemongrass, eucalyptus, and lavender all complement citronella and extend the repelling spectrum; adding five drops of each alongside the citronella produces a more complex and effective repelling blend than citronella alone (~$4–6 per bottle)
How to Make Them
- Fill the base of each jar with one to two inches of decorative pebbles, coarse sand, or glass stones — this base layer serves three functions simultaneously: it stabilizes the tea lights on the jar bottom so they cannot tip over during use, it elevates the candle flame to a more central position in the jar for better light distribution through the glass walls, and it adds visual texture that is visible through the jar and makes the finished candle look styled rather than simply functional.
- Place two tea lights on top of the base layer — position them side by side rather than stacked, pressing them gently into the pebbles or sand so they sit level and stable. Two tea lights per jar produce approximately twice the light and heat of a single tea light, which both improves the evening ambiance effect and more effectively volatilizes the citronella oil drops that will be added around them. A single tea light in a large quart jar produces insufficient heat to release the citronella oil effectively and can leave the jar looking underwhelming from a distance.
- Add the citronella essential oil drops around the tea lights rather than directly on the candle wax or wick — apply ten to fifteen drops by running the dropper tip around the inner circumference of the jar at the level of the pebble or sand base, depositing drops against the jar wall and into the base material rather than onto the tea lights themselves. Oil applied directly to a candle flame produces a flare-up; oil applied to the warm surfaces surrounding the flame volatilizes gradually and releases scent continuously through the evening without any flame disruption.
- Enhance the repelling blend by adding five drops each of lemongrass and eucalyptus essential oil alongside the citronella if you have them available — lemongrass contains citral and geraniol compounds that repel a broader spectrum of insects than citronella alone, and eucalyptus oil is one of the few plant-based insect repellents with EPA recognition for efficacy. The three-oil blend produces a scent that is complex and genuinely pleasant rather than the sharp, single-note citronella smell of most commercial products.
- Wrap the jar neck with natural twine by starting at the base of the neck threads, applying a small dot of hot glue to anchor the starting end, and wrapping four to five tight, even coils upward before tying off with a simple overhand knot and trimming the tail to a uniform short length. The twine wrap unifies the visual character of the full candle grouping and gives each jar a finished, intentional appearance that distinguishes the collection from a row of plain glass containers.
- Light the tea lights with a long lighter or match, reaching down into the jar to the wick level — a standard short lighter can be difficult to use in a deep quart jar without burning fingers on the jar rim. Once lit, the tea lights will begin heating the surrounding jar surfaces and base material within minutes, and the citronella oil volatilization — indicated by the characteristic scent becoming detectable from a standing distance — typically begins within five to ten minutes of lighting.
- Replenish the oil drops every two to three hours during extended evening use — the essential oil volatilizes as it heats and its repelling effectiveness diminishes as the concentration in the air around the candles decreases. A quick addition of ten drops per jar every few hours maintains consistent repelling effectiveness through a full evening of outdoor entertaining without requiring any attention to the candles themselves beyond the oil refresh.
- Arrange the finished candles at three heights for the most effective and visually impressive patio installation — some at ground level along steps or path edges, some on the table surface, and some elevated on small surfaces or plant stands at an intermediate height. The three-height arrangement both maximizes the repelling effect by distributing the scent through multiple air layers at different heights and creates the layered ambient lighting effect that makes a summer evening feel genuinely magical rather than simply illuminated.
Outdoor event planners who design mosquito management into large-scale patio gatherings always arrange citronella candles in a perimeter pattern around the seating area rather than clustering them at the center of the space — a ring of candles placed at the outer boundary of where guests will be sitting creates a scent barrier that mosquitoes are reluctant to cross, while candles clustered at the table center provide ambiance but leave the perimeter of the gathering area unprotected. The perimeter spacing should be approximately four to six feet between candles for effective continuous coverage; gaps larger than six feet allow mosquitoes to enter the space between candle positions where the repelling scent concentration is insufficient to deter them. A dozen jars arranged in a perimeter pattern covers a 12-foot-diameter gathering space effectively — which happens to be approximately the right size for a comfortable outdoor dining or lounge setting.














