Ladder Blanket Storage: Thrift Find, $15
A thrift store ladder, a can of whitewash, felt pads for the feet, and a wall bracket — and the throw blanket problem that has been living on your couch is solved with style.
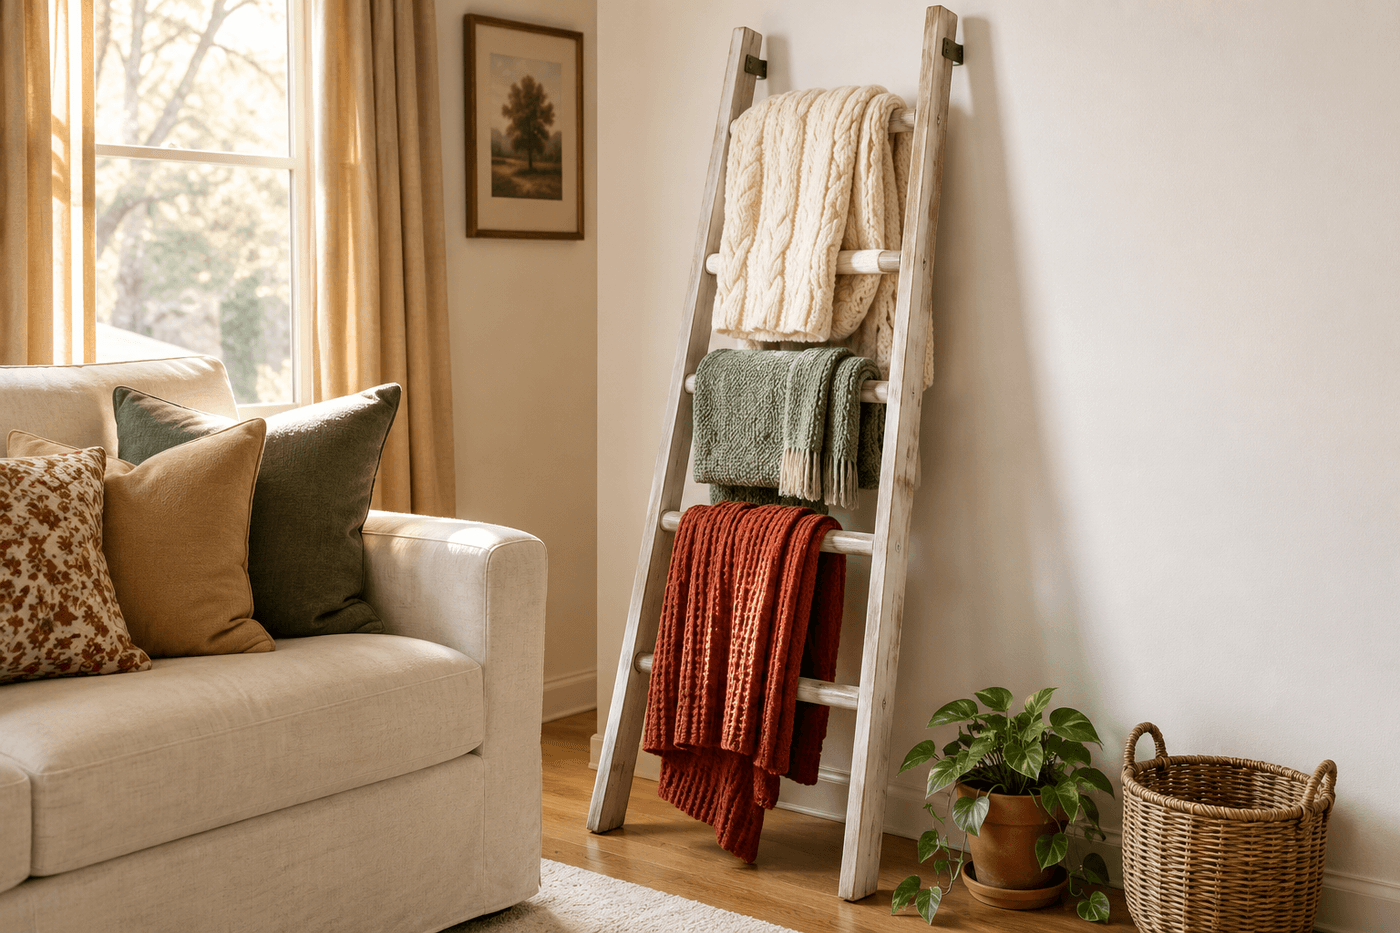
The throw blanket situation in most living rooms falls into one of two categories: blankets folded in a basket that gets excavated and never refolds properly, or blankets draped over the couch arm in a way that reads as comfortable but not designed. A blanket ladder solves both versions of the problem by giving each throw a dedicated rung at a visible, accessible height — the blankets are out, which means they are easy to grab, and the vertical display format means a carefully draped throw reads as an intentional design choice rather than something that was set down and never picked back up. A thrift store wooden ladder costs $5–15, the finish treatment takes an afternoon, and the safety additions — felt pads on the feet and a small wall bracket at the top — take about ten minutes. The ladder patina, the rung spacing, and the slight lean against the wall that makes the silhouette so appealing are all built into the object already; the transformation is almost entirely in deciding to use it for this purpose and finishing it to suit the room it is going into. Rustic charm, farmhouse warmth, or modern boldness — the finish makes the same ladder work in completely different room aesthetics.
What You'll Need
- Wooden ladder — orchard ladders, old painters' ladders, and vintage barn ladders all work; look for a ladder with 4–6 rungs spaced 10–14 inches apart for the most useful blanket display spacing; confirm all rungs are firmly attached and can bear the weight of multiple draped blankets without flexing; a ladder with some weathering and character looks more intentional as a decor piece than a pristine one (~$5–15 at thrift stores, barn sales, and Facebook Marketplace)
- Sandpaper, 80- and 120-grit — for removing splinters from all rung surfaces where blankets will contact the wood, and for smoothing any raised grain or rough patches on the ladder sides; thoroughly sanded rungs are essential since blanket fibers catch on rough wood and pull during removal
- Finish — choose based on room aesthetic:
- Clear matte sealer — preserves the natural weathered patina; Minwax Wipe-On Poly in matte or a simple tung oil finish; best for rustic and natural aesthetic rooms
- Whitewash — dilute white latex paint 1:1 with water, brush on, and wipe back with a cloth before fully dry; allows the wood grain to show through a white wash; best for farmhouse, coastal, and Scandinavian aesthetic rooms
- Solid paint color — chalk paint in matte black, deep navy, sage green, or terracotta for a modern or bohemian aesthetic; chalk paint adheres to most wood surfaces without primer (~$8–12 per quart)
- Felt furniture pads — adhesive felt pads applied to the bottom of all four ladder feet protect hardwood, tile, and laminate flooring from scratching and prevent the ladder from sliding when blankets are added or removed (~$3–5 for a pack)
- Small wall bracket and picture hanging hardware — a single 3M Command strip rated for 5–10 lbs or a small L-bracket screwed into a stud at the wall contact point near the top of the ladder prevents tipping under the weight of multiple heavy blankets or an accidental bump (~$3–8)
- Wood glue and clamps — for reinforcing any loose rungs before sanding or finishing; a rung that is loose before the ladder is put into use will fail under blanket weight and daily handling; apply wood glue into the rung joint, clamp overnight, and confirm the rung is fully rigid before proceeding
- Tack cloth — for wiping all sanding dust from the ladder surface before applying any finish; sanding dust trapped under finish creates a gritty texture and reduces adhesion
How to Transform It
- Assess the ladder structurally before any cleaning or finishing — stand it upright and apply body weight to each rung by pressing firmly downward to test for any flex or creak that indicates a failing joint; inspect each rung-to-rail joint visually for gaps, dried glue residue from previous repairs, or wood fiber separation that suggests the joint is weakening. Address every failing or questionable joint with wood glue and clamping before proceeding, since a rung that fails after the ladder is finished and in use is significantly more disruptive to repair than one addressed during the transformation process.
- Clean the full ladder surface with a damp cloth to remove dust, cobwebs, and surface dirt before sanding — sanding over gritty surface dirt dulls sandpaper faster than necessary and can drive surface particles into the wood grain where they are difficult to remove before finishing. Allow the ladder to dry completely after cleaning before beginning the sanding phase; wet or damp wood raises grain and produces a rougher sanded surface than dry wood sanded with the same grit.
- Sand all rung surfaces thoroughly with 80-grit followed by 120-grit — the rungs are the surface where blanket fabric will contact the wood repeatedly during draping, removal, and rearrangement, and any remaining roughness after sanding will catch delicate blanket fibers and eventually pill or snag them. Sand along the grain on the flat rung faces and use folded sandpaper wrapped around a finger to reach the curved underside of round rungs where splinters are most likely to be hiding. Wipe with a tack cloth between grits and after the final pass.
- Apply the chosen finish to the full ladder — for whitewash, dilute white latex paint 1:1 with water, apply with a brush in the direction of the grain, and wipe back with a clean cloth within 2–3 minutes before the wash dries fully; the wipe-back step controls how opaque or transparent the final whitewash reads and should be done consistently across the full ladder for a uniform result. For clear sealer or chalk paint, apply in thin, even coats with full drying time between coats; two coats of any finish produce a more consistent and durable result than a single heavy coat.
- Attach felt furniture pads to the bottom face of all four ladder feet — on a standard A-frame ladder this means the two feet at the base of each rail; on a straight leaning ladder this means the two feet that contact the floor and the two points at the top that contact the wall. The wall contact pads prevent scuffing and marking on painted walls, which is particularly important if the ladder will be repositioned periodically or placed against a freshly painted accent wall.
- Select the final placement position before mounting any wall hardware — lean the finished ladder against the wall at the intended position and step back to assess from the primary viewing angle in the room. The most visually effective placement positions the ladder where it is visible from the main seating area of the room rather than in a corner where it reads as hidden, and where the wall behind it is a single color without interrupting molding or artwork that competes with the ladder silhouette.
- Secure the top of the ladder with a Command strip or small wall bracket at the point where the ladder contacts the wall — the fastener prevents tipping under the weight of multiple thick blankets, which can shift the ladder's center of gravity enough to cause slow leaning and eventual tipping on smooth floors. A Command strip rated for 10 lbs is sufficient for most ladder weights; screw a small L-bracket into a stud if the ladder is particularly heavy or if it will be placed in a high-traffic area where accidental contact is likely.
- Drape blankets over the rungs in a deliberate arrangement rather than simply hanging them — fold each blanket to a width slightly narrower than the rung length so the folded edge hangs centered on the rung with a few inches of ladder rail visible on each side, and drape so the most visually interesting face of each blanket — the textured or patterned side — faces outward toward the room. Vary the drape depth on different rungs rather than making every blanket hang to the same length, which creates the layered, dimensional quality that makes a styled blanket ladder look designed rather than merely functional.
Interior stylists and home staging professionals who dress blanket ladders for residential photography and model home displays use one blanket selection and arrangement principle that produces the most visually compelling ladder display regardless of the ladder finish or room style: limit the blanket palette to three colors and vary the texture across all three rather than matching texture within the color palette. Three blankets in cream, sage, and rust that are a waffle-knit, a chunky cable-knit, and a woven cotton respectively read as a deliberate, curated collection that has depth and visual interest at every rung; three cream blankets in similar knit textures read as a monochromatic but dimensionally flat display that lacks the visual complexity that makes a styled ladder photograph well and look intentional in person. Stagers who dress blanket ladders for real estate photography follow this three-color, varied-texture rule as standard practice because it is the combination that consistently produces the warm, inviting, and lived-in quality that makes a room photograph at its most appealing — the specific visual effect a blanket ladder is positioned in the room to create.