Hexagon Planter: One Angle Is the Whole Trick
Hexagonal geometry looks intimidating until you realize the entire build depends on a single repeated cut — get that one angle right and six boards close perfectly on their own.
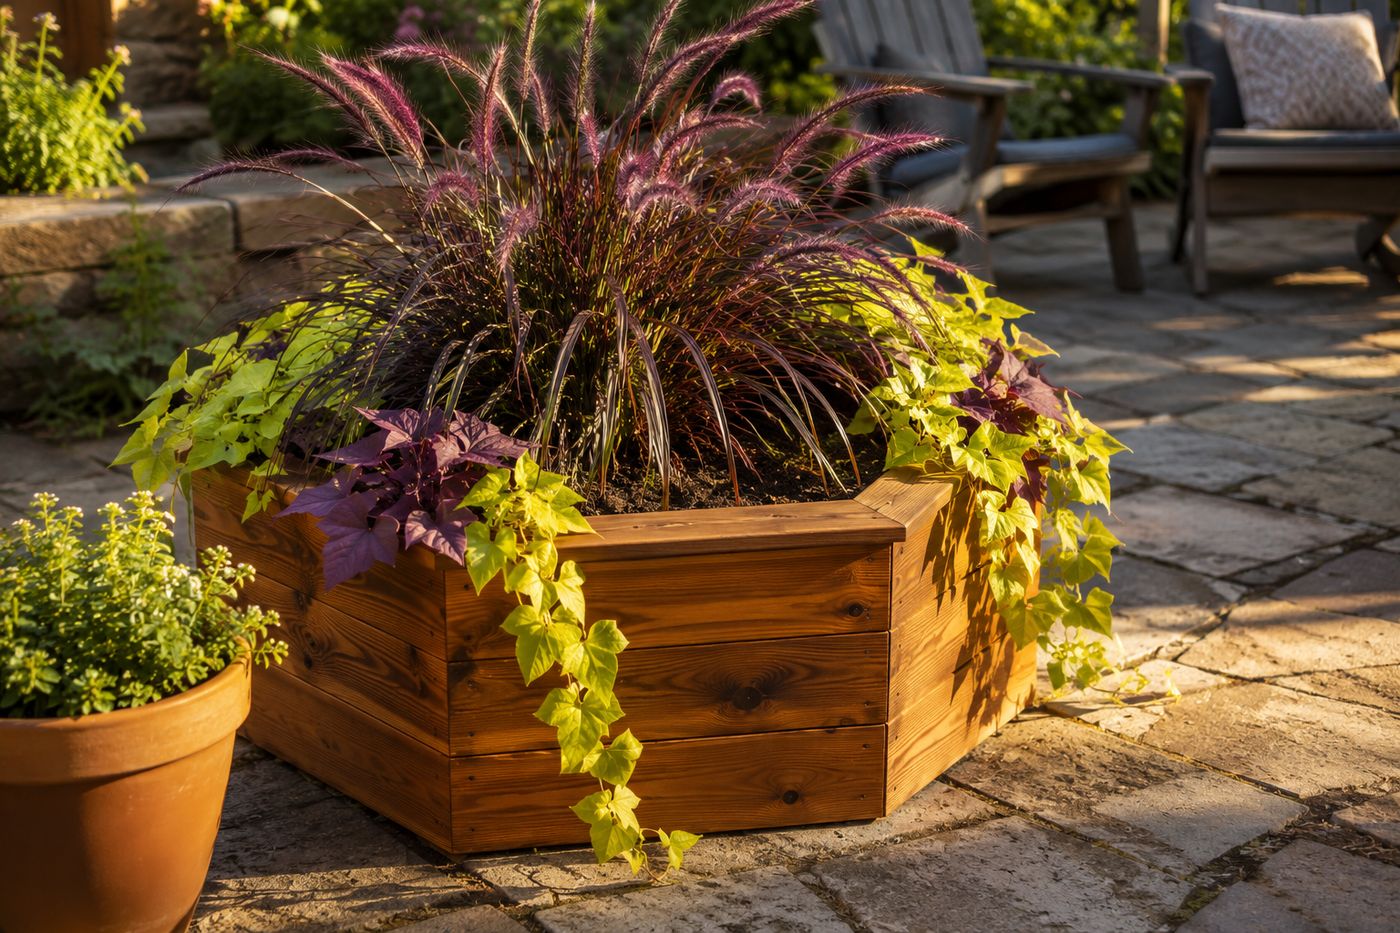
A hexagon has six interior angles that need to meet flush with no gaps, which sounds like it demands precise custom math for every joint — but the geometry actually simplifies to one number: cut every board end at exactly 30 degrees, and six identical boards will close into a perfect hexagon every time, since 30 degrees on each end of six boards adds up to the full 360-degree turn the shape requires. The distinction between a hexagon planter that closes with tight, invisible seams and one with visible gaps at every corner comes down entirely to how consistently that 30-degree angle is cut across all twelve board ends — a single board cut even a degree or two off throws the whole assembly out of alignment, since the error compounds across six joints instead of canceling out. Dry-fitting the entire shape before any glue or screws go in is what catches that error while it's still fixable. Get the angle right and the rest of the build is straightforward: glue, screw, and hold the joints with ratchet straps while everything cures. About $35 in cedar and finish, and one Saturday afternoon, gets you a planter with better proportions and grain than the $150 version in the catalog.
What You'll Need
- 6 cedar boards, cut to equal length for your desired planter size — about $22
- Miter saw, capable of locking to a precise 30-degree angle
- Exterior wood glue — about $4
- Exterior-rated wood screws — about $4
- Ratchet straps, for holding the hexagon assembly together while glue cures
- Landscape fabric, to line the interior for drainage — about $3
- Teak oil, for finishing the exterior — about $2
- Drill/driver
- Staple gun, for securing the landscape fabric liner
How to Build It
- Cut six boards to identical length, then set your miter saw to exactly 30 degrees and cut both ends of every board at that angle — consistency across all twelve cuts matters more than the length measurement itself, since even a small angle error compounds across six joints.
- Dry-fit the full hexagon on a flat surface like a driveway or garage floor before any glue touches the wood, checking that all six joints close tightly with no visible gaps — this is the step that catches a miscut board while it's still an easy fix.
- Apply exterior wood glue to each mitered joint and press the boards together in sequence, working your way around the full hexagon.
- Wrap ratchet straps around the entire assembly and tighten evenly, which pulls all six joints snug simultaneously in a way no clamp configuration can match on an angled shape.
- Drill pilot holes through each joint once the glue has set, then drive exterior screws through for permanent structural strength beyond what the glue alone provides.
- Remove the ratchet straps once screws are in place and check that the hexagon still sits flat and true on a level surface.
- Line the interior with landscape fabric, stapling it in place along the top edge, so soil stays contained while water still drains through freely.
- Finish the exterior with a coat of teak oil, applied with the grain, letting it fully absorb before planting to avoid staining the soil or roots.
Landscape designers who work with geometric planters typically build the plant arrangement around a single dramatic vertical anchor rather than an even distribution of species, because a hexagon's strong architectural lines get visually competed with rather than complemented by too many textures. One tall, structural plant in the center — an ornamental grass or upright succulent — with a single trailing variety spilling over the edges lets the planter's shape stay the visual focus instead of getting lost in the planting.