
Herb-Infused Olive Oil: Garden Flavors for $6
Fresh rosemary from the garden, good olive oil, twenty minutes on the lowest stovetop heat, and a decorative bottle — and the $18 specialty shop oil is yours for $6 with a flavor the shop version cannot match.
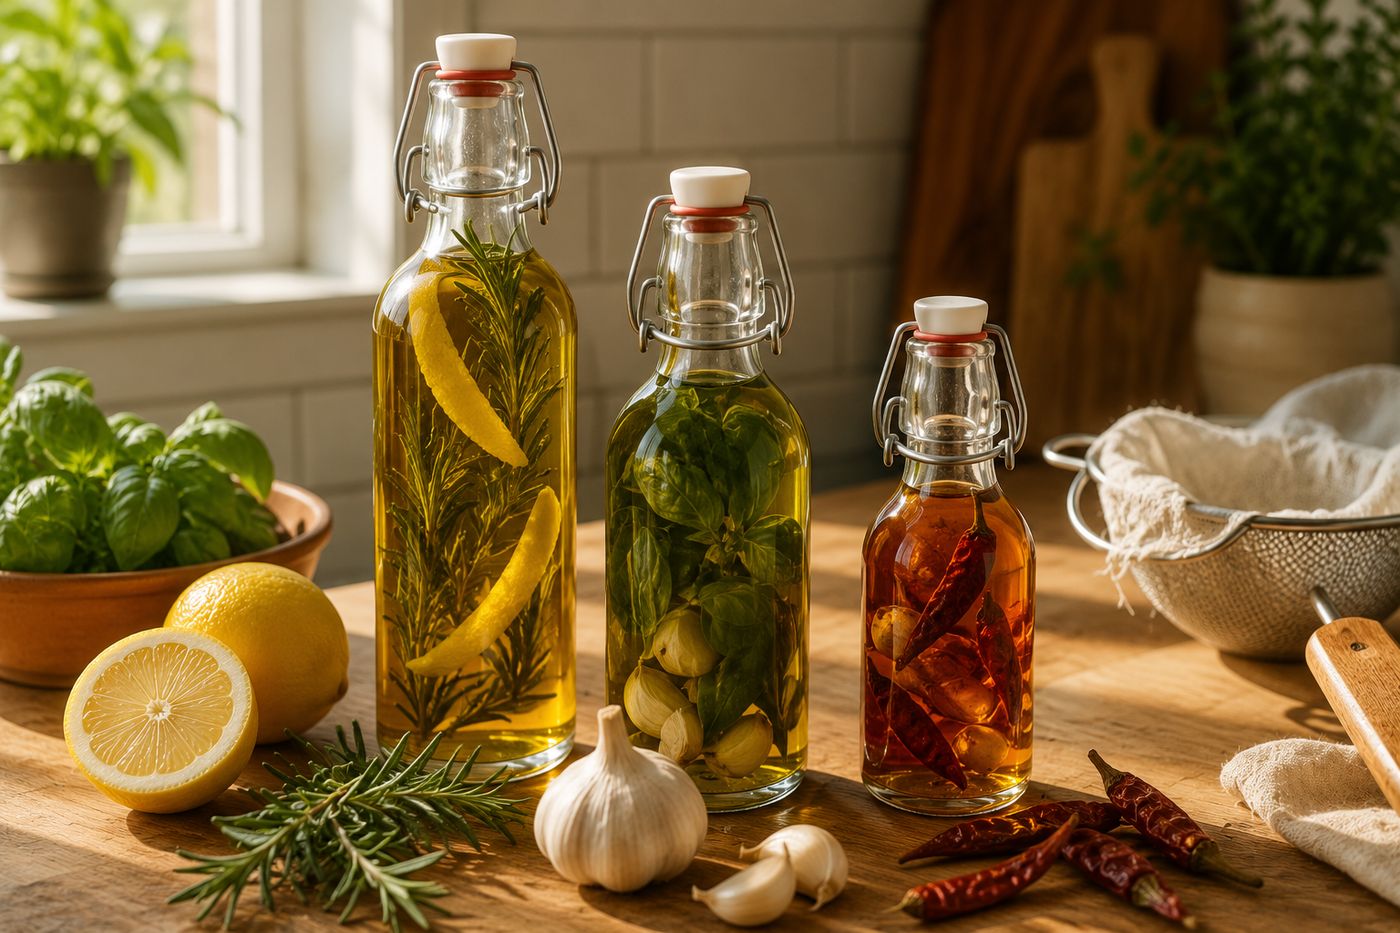
Herb-infused olive oil is one of those specialty food items where the price at the farmers market or the gourmet shop is entirely decoupled from the cost and effort of making it — a $18 bottle of rosemary oil contains olive oil, rosemary, and perhaps twenty minutes of someone's time, and the only thing preventing most people from making their own is not knowing how straightforward the process actually is. Fresh herbs from the garden, a good quality extra virgin olive oil, and either a one-to-two week cold steep for delicate herbs or a twenty-minute warm infusion on the lowest stovetop heat for hardier varieties produces something that is genuinely superior in flavor to most commercial infused oils, because the commercial version is optimized for shelf stability and the homemade version is optimized purely for flavor. Three combinations worth making in every batch: rosemary and lemon for grilled proteins, basil and garlic for bread dipping and pasta, and chili and garlic for roasted vegetables — each one costs about $6 in oil and produces the kind of kitchen gift that costs $15–20 at specialty shops and impresses everyone who receives or tastes it. The herb garden surplus that was going to bolt in the August heat becomes the thing the kitchen cannot do without through the fall.
What You'll Need
- Good quality extra virgin olive oil — the oil is the primary ingredient and its quality determines the quality of the finished infusion; a mid-range extra virgin olive oil with good flavor on its own produces an infused oil with depth and character; a lower-quality oil produces an infused oil with the same flavor limitations as the base oil regardless of how good the herbs are; a 750ml bottle of mid-range extra virgin olive oil produces three to four 200ml decorative bottles of finished infused oil (~$8–12 per bottle at grocery stores)
- Fresh herbs — choose per infusion:
- Rosemary — the most forgiving herb for warm infusion; 4–6 large sprigs per 200ml of oil; pairs with lemon zest (2 strips per bottle), black pepper (½ teaspoon), or garlic (3 smashed cloves)
- Basil — delicate; always cold steep rather than warm infuse to preserve the fresh green flavor that heat destroys; one large handful of fresh leaves per 200ml of oil; pairs with garlic (3 cloves) or lemon (1 strip of zest)
- Thyme and oregano — hardy herbs suitable for warm infusion; 6–8 sprigs per 200ml; excellent combined with garlic and a strip of lemon zest for a Mediterranean-style oil
- Chili and garlic — 3–4 dried red chilies split lengthwise plus 4 smashed garlic cloves per 200ml; warm infusion; produces the most versatile and universally loved finishing oil in any homemade batch
- Decorative glass bottles with tight-fitting stoppers, 200ml — swing-top Bormioli or similar glass bottles with rubber-gasketed swing tops provide the airtight seal that prevents oxidation and maintains infused oil quality during storage; clean and sterilize by running through the dishwasher on the hottest cycle or by filling with boiling water and allowing to air dry completely before filling (~$3–5 each at kitchen stores or online)
- Small saucepan — for the warm infusion method; the saucepan should be small enough that 200–400ml of oil fills it to at least 2 inches depth, which allows the herbs to be fully submerged during the infusion period
- Kitchen thermometer — for monitoring oil temperature during warm infusion; the target temperature is 180°F (82°C) — warm enough to extract flavor compounds efficiently without frying the herbs, which produces a bitter, cooked rather than fresh herbal flavor; oil that bubbles vigorously around the herbs is too hot
- Fine mesh strainer and cheesecloth — for straining the warm infusion into the decorative bottle; cheesecloth lined inside the strainer removes fine herb particles and any moisture from the herbs that would cause the finished oil to cloud or spoil more quickly than a clearly strained oil
- Food safety note on garlic — fresh garlic in oil at room temperature creates conditions favorable for Clostridium botulinum growth; refrigerate all garlic-containing infused oils immediately after preparation and use within two weeks; do not store garlic-in-oil preparations at room temperature regardless of how they were prepared
How to Make Them
- Prepare the herbs before touching the oil — wash all fresh herbs thoroughly and dry them completely with a clean towel followed by at least 30 minutes of air drying on a rack; any water remaining on herb surfaces when they contact the oil causes the finished oil to cloud, promotes microbial growth, and significantly reduces the shelf life of the infusion. This is the most important preparation step and the one most often rushed; herbs that feel dry to the touch may still have moisture in the stem joints and leaf undersides that releases into the oil during infusion.
- Choose the infusion method based on the herbs being used — warm infusion for rosemary, thyme, oregano, garlic, and dried chilies; cold steep for basil, tarragon, and other delicate herbs whose volatile aromatic compounds are destroyed by heat. The distinction matters significantly in the finished flavor: warm-infused rosemary oil has a deep, resinous, fully extracted flavor that a cold steep cannot achieve in the same time frame, while warm-infused basil oil tastes cooked and flat rather than the bright, fresh green of a properly cold-steeped basil oil.
- Warm infuse by combining the prepared herbs and oil in the small saucepan over the lowest possible heat — the goal is to maintain the oil between 150–180°F (65–82°C) for 20 minutes, which extracts flavor compounds efficiently without frying the herbs. Monitor the temperature with the kitchen thermometer every 5 minutes and adjust the heat as needed; most home stovetops require the burner to be set at the lowest mark and sometimes slightly elevated off the burner grate to maintain this temperature range without exceeding it. The herbs should show tiny, slow bubbles rising from their surfaces — active, vigorous bubbling indicates the oil is too hot and the heat should be reduced immediately.
- Remove the warm infusion from heat after 20 minutes and allow to cool for 10 minutes before straining — straining hot oil through cheesecloth produces steam burns from the rising heat and causes the cheesecloth to compress the herbs into the oil rather than filtering them out cleanly. At the slightly cooled temperature the oil flows through the cheesecloth freely and the herb particles are captured cleanly without the fine sediment that a too-hot straining produces.
- Cold steep basil and delicate herb oils by packing the fully dried herbs loosely into the sterilized decorative bottle — loosely rather than tightly compressed, which restricts oil circulation between the herb surfaces and slows the infusion — then pouring room temperature oil over the herbs until the bottle is full and all herb surfaces are completely submerged. Seal with the swing-top stopper and place on a cool, dark shelf away from direct light for 1–2 weeks, tasting at the one-week mark to assess flavor intensity and continuing for the second week if a more pronounced flavor is desired.
- Strain cold-steeped oils through cheesecloth into a clean container and then funnel into the decorative bottle for long-term storage — the fresh herb material left in the oil after the infusion period begins to degrade and contributes off-flavors after the initial infusion window; removing the spent herbs and transferring the strained oil to a clean bottle extends the quality window of the finished infusion significantly. Label the bottle with the infusion date and the herb combination; infused oils look similar and are difficult to distinguish by color alone once the herbs are removed.
- Store all infused oils correctly — garlic-containing oils in the refrigerator and used within two weeks without exception; herb-only oils (no garlic or other low-acid vegetables) in a cool, dark location away from the stove and used within one month for peak flavor. All infused oils should be examined before each use for any signs of cloudiness, off smell, or mold; a properly made and stored infused oil should smell cleanly of its herb and oil and look clear to slightly hazy at refrigerator temperature but clear at room temperature.
- Label and gift finished bottles with a hand-written tag noting the herb combination, the infusion date, the storage requirement (refrigerate if garlic-containing), and the use-by date — the label information is both a food safety requirement for gifted oils and the finishing detail that elevates a decorative bottle of oil from a homemade item to a thoughtful, professional-looking artisan gift. A simple kraft paper tag tied with twine produces the farmers market aesthetic that makes the recipient understand immediately that what they are holding is genuinely handmade and genuinely special.
Culinary school instructors and artisan food producers who teach infused oil production consistently recommend one technique that produces a significantly more complex and layered flavor than a single-herb infusion without additional cost or effort: build each infused oil around a flavor triangle — a primary aromatic herb, a secondary depth element, and a bright finishing note — rather than infusing a single herb alone. Rosemary is the primary aromatic; smashed black peppercorns add the secondary depth that pure rosemary oil lacks; a strip of lemon zest adds the bright, acidic finish that lifts the whole flavor and prevents the oil from tasting flat and one-dimensional. The same triangle principle applies across all combinations: basil (primary) with garlic (depth) and lemon (finish); chili (primary) with garlic (depth) and a strip of orange zest (finish) for a surprisingly sophisticated variation on the standard chili oil. Artisan food producers who use this flavor triangle framework describe it as the technique that makes the difference between an infused oil that tastes like olive oil with a herb note and one that tastes like a complete, considered flavor — the same difference between a successful recipe and a transcendent one, achieved through composition rather than additional complexity.














