Forest Bathing Nook: Shade Garden for $65
That shaded corner where nothing would grow is not a gardening failure — it is a forest bathing nook waiting for the right plants and fifteen minutes of your day.
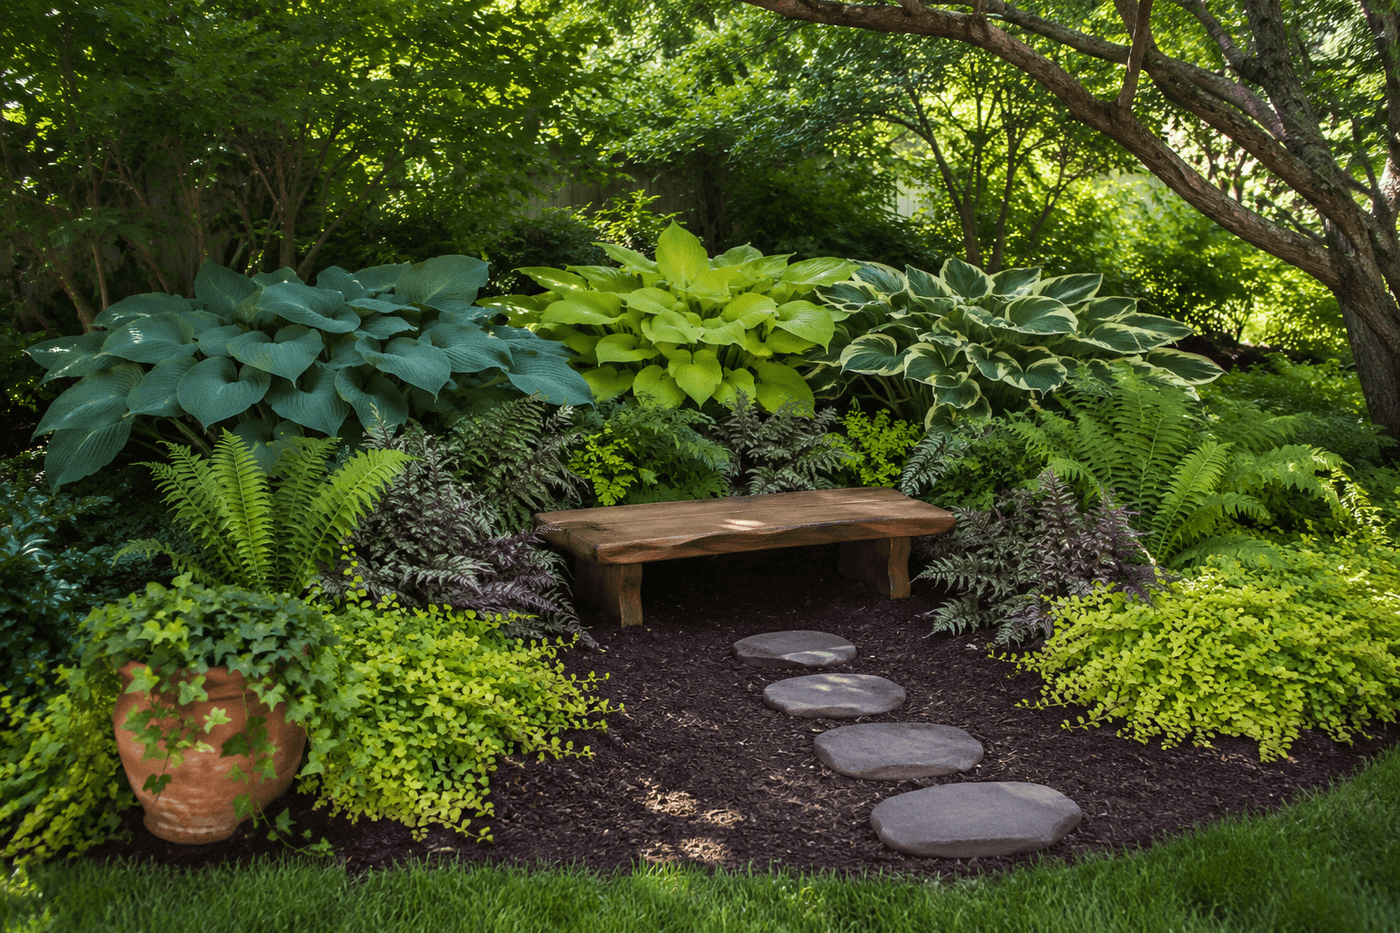
The deeply shaded corner where nothing grows is one of the most common sources of gardening frustration — and one of the most misunderstood opportunities in any backyard. The problem is not the shade; the problem is attempting sun-loving plants in a space that is asking for something entirely different. That enclosed, canopied quality that shade-loving plants create when layered at multiple heights — dense hostas at the back, ferns in the middle, creeping ground covers at the edges — is precisely the environmental condition that forest bathing research identifies as measurably restorative to the human nervous system. Cortisol drops. Heart rate slows. The particular quality of attention that dense green enclosure produces is different from sitting in an open sunny garden in ways that are documented in peer-reviewed research and completely obvious to anyone who has spent fifteen minutes in a properly planted shade nook. Turning a frustrating shaded corner into an intentional forest bathing nook costs about $65 in shade plants, dark bark mulch, and a low weather-resistant seat, takes three hours to plant and style, and converts your least-used outdoor space into the most restorative one on the property — which is one of the better return-on-investment calculations available in residential garden design.
What You'll Need
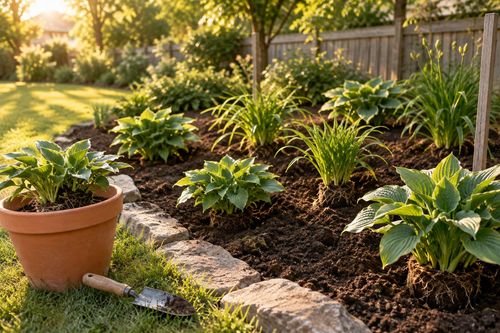
- Large hostas, 3 plants in varied leaf textures — choose one blue-leaf variety (Halcyon or Elegans), one chartreuse variety (Sum and Substance or August Moon), and one variegated (Frances Williams or Patriot) for maximum visual layering even within the same plant genus; plant these at the back of the nook as the primary backdrop (~$8–12 each at garden centers)
- Mixed fern flat — a flat of six to eight assorted ferns in a mix of upright and arching varieties; Japanese painted fern adds silver and burgundy color variation that prevents the all-green palette from reading as flat; ostrich ferns provide dramatic height in the mid-layer (~$18–25 for a flat)
- Creeping Jenny or creeping thyme — for the ground layer that blurs the boundary between planted area and mulched seating space; golden creeping Jenny (Lysimachia nummularia Aurea) provides a bright chartreuse contrast to the dark mulch that reads as luminous even in deep shade (~$4–6 for a four-pack)
- Dark bark mulch, 2 cubic feet — dark brown or black bark mulch in the seating area reads as forest floor and is the single material choice that most creates the forest bathing atmosphere; light or reddish mulch breaks the illusion; a 2-cubic-foot bag covers the seating area to a 2-inch depth (~$6–8)
- Smooth river stones, 8–12 pieces — for a simple stepping stone path leading into the nook; flat-bottomed river stones in varied sizes read as natural and found rather than manufactured; available by the bag at garden centers (~$8–12 per bag)
- Low teak or cedar bench or weather-resistant seat cushion on a garden stool — the seating should sit low — 14–16 inches from ground — rather than chair height, which positions the eye closer to the plant layer and intensifies the enclosure feeling; teak weathers to silver naturally and requires no treatment (~$20–35 for a simple low bench)
- Shade-formulated slow-release fertilizer — worked into the planting holes at installation; shade plants are slower-growing and benefit from a complete nutrient profile at planting rather than relying on depleted shaded soil alone (~$5–8 for a small bag)
- Compost or shade planting mix — shaded corners often have root-compacted, nutrient-depleted soil from competing tree roots; amending each planting hole with compost gives shade plants the organic matter they need to establish in challenging soil conditions (~$6–8 for a small bag)
How to Create It
- Assess the shade quality before purchasing any plants — stand in the corner at different times of day and observe how much direct sun, if any, reaches the space. True deep shade (fewer than two hours of direct sun) requires different plant selections than partial shade (two to four hours); the hostas and ferns specified here handle both, but the planting density and water requirements differ significantly between the two conditions. Note also whether the shade is dry shade under shallow tree roots or moist shade against a north-facing fence, as this determines how much soil amendment will be needed at planting.
- Clear the space of any existing failed plantings, weeds, and debris — pull all existing vegetation including roots, remove any landscape fabric that may be suppressing soil biology and preventing the deep mulch penetration that shade plants require. Rake the soil surface to identify the extent of surface root competition from adjacent trees; areas with dense surface roots within 6 inches of the soil surface need deeper planting holes with more compost amendment to give new plants enough root volume to establish before the tree roots outcompete them.
- Position the bench or seating element first before planting anything — the seating position determines the sightlines and the planting arrangement responds to it rather than the other way around. Sit on the bench in the chosen position and look outward from the nook; the plants that will feel most enveloping are those positioned just beyond arm's reach on both sides and behind, rather than planted in a wide perimeter that leaves the seating area feeling exposed in the center. Mark the seating position and the arm-reach radius clearly before the first plant goes in the ground.
- Plant the three hostas at the back of the nook in the positions that will form the backdrop when viewed from the seated position — space them 24–30 inches apart to allow for their mature spread, which in large varieties can reach 36–48 inches within three seasons. Dig each planting hole twice the diameter of the root ball and one and a half times the depth, amend generously with compost and a handful of slow-release fertilizer, and plant at the same depth the hosta was growing in its nursery container — planting too deep buries the crown and causes rot in the dense, moist conditions a shaded nook provides.
- Place ferns in the middle layer between the hostas and the seating area, varying their positions to create the asymmetric, naturalistic arrangement that reads as forest rather than landscape bed — odd numbers of plants in irregular groupings rather than evenly spaced rows or geometric clusters. Position the tallest fern varieties (ostrich, cinnamon) at the sides where their height creates the enclosing walls of the nook, and the lower arching varieties (Japanese painted fern, autumn fern) toward the center front where their texture and color variation are most visible from the seated position.
- Plant creeping Jenny along the front edges of the planted area where it will spread gradually over the mulch boundary and soften the transition between the planted nook and the surrounding lawn or path — press small divisions into the soil at 8–10 inch intervals and water immediately to settle the roots. The creeping Jenny will fill the gaps between placements within one season and begin flowing over the mulch edge within two, producing the blurred boundary between planting and seating that most creates the sensation of being inside the garden rather than adjacent to it.
- Lay the river stone path from the garden's edge to the bench — set each stone into the soil surface so the top face sits flush with or slightly above grade rather than perched on top of the soil, which produces stones that rock underfoot and require resetting after every rain. Irregular spacing between stones that requires a slight adjustment of stride — rather than evenly spaced steps that allow mindless walking — is the design detail that slows the approach to the nook and begins the transition from the garden's active spaces to the nook's restorative one before the bench is even reached.
- Apply dark bark mulch to a 2-inch depth across the full seating area around the bench and between the stone path — work the mulch around the base of newly planted specimens without piling it against plant stems or crowns, which causes crown rot in the moist shaded conditions the nook provides. Step back and assess the finished nook from the garden's edge before sitting down in it for the first time; adjusting one or two plant positions while everything is still freshly planted is infinitely easier than after the root systems have had two weeks to begin establishing in the amended soil.
Landscape designers and environmental psychologists who design restorative outdoor spaces for wellness-focused residential and clinical projects use one spatial principle that distinguishes a forest bathing nook that genuinely produces the calm it promises from a shaded garden seat that merely offers shade: the ratio of visual enclosure to visual opening should be approximately 70% enclosed and 30% open when assessed from the seated position. A nook that is 100% enclosed feels claustrophobic rather than held; a nook that is 50% open to the surrounding garden reads as a seat in the garden rather than a retreat from it. The 70/30 ratio — dense planting behind and to the sides, a single open sightline through the front of the nook toward a focal point such as a distant garden feature, a section of fence, or a borrowed landscape element — creates the prospect-refuge balance that environmental psychologists identify as the specific spatial condition humans find most restorative. It is the same proportion found in natural forest clearings — enclosed enough to feel protected, open enough to feel safe — and achieving it in a backyard nook requires only that the front planting be kept deliberately lower than the side and back plantings so the eye has one natural direction to rest while the body feels surrounded by green on the remaining three sides.