
Folding Adirondack Chair: Classic Build, $55
All the classic Adirondack silhouette, four inches flat for winter storage, and a Saturday of woodworking to get there.
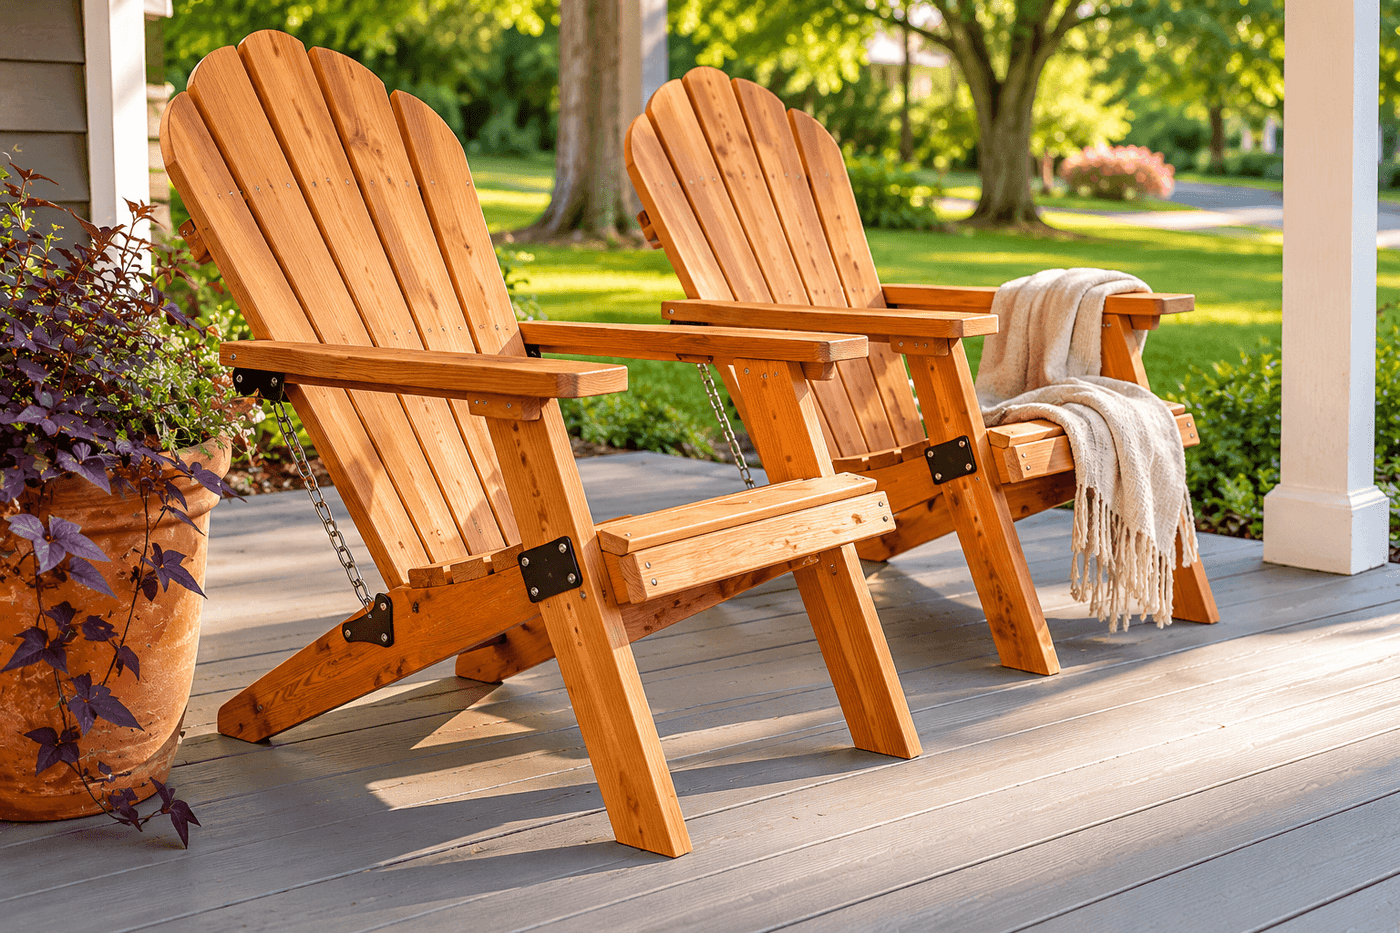
The Adirondack chair has one of the most recognizable silhouettes in outdoor furniture — wide armrests, fanned back slats, that specific reclined angle that signals summer and leisure in a way almost nothing else does — and the reason more people don't own them isn't cost or craftsmanship but storage. Five months of winter in a climate that demands furniture come inside is five months of a full-size Adirondack occupying garage floor space that is already at a premium, and that calculation quietly keeps a lot of porches empty. The folding version solves the problem entirely: two ladder-style frames — seat and back — connected by a pair of heavy-duty exterior hinges, with a simple chain on each side that limits the back recline to the classic Adirondack angle when open and releases to fold the whole chair flat in five seconds when the season ends. Four inches flat hanging on a single garage wall hook is the storage footprint of a chair that looks and feels like a full-size Adirondack in every way that matters. Cedar lumber, exterior hinges, and hardware run about $55, the build takes a full Saturday of six hours, and the result is the chair that finally makes porch sitting a daily habit rather than something deferred by storage math.
What You'll Need
- 1x4 cedar boards, 8 feet — six boards per chair; cedar is the correct species choice for outdoor furniture that will experience seasonal storage — it resists rot, stays dimensionally stable through humidity swings, and finishes beautifully with oil (~$5–6 each, six needed per chair)
- 1x6 cedar boards, 8 feet — two boards per chair for the wide seat slats and armrests (~$7–8 each, two needed per chair)
- Heavy-duty exterior strap hinges, 6-inch — two per chair; must be rated for outdoor use with stainless or hot-dipped galvanized hardware to prevent rust staining on cedar (~$6–8 per pair)
- Stainless steel chain, 12 inches per side — two lengths per chair; the chain limits back recline to the correct Adirondack angle; heavier chain (3/16" or ¼") handles weight without stretching (~$4–6 total)
- Screw eyes and S-hooks — four screw eyes and four S-hooks per chair for attaching chain ends to seat frame and back frame (~$3–4)
- Exterior wood screws, 1¼" and 2½" — stainless or coated; 1¼" for slat attachment, 2½" for frame assembly; pre-drilling all pilot holes prevents cedar splitting (~$6–8 per box)
- Exterior wood glue — Titebond II or similar water-resistant formula for reinforcing all frame joints before screwing
- Danish oil or exterior penetrating sealant — two coats on all surfaces before assembly; finishing lumber flat on the ground before building is dramatically more thorough than finishing an assembled chair (~$8–10)
- Sandpaper, 80-, 120-, and 220-grit — for smoothing all slat edges and surfaces before finishing; pay particular attention to armrest top surfaces where hands rest
- Circular saw or miter saw — for cutting slats to length and making the angled cuts on back slats that produce the fanned top profile
- Jigsaw — for shaping the curved front edge of the seat frame and the curved armrest profile that defines the classic Adirondack silhouette
- Drill and impact driver — for pilot holes and driving screws; a drill-driver combination prevents cedar splitting that a bare impact driver causes on small-dimension lumber
- Clamps — for holding frame assemblies square while glue sets before screwing
How to Build It
- Cut all lumber to final dimensions before any assembly — seat frame rails at 24 inches, back frame rails at 36 inches, seat slats at 21 inches, back slats in graduating lengths from 24 to 36 inches for the fanned profile, and armrests at 28 inches with the front curved profile marked but not yet cut. Cutting all pieces to length first and laying them out by assembly group confirms you have everything needed before any glue is opened.
- Shape the curved cuts on armrests and the seat frame front rail using a jigsaw — the armrest curve is what gives the folding Adirondack its classic profile and is worth taking slowly for a smooth, consistent arc. Trace the armrest curve from a printed template or use a flexible batten bent to the curve and traced with pencil; both sides must be mirror images of each other, so cutting them stacked and clamped together guarantees identical profiles.
- Sand all cut pieces progressively through 80-, 120-, and 220-grit before any assembly or finishing — sanding individual flat boards is fast and produces thorough results on all faces and edges; sanding the same surfaces after assembly means working around screws, into corners, and across joints where sandpaper cannot reach consistently. Pay particular attention to the top edges of all slats, which splinter in use if left with any roughness, and to the armrest top surface where prolonged hand contact makes any roughness immediately apparent.
- Finish all sanded pieces with two coats of danish oil or penetrating exterior sealant, applying with a rag and allowing full cure between coats — finishing flat, individual pieces before assembly reaches every surface completely, including the faces that will be glued or screwed together at joints, which are the surfaces most vulnerable to moisture penetration once the chair is assembled and those faces are no longer accessible. Allow the final coat to cure fully before assembly, typically 24 hours.
- Assemble the seat frame by gluing and screwing the two side rails to the front and rear crosspieces, checking square by measuring diagonally before the glue sets and clamping until cured. The seat frame is the structural foundation the entire chair rests on, and a frame that is even slightly out of square transfers that error to every slat attachment point and to the hinge alignment that determines whether the chair folds cleanly or binds during operation.
- Attach seat slats across the seat frame using 1¼-inch exterior screws driven through pilot holes, spacing evenly with a consistent gap — a ¼-inch gap between slats allows drainage and airflow while maintaining a comfortable seating surface. Drive all screws from the top face of the slats so fastener heads are visible on the seating surface rather than underneath, which is the correct orientation for weather resistance on horizontal outdoor surfaces where water sits rather than runs off.
- Assemble the back frame identically to the seat frame — two side rails connected by top and bottom crosspieces, glued and screwed square — then attach the graduating back slats with the shortest at each outside edge and the longest at center to create the classic fanned top profile. The angle cut at the top of each back slat that produces the fan effect is the most visually distinctive feature of the Adirondack silhouette; cut all slats to the same bottom length and vary only the top angle cut to produce the graduated fan.
- Connect the seat frame and back frame with two heavy-duty exterior strap hinges positioned at the rear of the seat frame top face and the bottom of the back frame front face — the hinge placement at this joint is what allows the back to fold forward flat onto the seat when closed. Position both hinges at identical distances from the frame sides before screwing, confirm both are parallel to each other, and use all provided screw holes rather than just the minimum, as hinge connections on a folding chair experience significant repeated stress that partial fastening cannot handle long-term.
- Set the back recline angle by opening the chair to the classic Adirondack position — approximately 100–105 degrees between seat and back — and attaching the chain on each side by screwing a screw eye into the seat frame side rail and another into the back frame side rail, then connecting with chain cut to the length that holds the back at exactly that angle when taut. The chain length is the single measurement that determines the chair's comfort angle permanently, so sit in the chair and adjust the back position until it feels correct before cutting and attaching the chain.
- Attach the armrests by resting each one on the seat frame side rail and back frame side rail at the correct height — armrest top surface typically sits 7–8 inches above the seat slat surface — and securing with two screws per end driven through pilot holes into the frame rails below. The armrests add significant lateral rigidity to the open chair structure and are the component that makes a folding Adirondack feel as solid as a fixed one when occupied, so confirm the fit is snug and the armrest surface is level before driving final screws.
Furniture designers and woodworking instructors who teach Adirondack chair builds consistently recommend one hinge selection detail that most first-time builders overlook and that determines how smoothly the folding mechanism operates after a full season of outdoor use: choose barrel hinges or heavy-duty strap hinges with a full 180-degree range of motion rather than standard cabinet or gate hinges, which are typically rated to only 90–120 degrees and bind before the chair reaches the flat-fold position. A hinge that binds at 150 degrees forces the builder to either stop the fold short — defeating the flat-storage benefit — or apply force that stresses the hinge mounting screws and eventually pulls them from the cedar frame. Full-motion exterior strap hinges rated for 180 degrees allow the back to fold completely flat onto the seat surface without resistance, which is the smooth five-second fold that makes the storage benefit feel effortless rather than like a workaround. Confirm the degree rating on the hinge packaging before purchasing; most hardware store exterior hinges display this specification, and the difference between a 120-degree and 180-degree hinge is the difference between a chair that sort of folds and one that folds completely flat every time.














