
Create Meditative String Art for Under $12
Small nails, embroidery floss, and an hour of deliberate wrapping — the practice that quiets a busy mind one connection at a time
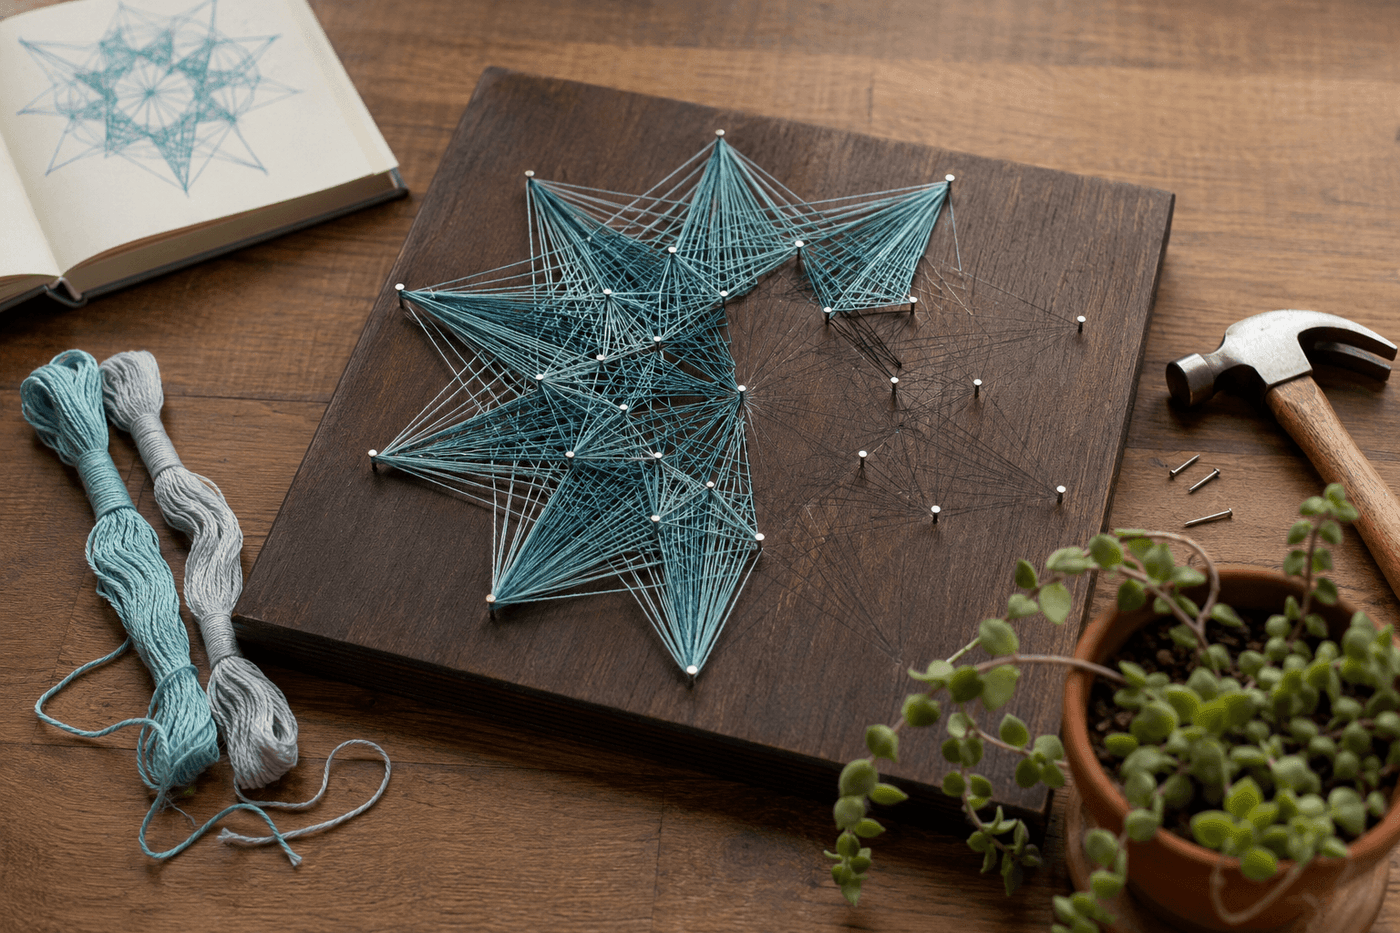
String art sits at a specific intersection of craft and meditation that is difficult to find elsewhere — it is structured enough to feel purposeful and productive, repetitive enough to quiet the analytical mind, and gradually revealing enough that each session ends with something genuinely beautiful that you made with your own hands in an hour of focused attention. The hammer work of setting each nail is satisfying and concrete; the wrapping of floss between nails is where the meditative quality deepens, because each wrap requires just enough attention to keep the mind present and just little enough complexity to allow the mental chatter to settle into the rhythm of string against wood and hand against thread. A 12-inch board, a packet of small nails, and a few skeins of embroidery floss in colors that bring you peace is the complete material investment for a practice that produces both a beautiful finished piece and the specific quality of quiet that comes from an hour of unhurried, intentional handwork.
What You Need
- Wooden board, 12×12" or larger, ½" to ¾" thick — pine craft board from any hardware or craft store works well; a thicker board holds nails more securely and produces a finished piece with more visual weight and substance (~$4–6 for a craft board cut to size)
- Small finish nails, 1" length, box of 100 — the nail length needs to be long enough to hold firmly in the board with at least ½ inch below the surface while leaving enough exposed nail shaft for the string to wrap around multiple times; ¾-inch to 1-inch finish nails work for most board thicknesses (~$3–4 for a small box)
- Embroidery floss in 2–3 colors — the standard 6-strand embroidery floss available at any craft store; using all 6 strands produces bold, visible string lines; separating to 3 strands produces finer, more delicate web patterns. Choose colors that feel calming or joyful to you personally rather than defaulting to what looks interesting in photos (~$1–2 per skein, $2–4 total)
- Small hammer — a standard finish hammer or lightweight craft hammer; smaller hammers give more control for setting nails precisely along design lines than a full-size framing hammer
- Pencil and ruler or compass — for sketching the nail placement design on the board surface before hammering begins; pencil lines are covered by the string wrapping and never visible in the finished piece
- Stain, paint, or clear sealer for the board — a dark stained board creates the highest contrast with lighter string colors and produces the most visually dramatic finished piece; raw wood works for warm or earth-tone string choices (~$4–6 for a small stain sample)
How to Make It
- Prepare the board first — sand it smooth at 120-grit and follow with 220-grit for the surface feel that makes a finished piece feel considered rather than rough, then apply one coat of dark wood stain and allow it to dry completely before sketching any design. The board preparation is not a step to rush through on the way to the nailing and wrapping — it is the first meditative act of the session, and a board that has been cared for as a surface before a single nail is set produces a finished piece with an entirely different character than one that was used as a raw construction material.
- Sketch your design lightly in pencil before picking up the hammer — a simple geometric shape like a star, circle, or initial letter drawn at a size that leaves 1 to 2 inches of border on all sides of the board is the ideal starting point for a first string art session. More complex designs produce beautiful results but extend the nail-setting phase significantly and can feel more like technical execution than meditative practice; a simple shape whose nail placement takes twenty to thirty minutes allows the majority of the session to be spent in the more meditative wrapping phase.
- Set nails along the pencil lines at ½-inch intervals, tapping each nail with the hammer until it stands firmly with approximately ¼ inch of shaft exposed above the board surface. Work around the full design outline at a steady, unhurried pace — the hammer work is where the session transitions from preparation into practice, and the physical rhythm of tap, tap, set, move to the next position is the first meditative element. Nails that are set too deep leave insufficient shaft for the string to wrap around multiple times; nails set too shallow pull free under string tension during wrapping.
- Tie the first string color to any nail with a secure double knot before beginning the wrapping phase — trim the tail end close to the knot so it tucks behind adjacent string wraps and disappears into the design as you work. The starting knot is the only technical decision in the entire wrapping phase; once it is tied, the rest of the session is pure repetitive wrapping that follows the intuition of the moment rather than a predetermined plan.
- Wrap the string between nails in whatever pattern emerges — around one nail clockwise, across to another nail, around that one counterclockwise, back across at a different angle, building the geometric web slowly and without rushing. The wrapping pattern does not need to be planned or consistent; the same nail arrangement wrapped by two different people in two different emotional states produces two completely different finished pieces, and the design that emerges from genuine spontaneous wrapping almost always looks more interesting than one executed according to a predetermined pattern.
- Allow the wrapping to continue until the design feels complete within the first color — then tie off with a double knot around the nearest nail, trim the tail, and sit with the work before deciding whether to add a second color. The pause between colors is its own meditative moment: looking at what has emerged, noticing which areas of the design feel complete and which feel open, choosing the next color from the available options based on what the piece seems to want rather than what was planned before beginning.
- Add subsequent colors by tying onto any nail and wrapping in patterns that complement or contrast with the existing string work — a second color wrapped more tightly in a smaller area creates visual density and depth; the same color wrapped lightly across the full design creates a layered, translucent quality where both colors are visible simultaneously. Each color addition takes the design somewhere neither planned nor predictable, which is the quality that makes string art made in a genuine meditative state look different from string art executed as a technical exercise.
- Finish by tying the final string securely and sitting quietly with the completed piece for a moment before moving or displaying it — the transition from making to observing is its own small practice, and the finished piece seen for the first time as a whole object rather than as a work in progress often reveals a quality and coherence that the maker couldn't see during the process of building it one wrap at a time. Display it on a shelf, give it to someone who needs something quietly beautiful in their space, or set it aside and begin another one next Thursday.
Art therapists who use string art in mindfulness sessions with clients always begin with what they call an intention color — asking the client to choose a first string color based purely on what they feel drawn to in the moment rather than what looks good with the board or matches a planned palette. The color chosen intuitively at the start of a session often reflects something about the emotional state the person brings to the work, and the act of noticing and honoring that intuitive pull — rather than overriding it with analytical color theory — is itself a small but meaningful practice of listening to internal states rather than external standards. The piece that results from an intention color chosen with genuine attentiveness is almost always more personally meaningful and more visually interesting than the piece planned from a color palette assembled before the session began.














