
Crate Plant Stand: Tiered Porch Garden, $15
Three or four wooden crates, a coat of outdoor paint, and a afternoon of assembly — and a bare porch corner becomes a lush, layered plant display.
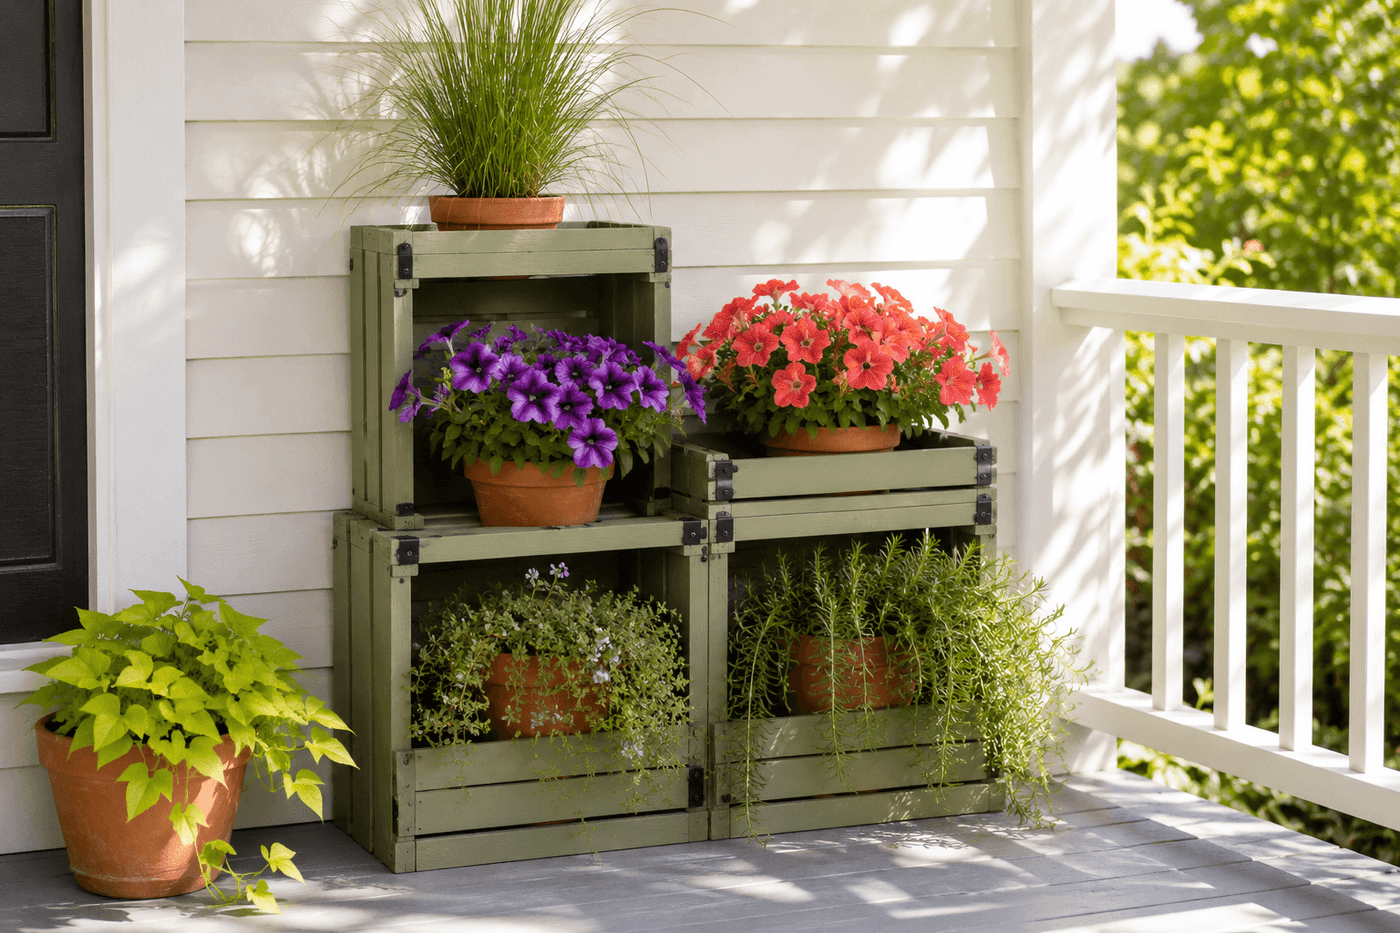
A collection of plants arranged in individual pots across a porch floor reads as a plant collection; the same plants displayed on a tiered wooden crate stand reads as a garden. The difference is entirely the structure — the varying heights, the layered depth, the visual organization that a staggered arrangement creates — and wooden crates provide that structure for $10–20 in materials while adding the kind of rustic, handmade character that no purchased plant stand replicates at any price. Wine crates, produce crates, and craft store versions all work equally well and do not need to match — mismatched crates in coordinating paint colors produce the eclectic, collected look that feels most alive and personal, while matching crates in a single color read as more cohesive and intentional. The slatted sides that define the crate form are also functionally ideal for outdoor plant display: they allow airflow around pots, drainage from watering to pass through rather than pooling, and the open construction keeps the structure from looking heavy or imposing in a small porch corner. Three to four crates secured with L-brackets or wood screws in a staggered configuration take an afternoon to paint, assemble, and plant, and the finished stand transforms a bare corner into the most visually interesting feature of the porch.
What You'll Need
- Wooden crates, 3–4 total — source options in order of cost:
- Free to $2 each — produce crates from grocery stores and farmers markets; ask at the back dock; most are given away freely
- $3–8 each — wine and spirits crates from liquor stores; sturdier construction and often more interesting proportions than produce crates
- $5–10 each — craft store wooden crates in standard sizes; most consistent dimensions for a tidy stacked assembly
- Sandpaper, 80- and 120-grit — for smoothing rough edges, splinters, and any raised grain on the crate surfaces before painting; pay particular attention to the top edges of each crate where hands will rest during rearranging
- Outdoor paint or exterior wood stain — chalk paint in outdoor formula or exterior latex paint; sage green, warm white, navy, or natural wood stain are the most versatile finishes for a plant stand that will display plants of every color (~$8–12 for a sample size that covers all four crates in two coats)
- Exterior wood sealer — one coat over the finished paint adds significant weather resistance for crates that will sit in rain and sun; particularly important for produce crates which are typically thinner wood than wine crates (~$6–8)
- L-brackets, 2-inch — two per crate-to-crate connection for securing the staggered assembly; corner brackets provide more holding surface than flat ones on crate-to-crate joints (~$4–6 for a pack of eight)
- Wood screws, ¾" and 1¼" — ¾" for attaching L-brackets to crate slats without penetrating through thin crate walls; 1¼" for direct crate-to-crate connections where thickness allows
- Drill and bits — for pilot holes before screwing into crate slats, which split easily without pre-drilling, particularly on older produce crates with dried wood
- Foam rollers and brushes — foam rollers produce the smoothest paint coverage on the flat crate faces; brushes for the slatted sides and interior corners
- Potted plants — chosen for display height and trailing habit:
- Top tier: upright specimen — a small topiary, ornamental grass, or standard geranium as the visual crown
- Middle tiers: compact flowering annuals — petunias, million bells, or calibrachoa in complementary colors
- Lower and inside crates: trailing herbs — thyme, oregano, trailing rosemary that cascade over the crate edges
How to Build It
- Sand all crates thoroughly before any painting — work through 80-grit to remove splinters, raised grain, and rough patches on all surfaces that will be handled or displayed, then follow with 120-grit for the final smoothing pass. Sand the top edges of every crate particularly carefully; these are the surfaces hands contact most during rearranging and watering, and any remaining roughness after painting becomes a splinter hazard that discourages using the stand for its intended purpose.
- Paint all crates before assembly — individual flat crates are dramatically easier to paint thoroughly than an assembled structure where brush access to interior corners and bottom faces is blocked by adjacent crates. Apply two coats of outdoor paint or stain with a foam roller on flat faces and a brush on slatted sides, allowing full cure between coats. Paint all six faces of each crate including the bottom, which will be in contact with the porch surface and is the face most vulnerable to moisture wicking if left unfinished.
- Apply one coat of exterior sealer over all painted surfaces once the final paint coat has cured fully — allow the sealer to cure for the time specified on the product label before assembly and definitely before any watering over the finished stand. Sealer applied before assembly reaches every face and edge completely; sealer applied after assembly misses the contact faces between stacked crates where moisture accumulates and wood degradation begins.
- Plan the final assembly configuration on the porch floor before drilling any holes — lay the crates flat and arrange them in different staggered configurations until the composition reads as balanced and visually interesting from the typical viewing angle. The most effective tiered configurations place the two largest crates as the base level in an L-shape or side-by-side arrangement, then step smaller crates upward and backward so the full face of each crate is visible from the front rather than hidden behind the crate in front of it.
- Secure the base crates to each other first — drill pilot holes through the crate walls at the contact points and drive 1¼-inch wood screws directly through one crate wall into the adjacent crate, or attach L-brackets at the inside corner of the joint for a connection that does not require screwing through the visible exterior face. Two connection points per crate-to-crate joint — one near the top of the contact face and one near the bottom — prevent the joint from racking under the weight of plants and pots.
- Attach the upper tier crates to the lower ones using the same pilot-hole and screw or L-bracket method — confirm the upper crate is positioned to show its full interior and front face from the primary viewing angle before committing any fasteners, since repositioning after screwing requires removing and filling screw holes that will be visible in the finished stand. A staggered offset of 3–4 inches between tiers in both the depth and height directions produces the most visually dynamic and planted-display-friendly configuration.
- Test the stability of the assembled stand by pressing firmly on each tier and the top crate from multiple angles — the stand should feel completely rigid with no rocking or lateral movement under applied pressure before any plants are placed on it. A stand that wobbles under hand pressure will rock and potentially tip under the combined weight of multiple potted plants, which for ceramic pots is a genuinely significant load that a single L-bracket per joint cannot always support reliably.
- Place plants using the thriller-filler-spiller principle scaled to the full stand — position the tallest, most upright specimen on the highest tier as the visual crown, compact mounding plants on the mid-level display surfaces, and trailing varieties on the lower crates and inside the open crate interiors where they cascade down over the slatted sides in the most architectural and visually complete way. Water each pot after placing rather than before, which prevents overloaded pots from shifting during the placement process and keeps the stand surface clean during the styling work.
Porch and container garden stylists who design plant displays for shelter magazine photography and high-end residential staging use one color coordination principle for crate plant stands that produces a cohesive, deliberately designed look regardless of how many different plant varieties are displayed: limit the pot colors across the entire stand to two — the crate paint color and one contrasting accent — rather than mixing every pot color available. A stand painted sage green styled with all terracotta pots reads as designed; the same stand with terracotta, white, black, blue, and yellow pots reads as a collection of plants that happen to be on a stand. The crate color and a single pot color create the visual structure that makes the plants themselves — in every color of the rainbow — read as a curated composition rather than accumulated variety. Garden stylists who shoot for editorial clients consistently enforce this two-color pot rule on every plant stand they style, because it is the single decision that most distinguishes a designed display from a merely well-planted one, and it costs nothing beyond the moment of restraint required to put the blue pot back and reach for another terracotta one instead.














