
Build Wooden Garden Markers on Stakes for $10
An afternoon of cuts and a wood burner — thirty garden markers that outlast every plastic label you've ever lost to the wind
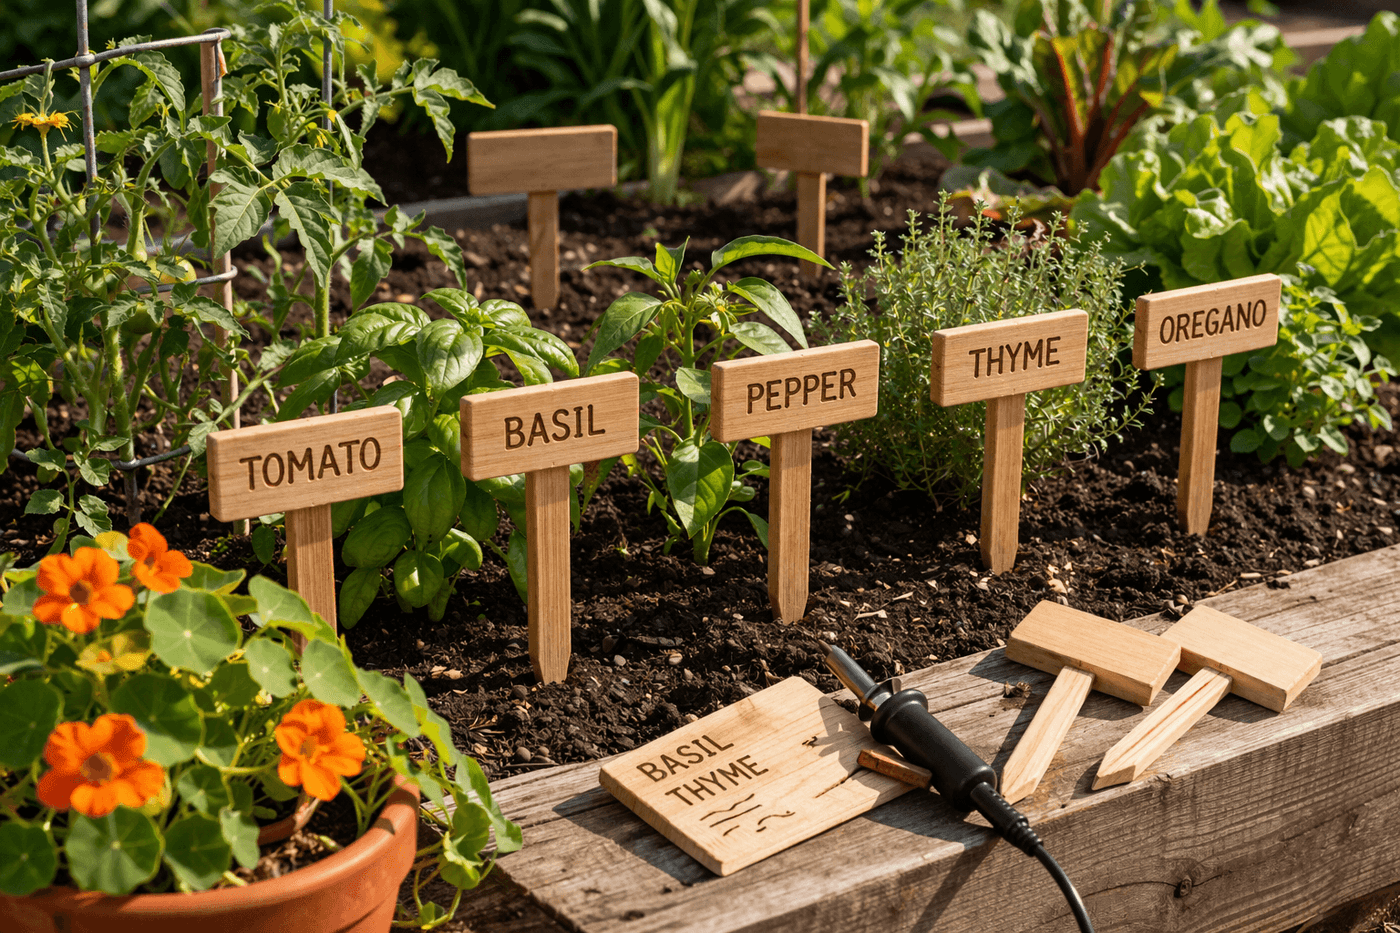
Plastic plant labels are one of those garden accessories that fail at the exact moment they matter most — the text fades by midsummer, they snap at soil level in the first cold snap, and they blow away on the first windy day in spring when you have genuinely no memory of what you planted where. Wooden garden markers built from scraps of 1×3 and 1×2 lumber have none of these problems: they stay exactly where you put them, the text — whether painted or wood-burned — remains legible through multiple seasons, and they look like a deliberate design choice in the garden rather than an afterthought. A ten-dollar investment in lumber cuts down to thirty markers in an afternoon of straightforward woodworking, and a wood-burning tool used to letter each one produces plant names that will never fade regardless of how many seasons those markers spend in the ground. This is the kind of one-time build that solves a recurring seasonal frustration permanently and makes the whole garden look more considered in the process.
What You Need
- 1×3 or 1×4 lumber, 6-foot length, qty 1 — for the rectangular label faces; yields approximately fifteen to twenty label pieces at 4–5 inches each from a single board (~$4–5)
- 1×2 lumber, 8-foot length, qty 1 — for the pointed stakes; yields approximately ten to twelve stakes at 12–15 inches each including the pointed tip cut (~$3–4)
- Wood glue — for bonding the label face to the stake top before screwing; glued and screwed joints on outdoor markers handle freeze-thaw stress without loosening at the joint over multiple seasons
- Exterior screws, 1¼", qty 30 — one screw per marker driven from the back of the stake into the label face; pre-drill every one to prevent splitting in the narrow 1×2 stake
- Wood-burning tool — the most permanent lettering method; a basic wood-burning pen costs $12–18 and produces text that never fades regardless of outdoor exposure (~$15 for a starter kit with multiple tip sizes)
- Alternatively: outdoor white paint and black paint pen — for a painted label finish; two coats of exterior white latex on the label face plus a black paint pen for lettering produces clean, legible markers that last two to three seasons with an annual clear sealer recoat
- Clear exterior polyurethane or outdoor sealer — essential for painted markers; optional but beneficial for wood-burned natural markers (~$8–10 for a small can)
- Sandpaper, 120-grit and 220-grit — for smoothing all cut faces and edges, with particular attention to the pointed stake tip that will be handled during installation
- Miter saw or handsaw — for cutting label pieces to consistent length and for making the angled cuts that form the pointed stake tips
How to Build Them
- Cut all label pieces first — mark your 1×3 board into consistent 4 to 5-inch lengths and cut them all in a single session before touching the stake lumber. Working in production batches rather than building one marker at a time from start to finish is what makes thirty markers feel like an efficient afternoon rather than a tedious repetitive project, and having all pieces cut and ready before any assembly begins means the build flows without interruption.
- Cut the stake pieces from the 1×2 lumber at 12 to 15-inch lengths, then make the pointed tip by setting the miter saw to a 45-degree angle and making two opposing bevel cuts at the bottom end of each stake to form a symmetrical point. A stake point cut at 45 degrees on both faces enters soil cleanly without splitting the wood fiber the way a blunt-ended stake does when driven with a mallet.
- Sand every piece at 120-grit and follow with 220-grit on the label faces specifically — the label face is the surface that will be wood-burned or painted, and 220-grit smoothness on that surface produces dramatically cleaner wood-burning lines and more even paint coverage than 120-grit alone. Sand with the grain direction rather than across it to avoid visible scratch marks that show through paint finishes.
- Assemble each marker by applying a bead of wood glue to the top face of the stake and pressing the label piece flat against it, centered and perpendicular to the stake length, then driving one pre-drilled exterior screw from the back of the stake through into the label face. Allow the glue to cure for at least thirty minutes before lettering — a label face that shifts during wood-burning because the glue hasn't set produces crooked text that cannot be corrected.
- Prime the label faces with one coat of exterior primer if you're using the painted finish method, allowing full drying time before applying two coats of exterior white latex in thin, even layers. White paint on outdoor wood requires primer to bond durably — unprimed white paint on bare wood begins to peel at the grain lines within the first season of outdoor exposure regardless of how many clear sealer coats are applied over it.
- Letter plant names on painted markers with a black paint pen once the white paint has dried fully — write in clear, simple block letters sized to fit the label face with comfortable margins on all sides, and seal with a coat of clear exterior polyurethane within twenty-four hours of lettering to protect the paint pen ink from moisture before it has fully cured into the paint surface beneath it.
- Wood-burn plant names onto natural or lightly sanded markers as the permanent alternative to paint — heat the burning pen to full operating temperature before touching it to the wood, and practice the letter forms on scrap wood until the pressure and movement speed that produces clean, consistent lines feels natural before beginning on the finished markers. The single technique variable that determines whether wood-burned lettering looks crisp and intentional or shaky and hesitant is moving the pen at a slow, consistent speed — too fast and the burn is too light, too slow and it scorches beyond the letter edge.
- Seal all finished markers — painted or wood-burned — with two coats of clear exterior polyurethane on all surfaces including the stake sides and pointed tip, paying particular attention to the end grain at the bottom of each stake where moisture enters most readily and causes the rot that eventually weakens the stake at soil level. End grain sealed with two coats of polyurethane extends the useful life of a wooden garden marker from two or three seasons to five or more.
Professional garden designers who specify custom garden markers for high-end kitchen garden installations always use cedar or redwood rather than standard pine for the stake material — both species contain natural oils that resist moisture and soil-contact decay without any sealer treatment, which means the portion of the stake below soil level (which is nearly impossible to reseal once installed) continues to resist rot year after year rather than softening and failing at the ground line the way untreated pine does after two to three seasons. The price difference between a pine 1×2 and a cedar 1×2 at most lumber yards is less than a dollar per board, and the lifespan difference in a garden marker that spends its working life with its tip in soil is the difference between a marker that lasts two seasons and one that lasts a decade.














