
Build a Wooden Outdoor Side Table for $25
Cedar lumber, four legs, an apron frame, and two hours — the outdoor side table that finally solves the drink-and-book problem permanently
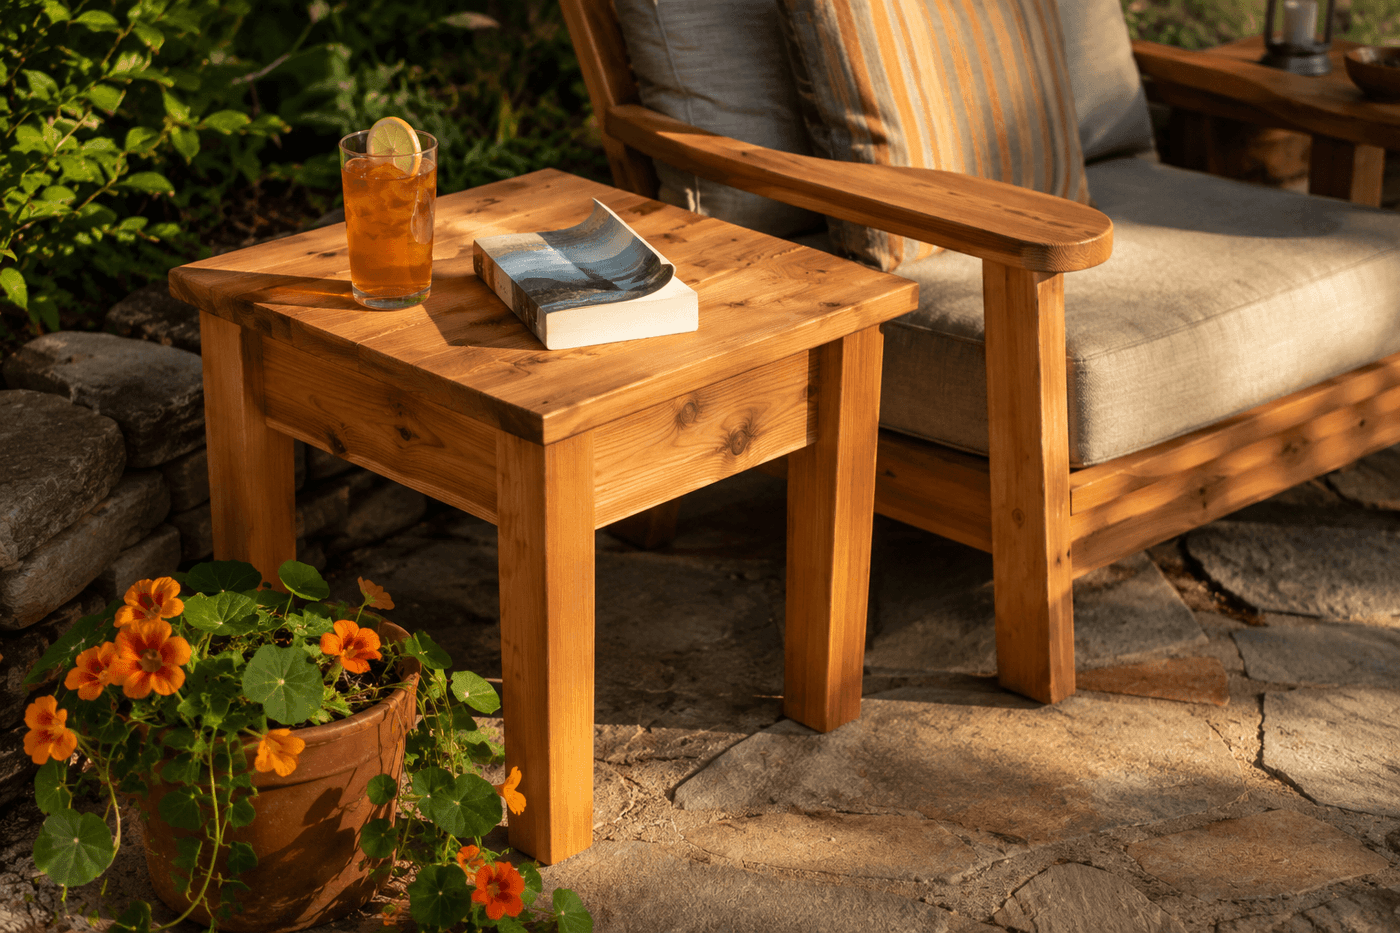
An outdoor side table is one of those pieces of furniture whose absence is felt at every single outdoor sitting session — the drink balanced on the arm of the chair, the book set face-down in the grass, the perpetual low-level annoyance of nowhere to put anything. Building your own from cedar lumber costs about $25, takes two hours, and produces a table that is more structurally sound, more visually considered, and more dimensionally appropriate for your specific chairs than most of what is available at the same price point in outdoor furniture retail. The four-leg-and-apron construction is the classic furniture joinery that has produced sturdy tables for centuries — legs at the corners, apron frame connecting them just below the tabletop, top screwed down from underneath — and it produces a side table that handles years of outdoor seasons, drink condensation, and regular use without wobbling, warping, or showing its age any faster than the honest weathering of good cedar. Build two and flank every lounge chair on the patio with one.
What You Need
- Cedar 4×4 post, 8-foot length, qty 1 — yields all four table legs at 17 inches each with material to spare; cedar's natural rot resistance makes it the correct choice for legs that will sit on a patio surface through rain and seasonal moisture cycling (~$10–14)
- Cedar 2×12 board, 2-foot length, qty 1 — for the tabletop cut to 18×18 inches; a single 2×12 board produces a tabletop with no glue joints or visible seams for the cleanest appearance (~$6–8 for a short length)
- Cedar 1×4 board, 6-foot length, qty 1 — yields all four apron pieces cut to connect between the legs just below the tabletop; one board is sufficient for a standard 18-inch-square table (~$4–6)
- Exterior wood screws, 2½" and 1⅝" — 2½-inch screws for leg-to-apron joints that carry the full structural load of the table; 1⅝-inch screws for attaching the tabletop to the apron frame from underneath (~$5–7 for a combination pack)
- Exterior wood glue — applied to every joint face before screwing; a glued-and-screwed outdoor table joint handles the thermal expansion and contraction of seasonal wood movement without loosening in a way that fasteners alone cannot maintain over multiple years
- Miter saw or handsaw — for cutting legs to consistent length and apron pieces to precise dimension
- Drill with pilot bit and driver bit — pre-drilling every fastener location prevents splitting in the apron-to-leg joints where wood is thinnest at the screw entry point
- Sandpaper, 120-grit and 220-grit — 120-grit for shaping and smoothing, 220-grit on the tabletop surface specifically where drinks will rest and hands will make regular contact
- Exterior wood stain or clear sealer — natural cedar can be left untreated to weather to a silver-gray, or sealed to maintain the warm honey tone (~$8–10 for a small can)
How to Build It
- Cut all pieces before beginning any assembly — four legs at 17 inches each from the 4×4 post, four apron pieces from the 1×4 board at a length equal to the tabletop dimension minus twice the leg width (for an 18-inch top with 3½-inch 4×4 legs, cut apron pieces at 11 inches), and the tabletop at 18×18 inches from the 2×12. Cutting everything before assembly begins allows you to confirm all dimensions are correct and consistent before any joint is committed.
- Mark the leg faces for apron attachment before any glue is applied — on two adjacent faces of each leg, mark a line 1½ inches from the top end of the leg (the thickness of the 1×4 apron board) to show exactly where the top of each apron piece will sit flush with the leg top. This reference mark is what keeps all four aprons at the same height on their respective legs, which determines whether the tabletop sits level or visibly tilts when installed.
- Assemble two opposing leg-and-apron pairs first — apply wood glue to the apron end face and the corresponding leg face, position the apron end flush with the marked line and flush with the outer face of the leg, clamp if possible, and drive two pre-drilled exterior screws through the apron face into the leg. Build both opposing pairs before connecting them into the full four-sided frame so you can lay each pair flat during assembly rather than trying to hold the full frame together in three dimensions.
- Connect the two assembled leg-and-apron pairs with the remaining two apron pieces to complete the rectangular frame — apply glue, align each apron end with its marked position on the remaining leg faces, and drive screws to complete all four frame corners. Set the finished frame on a flat surface and press down on each leg to confirm all four legs contact the surface simultaneously; a frame that rocks on the flat surface will produce a table that wobbles on the patio regardless of how level the surface beneath it is.
- Add cross-braces between the legs near the bottom if desired for additional lateral stability — cut four short 1×4 pieces at the same length as the apron pieces and attach them between each leg pair at approximately 4 inches from the leg bottoms, using the same glue-and-screw technique as the apron joints. Cross-braces are optional for tables that will be used on a flat, stable patio surface but are recommended for tables that will be used on uneven ground or grass where lateral forces from settling and shifting are greater.
- Attach the tabletop by centering it on the assembled frame — the tabletop should overhang the apron frame by equal amounts on all four sides for a proportional finished appearance, typically about two to three inches of overhang per side on a standard 18-inch top. Drive 1⅝-inch screws up through the apron frame into the tabletop from the inside of the frame, two screws per apron piece, angling the screws slightly inward so they enter the tabletop material rather than exiting through the surface.
- Sand the complete assembled table at 120-grit to smooth all surfaces and remove any glue squeeze-out at the joint lines, then follow with 220-grit on the tabletop face specifically. Round the top edges and all four leg bottom edges slightly with the sandpaper — rounded leg bottoms prevent the sharp edge splits that occur when square leg bottoms are dragged across concrete or stone patio surfaces, and rounded tabletop edges prevent the chipping at sharp corners that appears quickly on outdoor furniture that gets moved regularly.
- Finish with exterior stain or sealer applied to all surfaces including the leg bottoms that will contact the patio surface — the end grain at the very bottom of each leg absorbs moisture most readily and is the starting point for the rot that eventually softens outdoor furniture legs. Two coats of sealant on the leg bottoms specifically extends the table's serviceable life significantly, and the few minutes it takes to flip the table and apply two extra coats to the bottom end grain is the maintenance investment with the highest structural return of any finishing step in the build.
Furniture designers who build outdoor side tables for professional installations always size the tabletop height to match the arm height of the specific chairs the table will serve rather than building to a standard dimension — a table that sits two to four inches below the chair arm height is at the ideal ergonomic position for setting down a drink without stretching or bending, while a table that sits significantly above or below the arm creates the unconscious awkwardness that makes people set their drink on the ground anyway despite having a table available. Measure the arm height of your lounge chairs before cutting the legs, and cut the legs to produce a tabletop that sits two inches below that measurement for the most naturally comfortable and frequently-used outdoor side table you have ever owned.














