
DIY Projects

Recent Content

Wooden Dish Rack: The Dowel Angle That Drains Right

Wooden Dish Rack: The Dowel Angle That Drains Right

Build a slatted wood dish rack for $18—the dowel tilt angle is what actually drains water into the tray instead of pooling on your counter.

Install a Fireplace Draft Stopper in 20 Minutes for $25

Install a Fireplace Draft Stopper in 20 Minutes for $25

Stop your chimney from sucking heat right out of the house—an inflatable draft stopper seals it in 20 minutes for about $25.

The Shower Rod Trick That Fakes a Walk-In Closet

The Shower Rod Trick That Fakes a Walk-In Closet

Steal spare closet space with a second shower-curtain rod—zero holes, zero fuss, and your full deposit stays safe.

Pool Noodle Knife Block: The Slice Depth That Stops Wobble

Pool Noodle Knife Block: The Slice Depth That Stops Wobble

Turn a $1 pool noodle into a safe knife block—the slice depth is what keeps blades from wobbling loose or slicing through the foam.

Build a Wooden Pie Carrier in 2 Hours for $25

Build a Wooden Pie Carrier in 2 Hours for $25

Never smash a pie in the car again! Build a snug wooden pie carrier in 2 hours for $25—perfect timing for fall potlucks.

logo
  • Home Improvement
  • DIY Projects
  • Interior Design
  • Gardening & Outdoor
  • Real Estate
  • Home Improvement
  • DIY Projects
  • Interior Design
  • Gardening & Outdoor
  • Real Estate
  • ​

Crate Bookshelf: Anchoring Is the Non-Negotiable Step

Eight crates screwed together and loaded with books is a tall, top-heavy structure the moment it stands alone — the L-brackets into wall studs aren't a finishing touch, they're what keeps the whole thing from tipping.
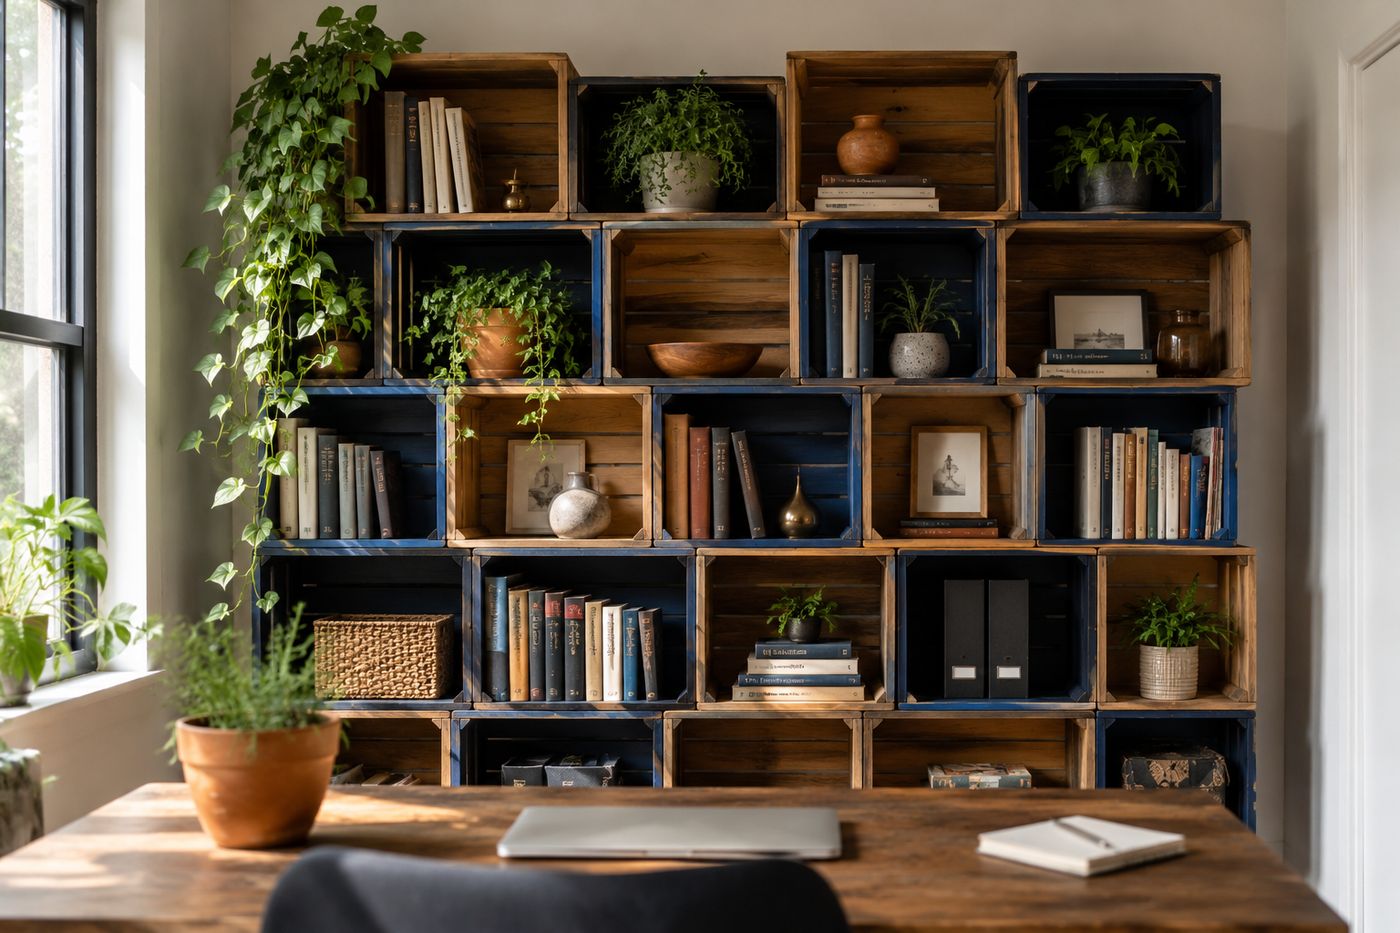
Modular wall bookshelf made from stacked wooden crates in navy and natural wood finishes, filled with books and plants
DIY Projects

Eight stacked crates screwed to each other create a tall, narrow column with weight concentrated well above the base, and a structure like that is inherently prone to tipping forward the moment it's loaded with books and someone leans on a shelf or pulls a heavy volume from the top row. Screwing the crates to each other solves lateral wobble between individual boxes, but it does nothing to anchor the entire column to something more stable than its own base — that's a completely separate problem, and it's the one that actually causes tip-over injuries with tall stacked furniture. Securing the full assembly to wall studs with L-brackets at the top is what transfers that tipping force into the wall itself instead of relying on the crates' footprint alone to keep the whole thing upright. Skip that step and the crate-to-crate connections, however solid, don't protect against the structure toppling forward under real-world load and use. Get the anchoring right, and the modular configuration itself is genuinely flexible creative territory — about $35 in thrifted crates and roughly three hours of work for a piece with far more character than anything off a showroom floor.

What You'll Need

  • Eight wooden crates, thrifted or from a craft fair — about $3-6 each, roughly $30 total
  • Wood screws, for connecting adjoining crate walls — about $2
  • L-brackets, for securing the top of the assembly to wall studs — about $3
  • Paint (optional), for finishing some or all crates — use leftover paint if available
  • Sandpaper
  • Stud finder
  • Drill/driver
  • Level

How to Build It

  1. Sand every crate smooth, paying attention to any rough or splintery edges, before deciding on your color layout.
  2. Paint your chosen crates in whatever finish you like, alternating painted and natural wood if you want the visual variety of a mixed look, and let everything dry fully.
  3. Plan your configuration on the floor first, laying out columns and orientations — some open-front for books, some open-side for display — before committing to any permanent connections.
  4. Connect each crate to its neighbors with two screws driven through the adjoining walls, working through the full stack until every crate is joined into one unified structure.
  5. Locate wall studs behind where the assembled structure will sit, marking their positions clearly before moving the crates into place.
  6. Position the assembled crate structure against the wall, checking level before moving to the anchoring step.
  7. Secure the top of the structure to the wall studs using L-brackets — this is the step that actually prevents a tall, loaded structure from tipping forward, and it isn't optional regardless of how solid the crate-to-crate connections feel on their own.
  8. Load books and display objects once the anchoring is fully secure, distributing heavier items toward the lower crates for additional stability.
DESIGNER TIP

Interior stylists who design modular shelving often keep roughly one-third of the cubbies deliberately empty or styled with a single object rather than filling every crate with books, because a completely packed grid reads as storage while a mix of full, sparse, and empty cubbies reads as curated display. That visual restraint is often the actual difference between a wall of crates that looks like a bookshelf and one that looks like a piece of designed furniture.


Related Content

DIY Projects

28 October 2026

Post

Wooden Dish Rack: The Dowel Angle That Drains Right

Build a slatted wood dish rack for $18—the dowel tilt angle is what actually drains water into the tray instead of pooling on your counter....

DIY Projects

27 October 2026

Post

Pool Noodle Knife Block: The Slice Depth That Stops Wobble

Turn a $1 pool noodle into a safe knife block—the slice depth is what keeps blades from wobbling loose or slicing through the foam....

DIY Projects

27 October 2026

Post

Build a Wooden Pie Carrier in 2 Hours for $25

Never smash a pie in the car again! Build a snug wooden pie carrier in 2 hours for $25—perfect timing for fall potlucks....

DIY Projects

26 October 2026

Post

Make Herb-Infused Honey in 30 Minutes for $12

Turn raw honey into a cold-season secret weapon—infuse it with thyme and ginger in 30 minutes for about $12, no fancy gear needed....

DIY Projects

25 October 2026

Post

Make Homemade Fire Cider in 20 Minutes for $15

Steep this spicy apple cider vinegar tonic now so it's ready to fight off fall colds in 4 weeks—20 minutes, $15, zero cooking skills....

DIY Projects

23 October 2026

Post

Build a Freestanding Coat Rack in 2 Hours for $35

Sick of coats piled on chairs? Build a sturdy freestanding coat rack in 2 hours for $35 — no wall drilling, just solid joinery....

DIY Projects

22 October 2026

Post

Window Frame to Pet Gate: The Hinge Set That Holds

Turn an old wooden window frame into a swinging pet gate for $22 — the hinge mortise depth is what keeps it from sagging open over time....

DIY Projects

22 October 2026

Post

Make Spiced Homemade Applesauce in 1 Hour for $12

Turn a bag of fall apples into silky spiced applesauce in an hour for $12 — no peeling required if you've got the right tool....

DIY Projects

21 October 2026

Post

Floating Nightstand: The Bracket Depth That Holds Weight

Build a wall-mounted wooden nightstand for $25 — the bracket depth inside the wood is what stops it from sagging under a lamp and books....

DIY Projects

20 October 2026

Post

Foam Letter Wall Art: The Spacing Trick for $6

Turn dollar-store foam letters into custom nursery wall art for $6 — the spacing template is what keeps names looking store-bought, not crooked....

DIY Projects

19 October 2026

Post

Build a Tabletop Fire Bowl in 90 Minutes for $35

Turn a $35 metal bowl and lava rock into a tabletop fire feature perfect for crisp fall evenings and s'mores nights....

DIY Projects

16 October 2026

Post

Build a Pet Food Storage Bin in 1 Hour for $30

Stop losing the war against stale kibble and pantry moths—build an airtight pet food bin in an hour for $30....

DIY Projects

15 October 2026

Post

Whittling a Wooden Spoon

Try meditative spoon whittling for under $15—cutting with the grain (not against it) is the one rule that keeps your blank from splitting mid-carve....

DIY Projects

14 October 2026

Post

Wooden Pet Ramp: The Cleat Spacing That Stops Slips

Build a wooden pet ramp for $20 — the traction cleat spacing is what keeps your dog's paws from sliding on the incline....

DIY Projects

13 October 2026

Post

Build a Compost Sifter Box in 1 Hour for $18

Turn chunky compost into fine garden gold! Build a simple hardware-cloth sifter box in an hour for $18—no more rock-and-stick surprises....
Terms and ConditionsDo Not Sell or Share My Personal InformationPrivacy PolicyPrivacy NoticeAccessibility NoticeUnsubscribe
Copyright © 2026 DIY HomeBoost












