
Build a Garden Potting Bench with Sink Basin for $85
One weekend, a salvage yard sink, and cedar lumber — the garden workstation that transforms potting from a chore into the best part of your day
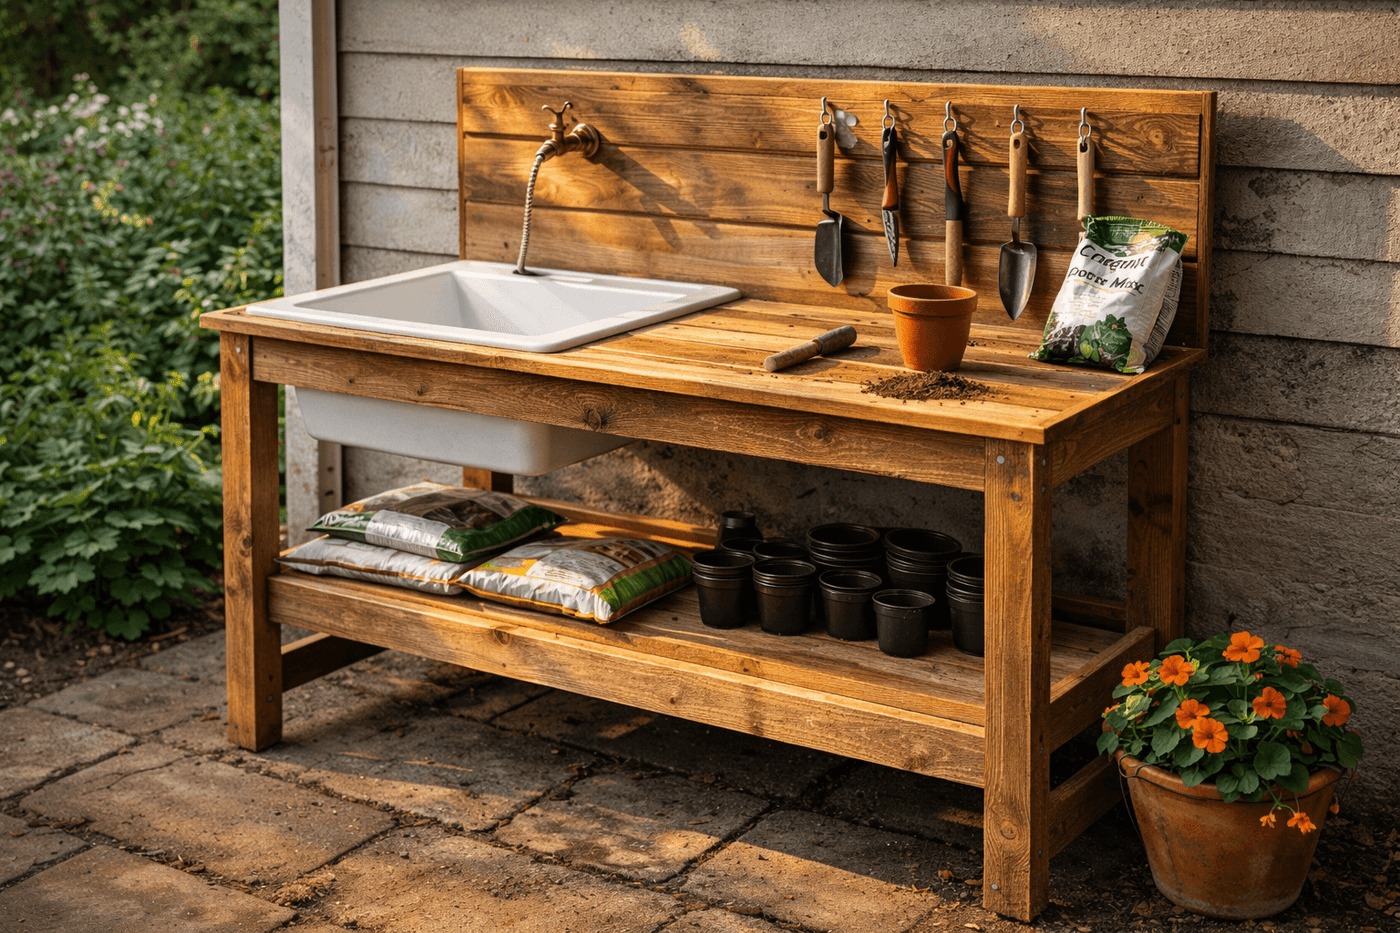
A garden potting bench is the kind of infrastructure upgrade that doesn't just make a specific task easier — it changes the whole relationship you have with the work. Repotting plants, mixing soil, washing roots, starting seeds, and cleaning tools all happen more efficiently, more enjoyably, and with dramatically less mess when they happen at a proper waist-height surface with water immediately available rather than crouched over a container on the ground. An architectural salvage farmhouse sink dropped into a cedar bench top handles all of that — soil mixing, rinsing, handwashing, seed tray filling — and the whole structure with two lower storage shelves and a back tool-hook board costs about $85 in materials and takes a full weekend to build properly. Pre-built potting benches with comparable features sell for $350 to $600, which makes this one of the highest value-per-dollar builds in the entire garden. Build it once, use it every season for the rest of your gardening life.
What You Need
- Farmhouse or utility sink, drop-in style — architectural salvage yards, Habitat for Humanity ReStores, and Facebook Marketplace consistently have single-basin sinks for $15–30; any sink with a standard drain opening works for this application (~$20)
- Cedar 4×4 posts, 4-foot length, qty 4 — the leg structure; cedar's natural rot resistance is essential for a bench that will live outdoors and see regular water exposure (~$10–14 total)
- Cedar 2×6 lumber, 8-foot lengths, qty 4 — for the bench top frame, lower shelf frames, and back board (~$8–10 each, ~$32–40 total)
- Cedar 2×4 lumber, 8-foot lengths, qty 3 — for cross bracing, shelf supports, and structural reinforcement (~$5–7 each, ~$15–21 total)
- Garden hose quick-connect fitting and short supply hose — for connecting water supply to the sink from an exterior spigot; a braided supply hose with quick-connect fittings at both ends handles the connection without permanent plumbing (~$8–12)
- PVC drain pipe, 1½" diameter, and elbow fittings — for running the sink drain to a gravel pit or appropriate gray water disposal point alongside the structure (~$8–10)
- Exterior structural screws, 3" and 2" — for all frame joints; structural screws rather than standard deck screws for the leg-to-frame connections that carry full bench load (~$8–10)
- Heavy-duty tool hooks, qty 6–8 — for the back board tool storage; rated for outdoor use and sized for trowel and pruner handles (~$6–8 for a pack)
- Exterior wood sealant — two coats on the bench top surface and all horizontal surfaces that will see regular water and soil contact (~$10–12 for a quart)
- Drill, miter saw, level, measuring tape, speed square, and clamps — standard build tools
How to Build It
- Measure your sink before cutting a single board — the sink dimensions determine the bench top frame opening, and building the frame first and then discovering the sink doesn't fit is a significantly more frustrating outcome than spending five minutes with a measuring tape at the salvage yard. Confirm the sink's overall dimensions, the rim width that will rest on the bench top frame, and the depth of the basin that will hang below the top surface — the basin depth determines the minimum clearance needed between the bench top and the first lower shelf.
- Cut all lumber to length before assembly begins — four legs at your chosen bench height (34 to 36 inches works well for most adults standing at a work surface), bench top frame members at your chosen bench width and depth, lower shelf frame members at the same footprint, and the back board at full bench width. A complete cut list executed before assembly means the build flows without interruption and dimension errors are caught before they're committed to the structure.
- Assemble the leg pairs first by attaching horizontal front and back rails between each pair of legs at bench top height and at lower shelf height, pre-drilling every joint and driving 3-inch structural screws through the rail ends into the leg faces. Apply wood glue to every joint face before screwing — a potting bench carries significant dynamic load from soil bags, heavy containers, and daily working pressure, and glued joints handle that load over years of use in a way that fasteners alone progressively loosen under.
- Connect the two leg pair assemblies with side rails at both bench top height and lower shelf height to complete the four-leg frame, checking for square diagonally across the frame before any joint is fully tightened. A frame that is even slightly out of square produces a bench top that rocks on an uneven garage floor and a sink opening that doesn't align with the sink — confirming square at the frame stage costs two minutes and prevents both problems entirely.
- Frame the bench top by building a rectangular frame of 2×6 lumber sized to the full bench top dimensions, with an interior opening framed to accept the sink rim — the opening should be slightly smaller than the sink's overall dimension but larger than the basin, so the sink rim rests on the frame with the basin hanging through. Cut the sink opening frame members carefully and confirm the sink drops in and rests level before attaching the frame to the leg structure.
- Install lower shelf boards across the lower shelf frame rails, spacing them slightly apart for drainage and air circulation rather than laying them tight together where moisture accumulates between boards and accelerates rot. Fill the remaining gap at the back of the lower shelf with a fixed board that prevents soil bags from sliding off the rear of the shelf during the loading and unloading that happens every time you work at the bench.
- Attach the back board vertically to the rear legs at full bench back height — this board serves as the backing for tool hooks and also provides rear structural bracing that stiffens the whole bench against the racking that would otherwise develop from years of daily lateral working pressure. Install tool hooks along the back board at comfortable reaching height, spaced for your specific tool handles rather than at uniform intervals that may not actually suit how your tools hang.
- Set the sink into its opening and connect the supply hose from the nearest exterior spigot using quick-connect fittings, then run the drain pipe from the sink basin drain to a gravel pit or drain point beside the structure — a simple gravel pit dug alongside the garage and filled with coarse gravel handles typical potting bench gray water volumes without any further infrastructure. Seal the bench top and all horizontal surfaces with two coats of exterior wood sealant, allow full curing time, and the bench is ready for the first season of daily use.
Professional garden designers who build potting stations for high-end residential gardens always position the bench so the dominant working hand faces toward the garden rather than toward the garage wall — a right-handed gardener works most naturally with the sink to the left and the open potting surface to the right, which means the bench should be oriented so the right side of the work surface faces into the garden space with clear access for setting down containers and moving plants in and out of the work zone. Positioning the bench without considering handedness and workflow direction produces a station that feels slightly awkward to use every single day in ways that are hard to articulate but impossible to ignore, and is nearly impossible to correct after the bench is built and weighted down with tools and soil bags.














