
Build a Classic Wooden Garden Bench for $42
Cedar lumber, exterior screws, and four hours — the garden bench that becomes the most used and most photographed spot in your entire yard
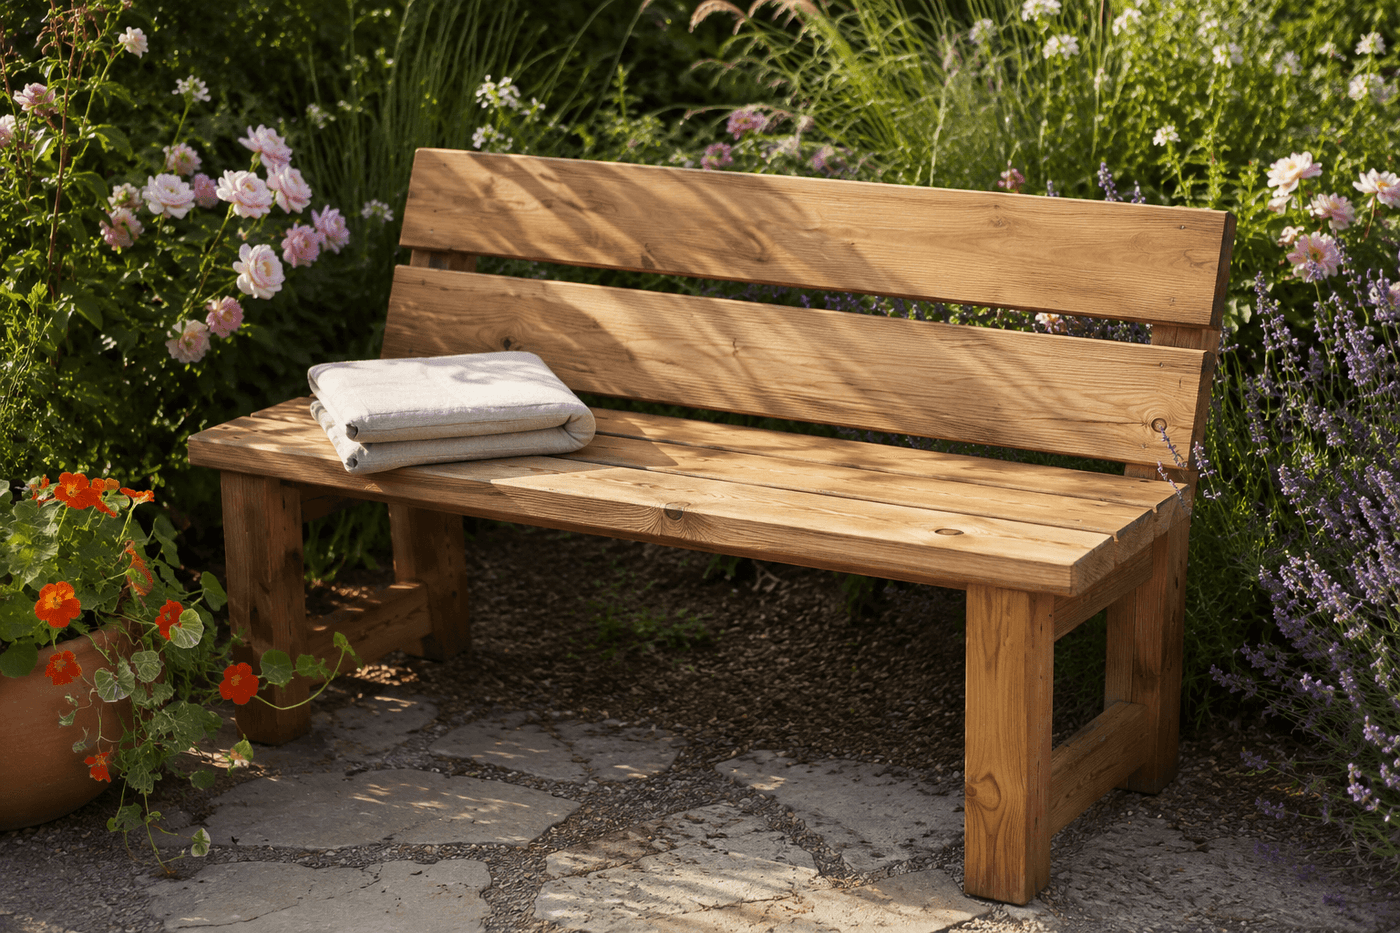
A garden bench is the piece of outdoor furniture that transforms a garden from something you walk through into something you sit in — the destination that makes the whole outdoor space feel worth having and maintaining rather than simply worth looking at from the window. Building your own from cedar lumber costs about $42, takes four hours, and produces a bench with the solid, honest construction quality that outdoor furniture at this price point in retail simply doesn't deliver. The classic design — two leg assemblies, three seat boards, two back boards at a slight recline — has been producing comfortable, durable garden seating for generations precisely because it works: the proportions are right, the construction is straightforward, and the finished piece looks completely at home in any garden style from formal to cottage to contemporary. Cedar is the correct material choice for garden furniture that will live outdoors year-round, and left unsealed it develops the silver-gray patina that reads as even more considered than paint after two seasons in the weather.
What You Need
- Cedar 2×4 lumber, 8-foot lengths, qty 4 — for the leg assemblies, seat frame, and back support structure; cedar's natural oils resist moisture and soil-contact decay without any chemical treatment, making it the correct lumber choice for outdoor furniture that will sit on grass or soil (~$5–7 each, ~$20–28 total)
- Cedar 1×6 boards, 8-foot lengths, qty 2 — for the three seat boards cut to 48 inches; two 8-foot boards yield three 48-inch seat boards with minimal waste (~$5–7 each, ~$10–14 total)
- Cedar 1×4 boards, 8-foot lengths, qty 1 — for the two back support boards cut to 48 inches; one 8-foot board yields both back boards (~$4–5)
- Exterior wood screws, 2½" and 1⅝" — 2½-inch screws for the structural leg assembly joints and leg-to-seat connections that carry the full seated load; 1⅝-inch screws for the seat board and back board attachment where shorter fasteners prevent breakthrough on thinner stock (~$6–8 for a combination pack)
- Exterior wood glue — applied to every joint face before screwing; a glued-and-screwed garden bench joint handles years of outdoor wet-dry cycling and the dynamic load of people sitting down without the progressive loosening that fasteners alone develop under repeated stress
- Miter saw or circular saw — for cutting leg pieces to consistent length and for the 15-degree angle cuts on the back support posts if you want a precisely angled back rather than an approximated lean
- Drill with pilot bit and driver bit — pre-drilling every fastener location prevents the splitting that occurs in cedar at screw entry points close to board ends
- Sandpaper, 120-grit and 220-grit — 220-grit on seat board surfaces and all edges that will contact clothing and skin; rough edges on a garden bench are felt every time someone sits down
- Exterior wood stain or clear sealer, optional — cedar can be left natural to weather to silver-gray or sealed to maintain the warm honey tone; paint is also an option for a bold color statement (~$8–10 for a small can)
How to Build It
- Cut all lumber to length before beginning any assembly — four leg pieces at 16 inches each from the 2×4 stock, two lower cross braces at 14 inches each from the remaining 2×4, two upper seat-height rails at 14 inches each, three seat boards at 48 inches from the 1×6 stock, and two back boards at 48 inches from the 1×4 stock. Cutting all pieces before the first screw goes in allows you to confirm all dimensions are correct and consistent before any joint is committed.
- Assemble the two leg units first — each unit consists of two vertical 2×4 legs connected by a horizontal lower brace near the foot and an upper rail at seat height. Apply wood glue to all contact faces before driving 2½-inch screws through the legs into the brace and rail ends, pre-drilling every fastener location. Build both leg units using the same measurements from the same reference points so they are genuinely identical; two leg units that differ even slightly in the position of the upper seat rail produce a bench that rocks rather than sitting level.
- Confirm each leg unit is square by measuring diagonally corner to corner in both directions — equal diagonal measurements confirm a square assembly. A leg unit that is out of square produces a bench seat that is twisted rather than flat, which is the most visible possible construction defect and one that cannot be corrected after the seat boards are attached. Set the glue and screw joints with the units clamped square rather than simply held by hand, and recheck the diagonal measurements before setting the clamps aside.
- Position the two leg units 48 inches apart on a flat surface — the distance between the inside faces of the leg units should be 48 inches, which combined with the leg unit width produces the full bench length — and attach the three seat boards across the tops of both leg units. Space the seat boards approximately ½ inch apart using a spacer piece during installation; the gaps allow rainwater to drain through the seat rather than pooling on the surface and accelerating wood deterioration at the sitting surface where moisture exposure is most sustained.
- Drive two 1⅝-inch screws through each seat board into the upper rail of each leg unit, pre-drilling every location and countersinking the screw heads slightly below the seat surface so no fastener head protrudes where it would be felt through a cushion or catch on clothing. The front seat board should sit flush with the front face of the leg units for a clean visual line from the front; the remaining two boards are positioned behind it with consistent ½-inch gaps.
- Attach the back support structure by positioning the two back boards at the rear of the seat assembly at approximately 15 degrees from vertical — a slight backward lean that provides comfortable lumbar support without the full recline angle that makes a bench feel like a lounger rather than a seat. Secure each back board to the rear face of the back leg on each leg unit using 2½-inch screws driven through the back board face into the leg; clamp the back board at the correct angle before driving any fasteners and confirm the angle feels comfortable by sitting on the bench and checking that the back supports the natural resting position of your spine.
- Sand the complete assembled bench at 120-grit to smooth all surfaces and remove any glue squeeze-out at joint lines, then follow with 220-grit on all seat board surfaces, back board faces, and every edge that will contact skin or clothing. Round all top edges with the sandpaper rather than leaving them sharp — a slightly rounded edge on a seat board is comfortable against the back of legs during extended sitting, while a sharp sawn edge creates pressure discomfort that makes sitting on an otherwise well-built bench unpleasant.
- Finish the bench with exterior stain, sealer, or paint if desired, applying two coats to all surfaces including the underside of the seat boards and the bottoms of the leg feet where ground moisture contact is most sustained. Alternatively, leave the cedar natural and allow it to begin its gradual weathering to the silver-gray patina that many gardeners find more beautiful than any applied finish — cedar that is left natural requires no maintenance, never chips or peels, and develops the authentic character of a bench that has genuinely lived outdoors rather than simply been placed there.
Garden designers who specify built seating for residential gardens always position benches to face a specific focal point rather than simply placed where space permits — a bench oriented toward the most beautiful view of the garden, a water feature, a specimen plant in seasonal bloom, or the house itself seen from the garden creates a seat that invites deliberate sitting and looking rather than one that simply exists as a place to land when tired. The bench orientation decision costs nothing to get right at placement time and costs significant effort to correct after a bench has been in position long enough to settle into the garden's established layout. Walk the intended bench location at different times of day before committing to a position, sitting in a chair to simulate the bench view from that spot, and choose the orientation that makes you most want to linger rather than the one that most conveniently uses the available space.














