
Gardening/Outdoor

Recent Content

Shoe Bench Build: The Cubby Depth That Keeps Pairs Upright

Shoe Bench Build: The Cubby Depth That Keeps Pairs Upright

Build a wooden entryway shoe bench for $35—the cubby depth is what keeps boots standing instead of toppling into a pile every morning.

Style a Layered Nightstand Vignette in 1 Hour for $35

Style a Layered Nightstand Vignette in 1 Hour for $35

Turn a cluttered nightstand into a cozy styled vignette with the height-rule trick—1 hour, $35, instant bedroom upgrade.

The Cafe Rod Trick for a Fake Built-In Vanity

The Cafe Rod Trick for a Fake Built-In Vanity

Fake a built-in bathroom vanity shelf with a tiny cafe rod and basket—zero drilling, zero suction cups, full deposit intact.

Tension Rod Shelf: The Rod Width That Won't Slip

Tension Rod Shelf: The Rod Width That Won't Slip

Build a hidden double-decker shelf under your sink for $6—the rod tension width is what keeps it from crashing down on cleaning day.

Mulch Perennial Beds for Winter in 1 Hour for $25

Mulch Perennial Beds for Winter in 1 Hour for $25

Tuck your perennials in right! A 3-inch mulch blanket now saves roots from winter heave for about $25.

logo
  • Home Improvement
  • DIY Projects
  • Interior Design
  • Gardening & Outdoor
  • Real Estate
  • Home Improvement
  • DIY Projects
  • Interior Design
  • Gardening & Outdoor
  • Real Estate
  • ​

Basket Liners: Dollar Store Fix, $2 Each

Lush, trailing hanging baskets for your porch — without paying garden center prices for a piece of coconut fiber.
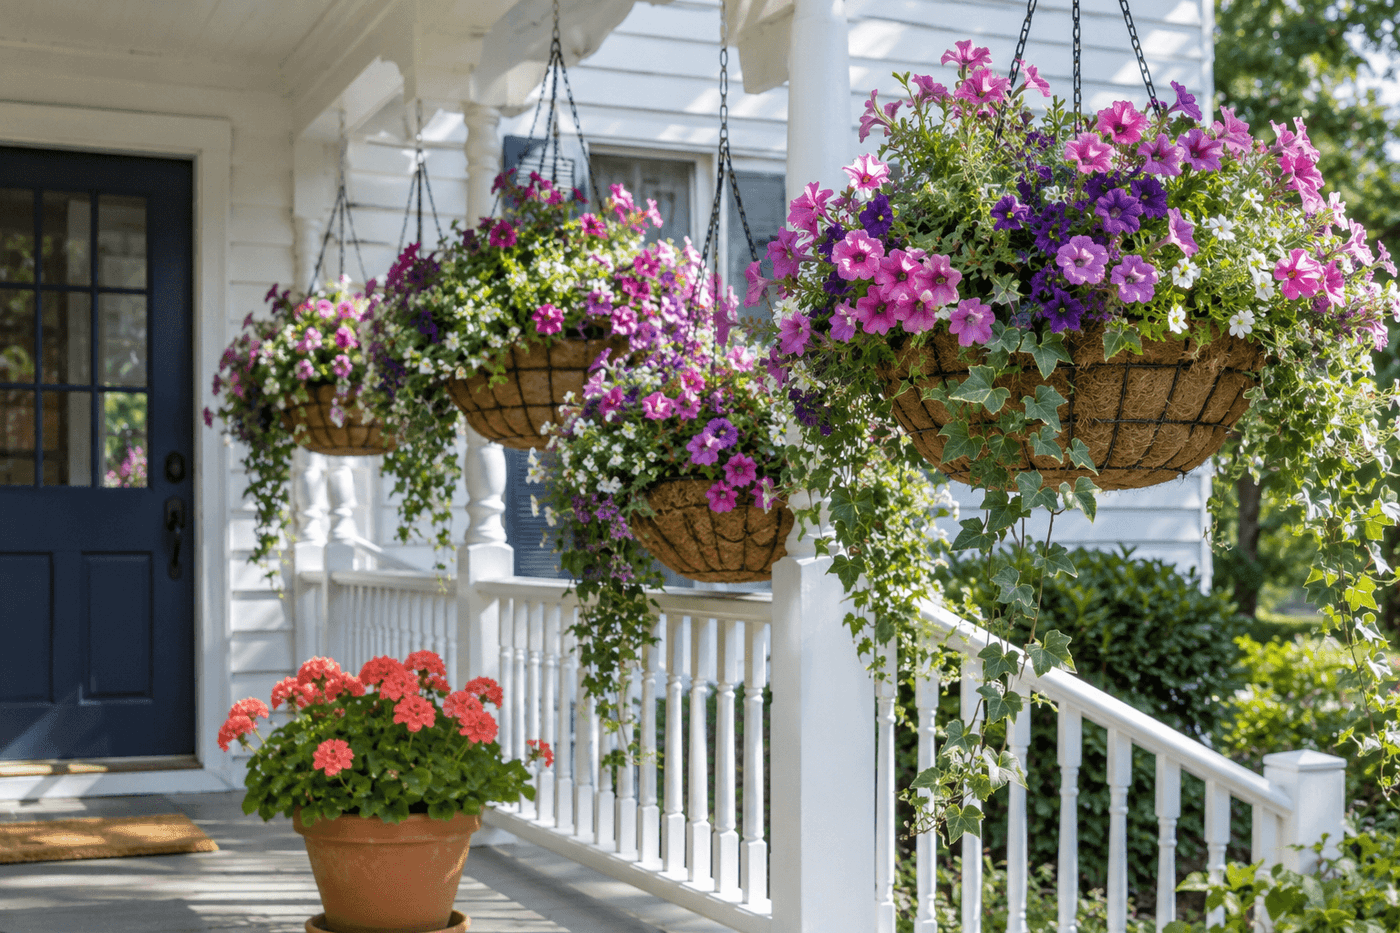
Row of lush wire hanging baskets overflowing with trailing petunias and ivy on a sunny front porch, lined with burlap and natural fiber materials
Gardening/Outdoor

Wire hanging baskets are everywhere at the end of season sales — a dollar or two each, sometimes less — and they'd be perfect if it weren't for the liner situation. Pre-made coconut coir liners run $8–12 apiece, which quietly turns a budget project into an expensive one before you've bought a single plant. The dollar store fix is genuinely better than that: burlap fabric, coconut coir sheets when you can find them, or even colorful reusable shopping bags cut open and repurposed all work beautifully, hold soil securely, and drain the way a hanging basket needs to. Line four to six baskets in a coordinating color story, fill them with trailing petunias or million bells, and hang them across your porch — the end result looks like something from a garden center display, for a fraction of what garden centers charge. Renters especially: this is your move for a gorgeous garden footprint that packs up and moves with you.

What You'll Need

  • Wire hanging baskets — 10–14" diameter; end-of-season sales or dollar stores often carry these for $1–3 each
  • Liner material — choose one:
    • Burlap fabric — most reliably available; neutral, natural look (~$1–2/yard)
    • Coconut coir sheets — check dollar stores and discount garden sections; most natural option
    • Reusable shopping bags — dollar store staple; colorful options add a pop of personality
  • Floral wire or zip ties — for securing liner to basket frame (~$1–2)
  • Scissors or utility knife — for shaping liner material to basket curve
  • Pencil or skewer — for poking drainage holes in solid liner materials
  • Quality potting mix — don't skimp here; good soil is what makes baskets thrive all season
  • Trailing plants — petunias, million bells, ivy, sweet potato vine, or bacopa (~$2–4 per cell pack)

How to Do It

  1. Choose your liner material based on what's available and the look you want — burlap reads natural and rustic, reusable bags add color, and coconut coir is the most traditional. Plan to coordinate liner colors across all your baskets for a pulled-together porch look rather than a random assortment.
  2. Cut your liner material into a circle roughly 4–5" wider than the basket diameter, which gives you the 2–3" overlap needed to fold up the sides without gaps. For shopping bags, cut along the seams and open flat before cutting to size — one bag typically lines one 10" basket.
  3. Press the liner into the basket, smoothing it against the wire frame from the center outward and pleating the edges as needed so the material sits flush against the basket sides with no large air pockets between liner and wire.
  4. Secure the liner by threading short lengths of floral wire through both the liner material and the wire basket frame at four evenly spaced points around the rim, twisting to hold. For shopping bag liners, zip ties threaded through punched holes work equally well and hold through an entire season of watering.
  5. Poke 8–10 drainage holes across the bottom of the liner using a pencil, skewer, or scissors tip — this is the step most beginners skip, and it's the direct cause of root rot and plant death in otherwise healthy baskets. More holes are better than fewer.
  6. Fill with potting mix to about 2" below the basket rim, pressing gently to eliminate air pockets but not compacting so tightly that drainage is impeded. Potting mix, not garden soil — garden soil compacts in containers and suffocates roots within weeks.
  7. Plant your trailing varieties by nestling root balls into the soil at the basket center and edges, angling outer plants slightly toward the rim so they cascade outward naturally from the start. Three to five plants per 12" basket fills in beautifully by midsummer without overcrowding.
  8. Water thoroughly until water runs freely from the drainage holes, then hang in your chosen spot. Check moisture daily in summer heat — hanging baskets dry out faster than ground containers, and consistent watering is what separates a lush, full basket from a struggling one.
DESIGNER TIP

Porch and container garden stylists who design for photography and home staging use a specific planting formula that makes hanging baskets look instantly lush rather than sparse: the "thriller, filler, spiller" layering method, applied even to small baskets. Place one upright centerpiece plant (the "thriller" — a small ornamental grass, coleus, or geranium) at the basket's center, surround it with two or three mounding plants (the "fillers" — compact impatiens or diascia), then tuck trailing varieties (the "spillers" — million bells, ivy, or bacopa) at the outer edges angled outward. This three-layer structure creates the dense, layered look of a mature basket from the first week rather than waiting six weeks for a single variety to fill in — and it's exactly the technique used in every garden center display basket that stops you in your tracks.


Related Content

Gardening/Outdoor

03 November 2026

Post

Mulch Perennial Beds for Winter in 1 Hour for $25

Tuck your perennials in right! A 3-inch mulch blanket now saves roots from winter heave for about $25....

Gardening/Outdoor

31 October 2026

Post

Glow Skeleton Fence: The UV Primer Coat That Pops

Paint glowing skeleton silhouettes onto your fence for Halloween—the UV primer coat underneath is what makes them blaze under black light, not fade flat....

Gardening/Outdoor

29 October 2026

Post

Plant a Fall Pansy Container in 1 Hour for $25

Pansies shrug off frost but not soggy roots—plant them right this week for months of color through the first hard freezes....

Gardening/Outdoor

24 October 2026

Post

Divide and Replant Perennials in 90 Minutes for $15

Overgrown hostas and daylilies? Split them now for free plants and healthier beds—90 minutes, $15, zero green thumb required....

Gardening/Outdoor

18 October 2026

Post

Wrap Tree Trunks for Winter Protection in 30 Minutes for $15

Rabbits and frost cracks love bare bark—wrap young tree trunks now to save them from winter damage for just $15....

Gardening/Outdoor

17 October 2026

Post

Winterize Your Outdoor Fountain in 1 Hour for $15

Don't let ice crack your fountain! Drain, clean, and seal it right in an hour for $15 before the first hard freeze hits....

Gardening/Outdoor

08 October 2026

Post

Winterize Your Rain Barrel in 45 Minutes for $20

Don't let freezing water crack your rain barrel! Drain, disconnect, and store it right in 45 minutes for about $20 before the first hard freeze....

Gardening/Outdoor

05 October 2026

Post

Broken Umbrella Planter: The Drainage Cut That Saves It

Turn a busted umbrella canopy into a hanging garden planter—the drainage slits you cut first are what stop root rot before it starts....

Gardening/Outdoor

02 October 2026

Post

Sow a Cover Crop in Your Garden Beds in 1 Hour for $20

Skip the bare dirt this fall! Sow a cheap cover crop now and let it build free, crumbly soil for next spring's garden....

Gardening/Outdoor

28 September 2026

Post

Overwinter Tender Bulbs Indoors in 1 Hour for $20

Dig up dahlias and cannas before frost hits! Cure and pack them right so they wake up healthy again next spring....

Gardening/Outdoor

22 September 2026

Post

Build a Leaf Mulch Cage in 1 Hour for $25

Stop bagging leaves for the curb! A wire mulch cage turns fall leaf drop into free garden gold by spring....

Gardening/Outdoor

19 September 2026

Post

Plant Spring Bulbs in 1 Hour for Under $25

Plant tulip and daffodil bulbs the right way this fall—pointy-end-up depth and drainage make all the difference come spring!...

Gardening/Outdoor

17 September 2026

Post

Build a Root Vegetable Storage Bin in 2 Hours for $35

Stash your fall harvest right! A DIY sand-layered storage bin keeps carrots and beets crisp for months, no root cellar needed....

Gardening/Outdoor

16 September 2026

Post

Pumpkin Display Stand: Weight First, Then the Angle

Put your biggest pumpkin on the wrong tier and this stand becomes a tipping hazard. Build it right....

Gardening/Outdoor

31 August 2026

Post

Hanging Herb Jars: The Pebble Layer Isn't Optional

Jars have no drainage hole — skip the pebble layer and your herbs slowly rot. Mostly free, 90 min....
Terms and ConditionsDo Not Sell or Share My Personal InformationPrivacy PolicyPrivacy NoticeAccessibility NoticeUnsubscribe
Copyright © 2026 DIY HomeBoost












