
Turn Vintage Silverware into Garden Markers for $5
Thrift store spoons, a metal stamp kit, and a pair of pliers — the garden markers that look like a boutique find and cost twenty-five cents each
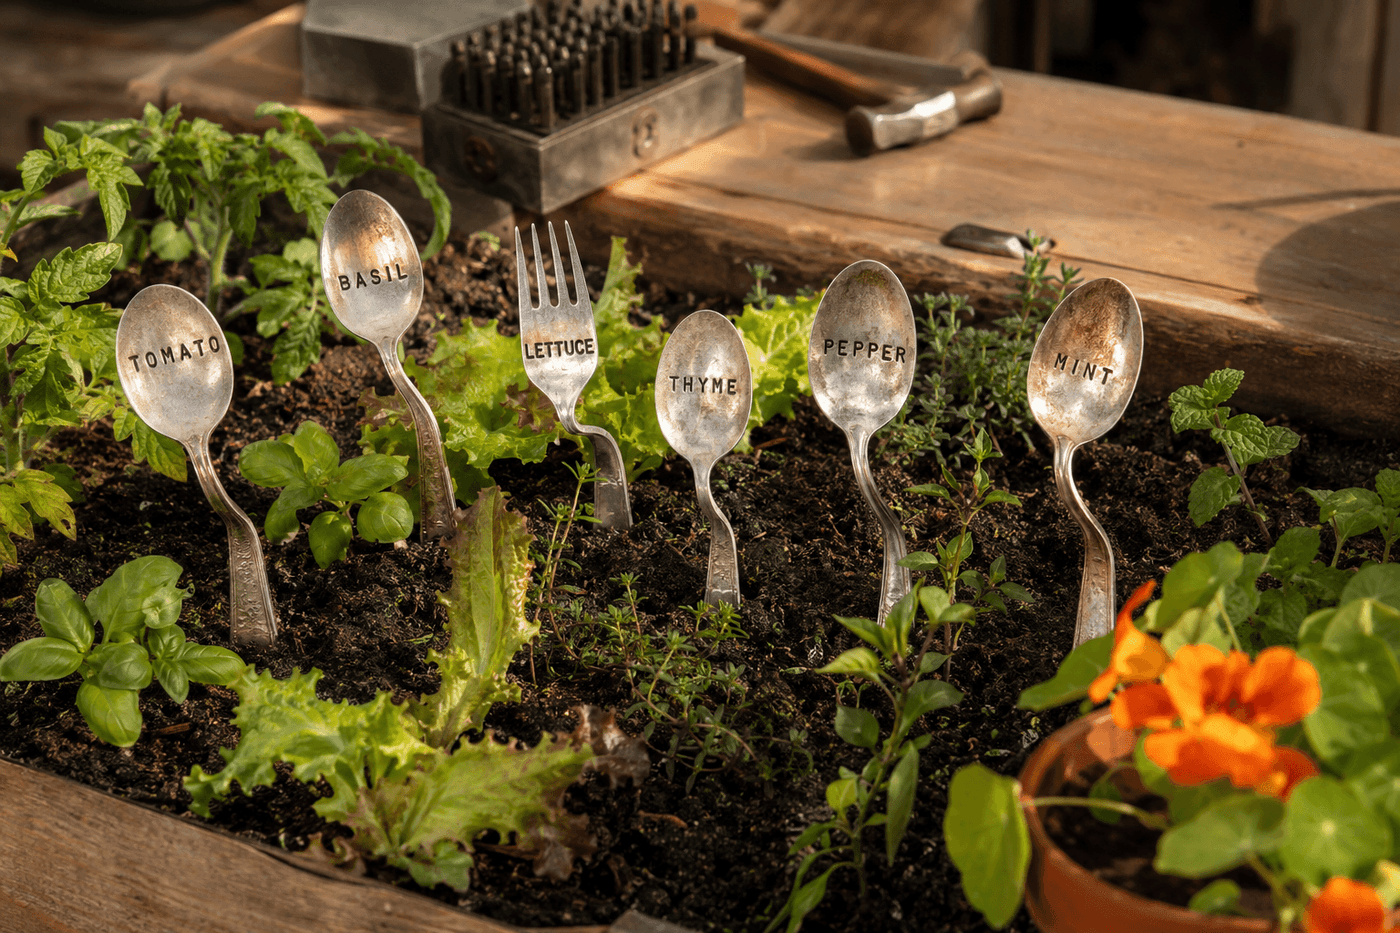
Vintage silverware garden markers occupy a specific sweet spot in garden décor — they are genuinely useful, completely weatherproof, visually beautiful in both growing season and bare winter beds, and made from something that would otherwise sit in a thrift store bin for a quarter because no one needs a single fork from a 1960s dinner service. A metal stamping kit from a craft store and a pair of pliers transform a collection of mismatched spoons into the kind of garden markers that boutique garden shops sell for $8 to $12 each, and the tarnish and imperfection of vintage silverware is precisely what makes them more charming rather than less. Plant names stamped into the bowl of each spoon — TOMATO, BASIL, LETTUCE, ROSE — in the irregular, handmade impression of individual metal stamps produce a label that looks artisanal and considered in a way that laser-engraved boutique markers never quite manage. Twenty-five cents apiece at the thrift store, an afternoon of stamping and bending, and every bed and pot in the garden has a marker worth keeping year-round.
What You Need
- Vintage spoons and forks, qty 10–20 — mismatched is ideal; variety in handle pattern and bowl shape creates a more interesting collection than uniform matching pieces. Avoid pieces with very thin or very ornate handles that will bend unevenly or break at the stamping pressure point; look for sturdy, moderately weighted silverplate or stainless pieces (thrift stores and yard sales, $0.25–0.50 each)
- Metal letter stamp set, 3mm or 4mm size — individual letter stamps struck with a hammer to impress letters into metal; 3mm stamps fit single-word plant names in most spoon bowls; 4mm stamps produce bolder, more readable impressions for markers that will be read from a standing distance (~$12–18 for a complete alphabet set at craft stores)
- Steel bench block or small anvil — a hard, flat steel surface to stamp against; stamping on a wooden surface or the floor absorbs the hammer strike and produces faint, inconsistent impressions rather than the crisp, deep letter marks that read clearly in a garden setting (~$10–15, or use a piece of scrap steel)
- Hammer — a standard 16-ounce claw hammer; heavier hammers produce deeper impressions with less effort, lighter hammers require more strikes per letter and increase the likelihood of the stamp shifting between strikes and producing a blurred character
- Needle-nose pliers and standard pliers — for bending the spoon handles to the 45-degree angle that positions the bowl facing upward when the handle is pushed into soil
- Painter's tape or masking tape — for creating a straight baseline guide along the spoon bowl before stamping, ensuring letters are stamped in a consistent horizontal line rather than drifting upward or downward across the bowl
- Black paint pen or stamping ink pad — for rubbing color into the stamped impressions after stamping to make the letters stand out more clearly against the silver surface (~$3–5)
How to Make Them
- Plan the word for each spoon before stamping anything — count the letters in each plant name and center the letter sequence in the spoon bowl by marking the center point of the bowl and counting outward in each direction from the center. A six-letter word like TOMATO centered in the bowl reads as intentionally composed; the same word stamped from the left edge of the bowl and running off the right side reads as miscalculated. The planning phase takes thirty seconds per spoon and determines the professional quality of the finished marker.
- Apply a strip of painter's tape horizontally across the spoon bowl at the position where the bottom of the letters should sit — this tape line serves as the baseline that keeps all letters at a consistent height across the word. Without a baseline guide, individual letter stamps drift upward or downward from each other and produce a wavy text line that reads as amateur rather than handcrafted even when each individual letter impression is clean and clear.
- Place the spoon face-up on the steel bench block and position the first letter stamp at the leftmost position of your planned word — hold the stamp firmly perpendicular to the spoon bowl surface with one hand and strike it once with the hammer using enough force to produce a visible impression without striking so hard that the stamp slides or the spoon dents around the impression. A single confident strike produces a cleaner impression than two or three lighter strikes, because the stamp can shift slightly between multiple strikes and produce a blurred character.
- Work from left to right through the remaining letters of each word, spacing each stamp consistently — the width of the stamp itself is a useful spacing guide; placing each stamp one stamp-width away from the previous letter produces natural, readable letter spacing without measuring. Remove the baseline tape after all letters are stamped and assess the word from arm's length before moving to the next spoon; a letter that is significantly deeper or shallower than its neighbors, or one that has drifted from the baseline, is most easily identified and noted before the stamping rhythm carries you to the next piece.
- Enhance the stamped impressions by rubbing a black paint pen or black stamping ink into the letters immediately after stamping, then wiping the excess from the flat spoon bowl surface with a cloth — the ink remains in the recessed impressions and makes each letter dramatically more readable against the silver surface at garden viewing distance. Impressions without any ink fill are visible close up but can be difficult to read quickly while standing over a garden bed; ink-filled impressions read clearly from a normal standing height even on tarnished or patinaed silver surfaces.
- Bend each handle to the 45-degree angle that will position the bowl facing upward when the handle is pushed into soil — grip the handle firmly with standard pliers at the midpoint and bend it toward the bowl side of the spoon in a single smooth motion rather than working the bend back and forth, which work-hardens the metal at the bend point and increases the risk of cracking. The bend should be sharp enough that the handle and bowl form a clear angle rather than a gentle curve; a gradual curve produces a marker that tilts rather than standing with the bowl facing cleanly upward.
- Sharpen the handle end to a point if needed by filing or using wire cutters to create a diagonal cut at the tip — a pointed handle end pushes into garden soil and potting mix without requiring excessive force that could bend or distort the marker at the handle bend point. Most silverware handles taper to a blunt end that pushes into loose soil adequately, but in compacted or clay-heavy soil a sharper tip makes installation significantly easier.
- Install each finished marker by pushing the handle end into the soil at a slight backward lean — the weight of the bowl and the angle of the bend mean a perfectly vertical installation will tip the marker forward toward the ground over time, while a slight backward lean counteracts this tendency and keeps the bowl face consistently readable from a standing position throughout the growing season and beyond.
Garden stylists who work with vintage silverware markers for professional kitchen garden installations always mix spoon and fork markers within the same bed rather than using only one type — a fork marker pushed into the soil with its tines facing upward alongside a spoon marker with its bowl facing upward creates a visual rhythm of different silhouettes that reads as more curated and intentional than a uniform row of matching forms. They also vary the handle bend angle slightly between markers in the same bed — some at 30 degrees, some at 45, some at 60 — so the markers stand at different heights and angles rather than forming a uniform row, which mirrors the organic, layered quality of the plants themselves and makes the markers feel grown into the bed rather than placed in it.














