Turn a Salvage Door into a Statement Headboard for $28
A $15 architectural salvage door, a French cleat, and an afternoon — the one-of-a-kind headboard that makes every guest ask where it came from
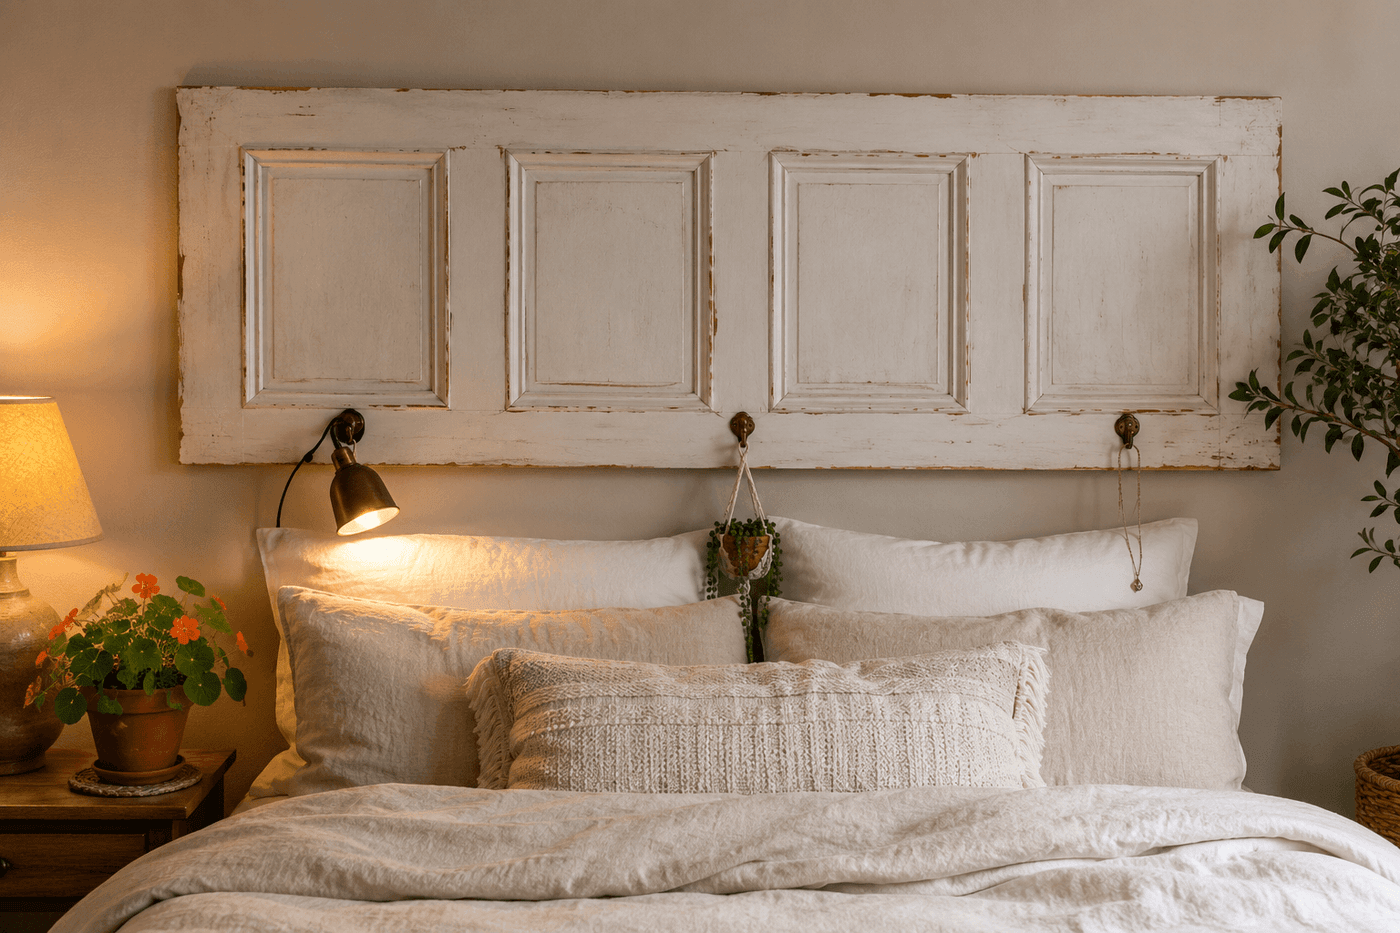
A purchased headboard is a rectangle of material in a standard size at a standard price point — functional, forgettable, and completely interchangeable with the headboard in every catalog and every showroom at that price. A vintage door mounted horizontally on the wall behind a bed is something else entirely: it carries the architectural detail of the era it came from, the character of the paint layers it has accumulated, the story of the house it opened and closed in for decades before it arrived in your bedroom. Architectural salvage yards and Habitat ReStores price these doors at $15 to $25, the French cleat mounting hardware costs another $10, and the afternoon of prep and installation produces a headboard so specific and so striking that guests consistently ask about it before they've said anything else about the room. This is the bedroom upgrade that no amount of money spent on manufactured furniture can replicate, because the one quality it has — genuineness — is available only from something that has actually lived.
What You Need
- Vintage door from architectural salvage — look for doors with interesting panel configurations, original glass inserts, or decorative molding profiles; avoid doors with significant structural damage, severe warping, or rot at the bottom rail that would compromise wall mounting stability. Standard interior doors run 80 inches tall and 28 to 36 inches wide — ideal dimensions for a queen or full bed headboard (architectural salvage yards, Habitat ReStores, estate sales, ~$15–25)
- French cleat hardware, 24–36" length — the safest and most stable mounting method for a heavy door; a French cleat distributes the door's weight across multiple wall studs rather than concentrating it at two lag bolt points, and it allows the door to be removed and repositioned without patching holes (~$10–15 for a steel French cleat kit)
- Wood filler — for filling any unwanted hardware holes, damage, or surface defects that won't contribute to the finished aesthetic; allow to dry completely and sand flush before painting or staining (~$5–6)
- Exterior or interior paint, chalk paint, or wood stain — in your chosen finish; chalk paint in distressed white for farmhouse style, bold navy for a dramatic statement, or clear sealer over natural wood for rustic warmth. Chalk paint adheres directly to most door surfaces without primer (~$8–12 for a sample pot that covers the full door)
- Sandpaper, 120-grit and 220-grit — for smoothing rough spots, scuffing glossy existing paint for adhesion, and the finish sanding before painting
- Small utility hooks, qty 3–5 — for installing along the bottom edge of the mounted door as functional hanging storage for reading lights, jewelry, or a small plant; hooks installed into the door's bottom rail rather than the wall make them part of the headboard rather than a separate wall installation (~$4–6 for a pack)
- Stud finder and level — for accurate French cleat placement that keeps the door hanging level on the wall; a door mounted even slightly off-level is immediately visible against the horizontal reference line of the bed behind it
How to Do It
- Assess the door carefully before investing any time in prep or finish — lay it flat and sight down its length to check for significant warping that would cause it to bow away from the wall when mounted, press firmly on each panel to confirm the panel and rail joints are structurally sound, and check the bottom rail specifically for any softness that indicates moisture damage. A door with a slight surface bow that has not compromised the structural joints can be mounted flat against the wall with additional French cleat attachment points; a door with genuine structural damage will require more remediation than the project justifies.
- Remove all existing hardware — hinges, strike plates, locksets, and any remaining mounting hardware — using the appropriate screwdrivers and a pry bar for stubborn hinge pins. Save decorative door knobs, escutcheon plates, and interesting hardware pieces for repurposing as decorative hooks or accents elsewhere in the room; the original hardware often has more visual character than anything purchased new for that purpose. Fill all hardware holes with wood filler, allow to dry completely per the filler instructions, and sand flush with 120-grit paper before proceeding to finish prep.
- Prepare the door surface for finishing by sanding any rough areas, loose paint edges, or texture inconsistencies with 120-grit paper — not the entire surface, just the areas that would show through the finished paint as raised ridges or rough patches. For a distressed or intentionally aged finish, minimal surface preparation produces the most authentic result; for a clean, smooth painted finish, a more thorough scuff-sand with 120-grit across all surfaces followed by 220-grit provides the smooth base that shows the finished paint color most accurately.
- Apply your chosen finish — chalk paint in two thin coats for the most durable matte result, or exterior stain worked into the wood grain with a cloth for a natural wood finish that preserves and enhances the door's existing character. For a distressed white farmhouse finish, apply one coat of chalk paint, allow to dry fully, then lightly sand the raised panel edges and molding profiles with 220-grit to reveal the wood or previous paint color at the naturally worn points — the areas that would accumulate wear on a door in actual use are the same areas that should be distressed for the most authentic aged appearance.
- Determine the correct mounting height by positioning the door against the wall with the bed in place and assessing where the top of the door should sit relative to the ceiling, the bottom of the door relative to the mattress surface, and the door width relative to the bed width. A door headboard that is too wide for the bed extends awkwardly beyond the mattress edges; one that is too narrow looks undersized and loses the architectural impact of the installation. For a standard queen bed, a door 28 to 32 inches wide centered behind the bed produces the most proportional relationship between headboard and mattress.
- Install the wall section of the French cleat by locating wall studs with a stud finder, marking the cleat position at the determined headboard height, and driving lag bolts through the cleat into at least two studs. Use a level to confirm the cleat is perfectly horizontal before tightening the final lag bolts — the cleat's horizontal precision directly determines the door's hanging level, and a cleat that is even slightly off-horizontal produces a door that hangs visibly tilted against the wall regardless of how carefully the door itself was prepared.
- Attach the door section of the French cleat to the back face of the door, positioning it at the appropriate height to produce the desired headboard mounting height when the two cleat sections interlock. Drive screws through the door-side cleat into the door's top rail where the wood is thickest and the fastener holds most securely; the top rail of a solid wood door provides 1½ to 2 inches of solid wood for the cleat screws to grip, while the door's panel sections are too thin to provide reliable fastener purchase.
- Hang the door by hooking the door-side cleat over the wall-side cleat and sliding it to the centered position — French cleat mounting allows the door to be slid left or right along the cleat to fine-tune the centering over the bed without unmounting the wall hardware. Install utility hooks along the bottom edge of the mounted door at evenly spaced intervals for hanging reading lights, jewelry, or a small trailing plant, driving the hook screws into the door's solid bottom rail rather than into the panel sections where the thin wood wouldn't provide adequate fastener purchase for hooks under load.
Interior designers who work with salvage architectural elements always add picture light or LED strip lighting behind the door at the wall — a narrow LED strip adhered to the wall perimeter behind the door casting warm light outward from behind the edges produces a floating, backlit effect that makes the headboard look dramatically more designed and intentional than the same door mounted flush without lighting. The LED strip connects to a smart plug for scheduled lighting that turns on at dusk and off at bedtime automatically, costs about $15 for the strip and plug, and transforms a beautiful salvage headboard into the focal point of the room at every hour when the bedroom light is dim. The gap between the back of the mounted door and the wall surface — typically ½ to 1 inch with French cleat mounting — is exactly the right space for the LED strip to nestle without being visible from the front of the headboard.