
Ombré Pot Wall: Living Color Installation for $40
Nine identical pots painted in nine precisely mixed shades of the same color, mounted in a diagonal grid, planted with uniform trailing greenery — and a blank fence becomes a living art installation that stops everyone at the gate.
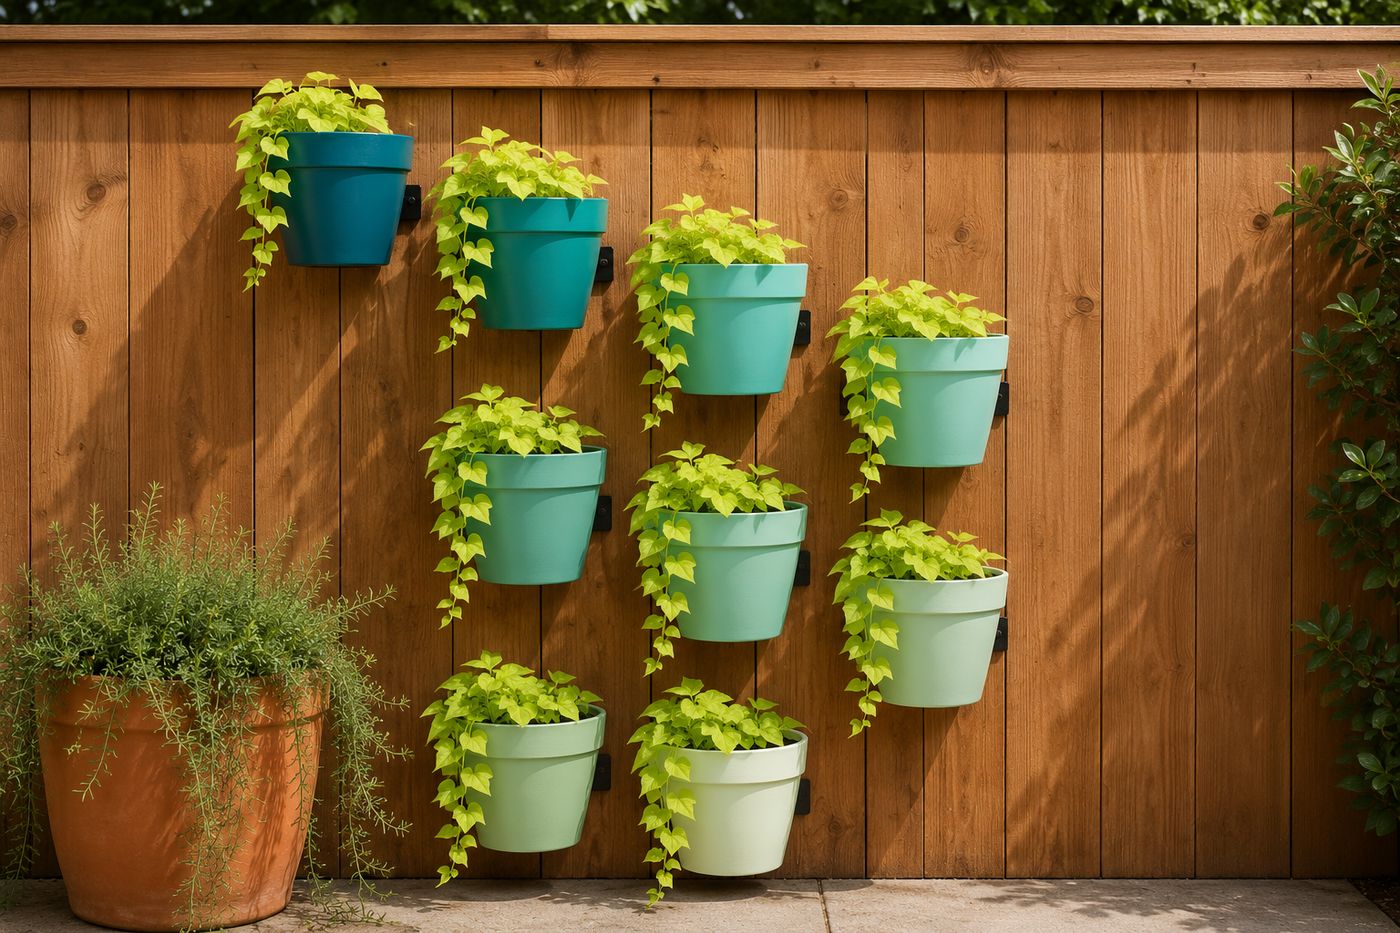
A single painted pot on a fence is decorative. Nine pots mounted in a precise diagonal grid and painted in a mathematically consistent ombré gradient from deep saturated color at one corner through nine graduated steps to pale near-white at the opposite corner — each planted with the same trailing green plant so the gradient is the only visual variable — is a living art installation that reads from across the yard and holds attention up close in completely different ways simultaneously. The ombré effect works because the eye follows the color transition automatically from dark to light, which creates movement and directionality in a static arrangement that a random multi-color grouping cannot produce. The uniform plant choice — all the same trailing variety so every pot has identical green foliage — is the discipline that makes the color gradient the star rather than one element competing with plant variety for visual attention. Nine pots, one color mixed in nine precisely calculated steps, nine identical plants, and a diagonal mounting grid is the formula for the specific kind of bold, confident, unambiguous garden design statement that people photograph and then try to replicate in their own spaces.
What You'll Need
- Identical terracotta or plastic pots, 9–12 — the same size, same shape, same brand if possible; variation in pot profile between units disrupts the visual rhythm of the grid and makes the installation read as an assortment rather than a composed piece; 6-inch diameter pots are the most practical scale for a fence-mounted installation — large enough to hold a meaningful plant, small enough that the full grid fits on a standard fence section without requiring an oversized wall area (~$1–3 each at garden centers or dollar stores)
- Outdoor acrylic paint — one saturated base color and white — choose one vibrant base color that the full gradient will work through:
- Teal to mint — deep teal base mixed with increasing white through nine steps to pale mint; the most sophisticated and photographable ombré palette for outdoor use
- Hot coral to blush — deep coral base to pale blush; warm and bold against natural wood fence backgrounds
- Cobalt to sky blue — deep cobalt to pale sky; the most dramatic contrast range of any single-color gradient
- Terracotta to peach — deep burnt terracotta to pale peach; the most natural-looking gradient for a garden wall context
- DecoArt Outdoor Living or Rust-Oleum 2X in the chosen base color plus a white of the same formula; one 8 oz bottle of base color and one of white covers nine 6-inch pots in two coats each (~$4–6 per bottle)
- Nine small labeled cups or containers for mixing — for preparing and labeling each of the nine gradient steps before any painting begins; mixing all nine shades before painting allows visual assessment of the full gradient sequence and adjustment of any step that jumps too far or too little from its neighbors
- Clear outdoor sealer — two coats over fully cured paint on all nine pots; critical for pots that will be watered regularly and exposed to outdoor conditions through a full season (~$6–8 for a can covering all nine pots)
- Pot ring brackets or wall-mount pot holders — one per pot; sized to the pot diameter; powder-coated or galvanized steel for outdoor weather resistance; confirm the bracket mounting method suits the fence or wall material — screw-in brackets for wood fences, masonry anchors for brick or concrete walls (~$3–5 each, or $25–40 for a nine-pack online)
- Drill and appropriate bits — for mounting the brackets; a masonry bit for brick or concrete walls, a standard wood bit for wood fences; pre-drilling prevents splitting on wood fence boards and is required for masonry installations
- Level and tape measure — for laying out the grid precisely before any bracket is installed; a diagonal grid where the spacing is consistent in both directions reads as intentional design; one incorrectly spaced bracket disrupts the visual rhythm of the full installation
- Uniform trailing plants, 9 — one per pot; sweet potato vine, trailing string of pearls, creeping jenny, or small-leaved ivy all produce the consistent cascading green that makes the gradient the visual star; purchasing all nine plants from the same flat at the same time ensures matching size and habit across the full installation (~$2–4 each)
How to Create It
- Mix all nine gradient shades before painting a single pot — label nine small cups 1 through 9, place pure base color in cup 1, and add one additional measure of white to each successive cup so cup 9 contains the maximum white dilution that still reads as a tint of the base color rather than plain white. Set all nine cups in order and assess the gradient from arm's length; any step that jumps too dramatically from its neighbor needs an adjustment to the white ratio before the paint is committed to the pots. Consistency of step size across the full nine-shade sequence is what produces the smooth, seamless ombré transition that makes the installation look professionally designed.
- Paint all nine pots in two to three coats — work through the gradient sequence from darkest to lightest, which prevents accidentally contaminating a light shade cup with dark color on the brush from the previous pot; rinse the brush between each pot shade even when working dark to light. Paint the full exterior of each pot including the rim and the top 2 inches of the interior that will be visible above the soil line; an unpainted interior rim breaks the color read of each pot from any angle above the pot center and is immediately visible in a wall-mounted installation where pots are viewed at or above eye level.
- Number each pot lightly on the base in pencil as it is painted — pot 1 (darkest) through pot 9 (lightest) — so the installation sequence is unambiguous when the pots are carried to the mounting location; nine pots in graduated shades look similar enough when separated from the full sequence that incorrect installation order is a genuine risk without this numbering step.
- Seal all nine pots with two coats of clear outdoor sealer after the paint is fully cured — allow 24 hours of paint cure before sealing; sealer applied too early traps solvents that cause the paint to lift from the terracotta surface under watering pressure within the first season. Apply the sealer to the interior of each pot as well as the exterior; terracotta pots that are not sealed internally absorb water through the pot wall during watering, which leaches color from the painted exterior surface and produces visible tide marks at the water level inside the pot.
- Plan the grid layout on paper before marking a single point on the fence — determine the diagonal arrangement by deciding whether the darkest shade will be at the top left or top right corner of the installation, which determines the direction the color flows across the fence. A dark-top-left to light-bottom-right diagonal follows the natural reading direction of the eye and produces the most intuitively satisfying gradient flow; a dark-bottom to light-top diagonal creates a different visual weight distribution that suits some fence and planting contexts better. Draw the nine pot positions in their diagonal grid on paper, measure the fence section available, and calculate the center-to-center spacing that distributes the nine pots evenly across the available area with equal margins at all four edges of the installation.
- Mark all nine bracket positions on the fence before installing any hardware — use a tape measure and level to mark each position precisely, snapping a chalk line along the diagonal grid axis to confirm the alignment before drilling. Step back 10–15 feet after marking all nine positions and assess the grid from the primary viewing distance; spacing that appears correct from directly in front of the fence can read as slightly compressed or expanded from the viewing distance where the installation will actually be seen, and adjusting chalk marks is considerably easier than moving installed brackets.
- Install the brackets in sequence from top to bottom of the diagonal — working top to bottom means any bracket alignment correction can be made before the lower brackets are committed to positions that depend on the upper bracket alignment. Confirm each bracket is level in both axes before driving the final screw; a bracket that is slightly off-level makes the pot sit visibly askew in its ring and reads as a placement error rather than an intentional design choice.
- Plant each pot with one trailing plant, water thoroughly, allow to drain completely, and mount in the bracket in gradient sequence — pot 1 (darkest) in the anchor position of the diagonal, continuing through pot 9 (lightest) at the opposite corner. Assess the full installation from the primary viewing distance with all nine planted pots in position before considering it complete; the relationship between the trailing plant growth and the pot color gradient reads differently with live plants than the empty painted pots suggested during planning, and one or two pot positions occasionally benefit from swapping to better integrate the plant habit with the color flow of the full installation.
Installation artists and garden designers who create large-scale planter wall installations for public gardens, festivals, and high-end residential projects use one visual calibration technique that amateur installations almost universally skip and that produces a gradient that reads as smooth and seamless from the primary viewing distance rather than as a series of visibly stepped shades: assess and adjust the full nine-shade gradient sequence from 15 feet rather than from the mixing distance, because the perceived difference between adjacent shades increases significantly at viewing distance and shades that appear adequately graduated from 2 feet appear to jump dramatically from 15 feet. Installation artists who paint ombré pot walls consistently report that the gradient that looks perfect at close range requires the middle shades to be pulled closer together — adding slightly more white to shades 3, 4, 5, and 6 and slightly less to shades 7, 8, and 9 — to achieve the smooth visual transition at the 10–15 foot distance where the full installation is actually experienced. This adjustment is made at the cup-mixing stage before any pot is painted, by placing the nine shade cups in a row on the ground and walking 15 feet back to assess the transition — the two minutes this assessment takes prevents the situation of a completed installation that looks stepped rather than gradient from across the yard.














