Dresser Rescue: Chalk Paint Skips the Primer Step
Regular furniture paint needs a primed, sanded surface to bond properly — chalk paint grips almost any material as-is, which is the entire reason a donation-bound dresser can become a finished piece in one weekend instead of two.
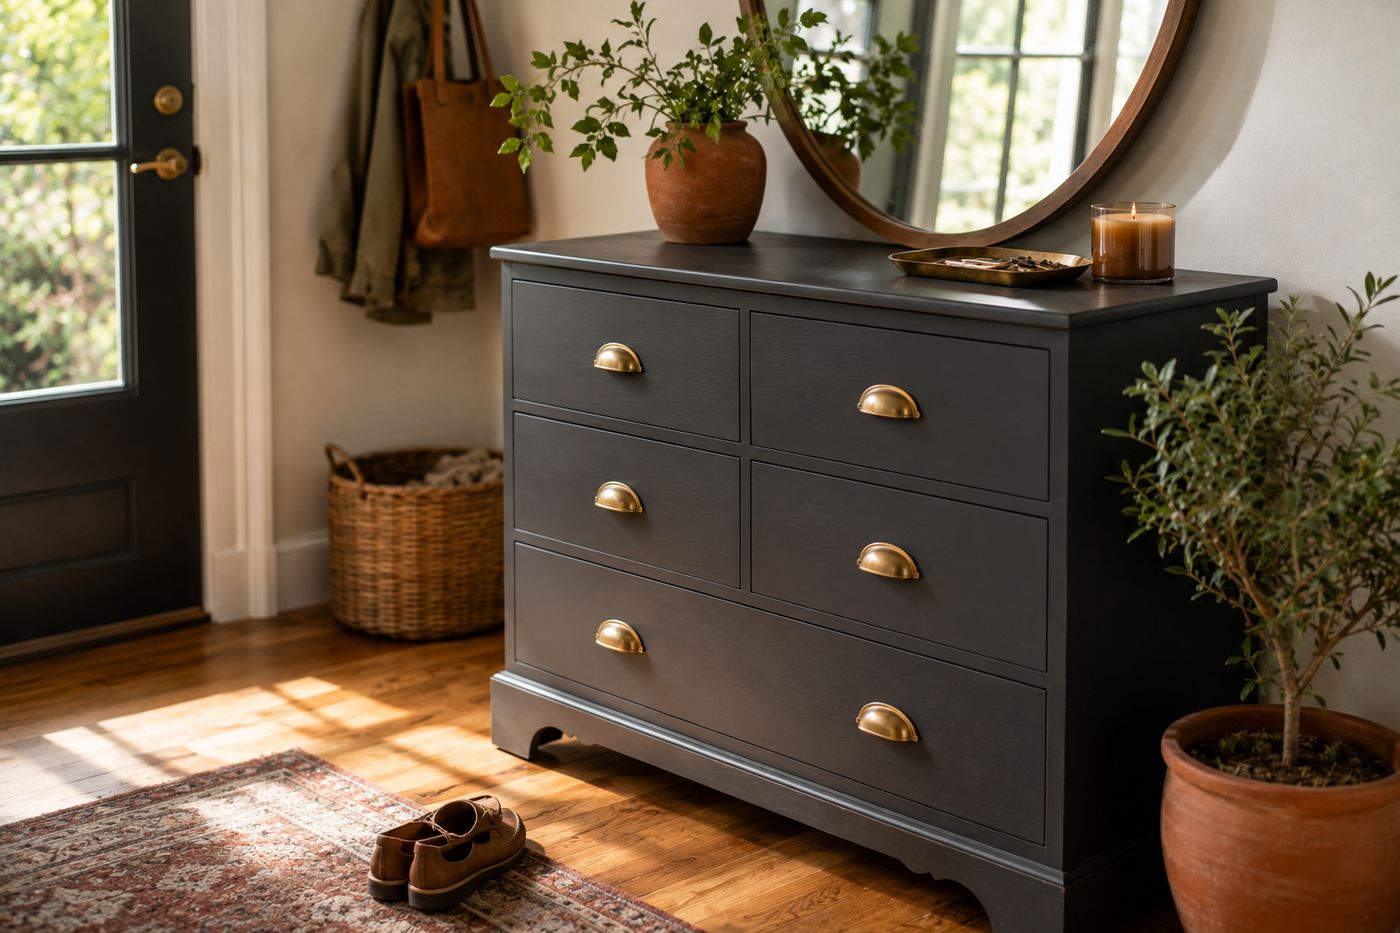
Standard furniture paint needs a properly sanded and primed surface to actually bond, since it's designed to grip a prepared substrate rather than whatever finish the piece already has — skip that prep on an old dresser and the paint peels or chips within months regardless of how many coats went on. Chalk paint works completely differently: its chemical makeup lets it adhere to laminate, old varnish, and even slightly glossy surfaces without sanding or priming first, which is the actual reason a garage castoff can go from donation pile to finished furniture in a single weekend instead of the two weekends a proper strip-and-prime job would take. That difference matters more than the color choice itself, though a matte chalk finish also happens to read as current and intentional rather than dated, which helps sell the whole transformation visually. Once the paint decision is made, the rest of the build — hardware swap, drawer lining, function assignment — is straightforward. The whole piece cost about $30 and came together in roughly four hours across a weekend, including drying time between coats.
What You'll Need
- Old dresser — free if already owned or headed for donation
- Chalk paint, in your chosen color (deep charcoal works well) — about $12 for a quart
- New drawer hardware (brushed brass or your preferred finish) — about $10
- Peel-and-stick wallpaper, for lining drawer interiors — about $6
- Small file organizer or tray, for the top drawer — about $2, or already owned
- Paintbrush or foam roller
- Screwdriver, for hardware
- Scissors and a craft knife, for trimming the drawer liner
- A tray and mirror (optional), for styling the dresser top
How to Do It
- Wipe down the dresser to remove dust and grime, then move straight to painting — chalk paint's ability to skip sanding and priming is exactly what makes this a one-weekend project rather than a two-weekend one.
- Remove the drawers and existing hardware before painting, working on the body of the dresser and drawer fronts separately for full coverage.
- Apply your chalk paint in even coats, letting each dry fully before adding the next — most chalk paints need two coats for full, even color.
- Let the final coat cure completely per the product's instructions before attaching new hardware or handling the piece further.
- Attach new drawer pulls or knobs, checking that they're centered and level on each drawer front.
- Line the interior of each drawer with peel-and-stick wallpaper, cutting pieces to fit and pressing out air as you go for a smooth finish.
- Assign a specific function to each drawer before loading anything in — mail and paperwork in a top drawer with a small file organizer, accessories like scarves and gloves in the middle, shoes in the deepest bottom drawer — since a clear function per drawer is what keeps the piece organized rather than becoming a place things disappear into.
- Style the dresser top with a small tray for keys and a candle, and lean a simple mirror against the wall above it to finish the vignette.
Furniture painters who work with chalk paint professionally often finish with a coat of clear wax specifically over the top surface and drawer fronts, the areas that get touched and bumped most, rather than waxing the entire piece uniformly, because chalk paint's matte finish is naturally more porous and prone to marking than a traditional painted finish, and wax on just the high-contact areas protects against that without dulling the matte look everywhere else.