
Bottle Solar Lights: Garden Magic for $10
Colored glass bottles, a handful of marbles, and a dollar store solar stake — and your garden path glows like a jeweled lantern after dark.
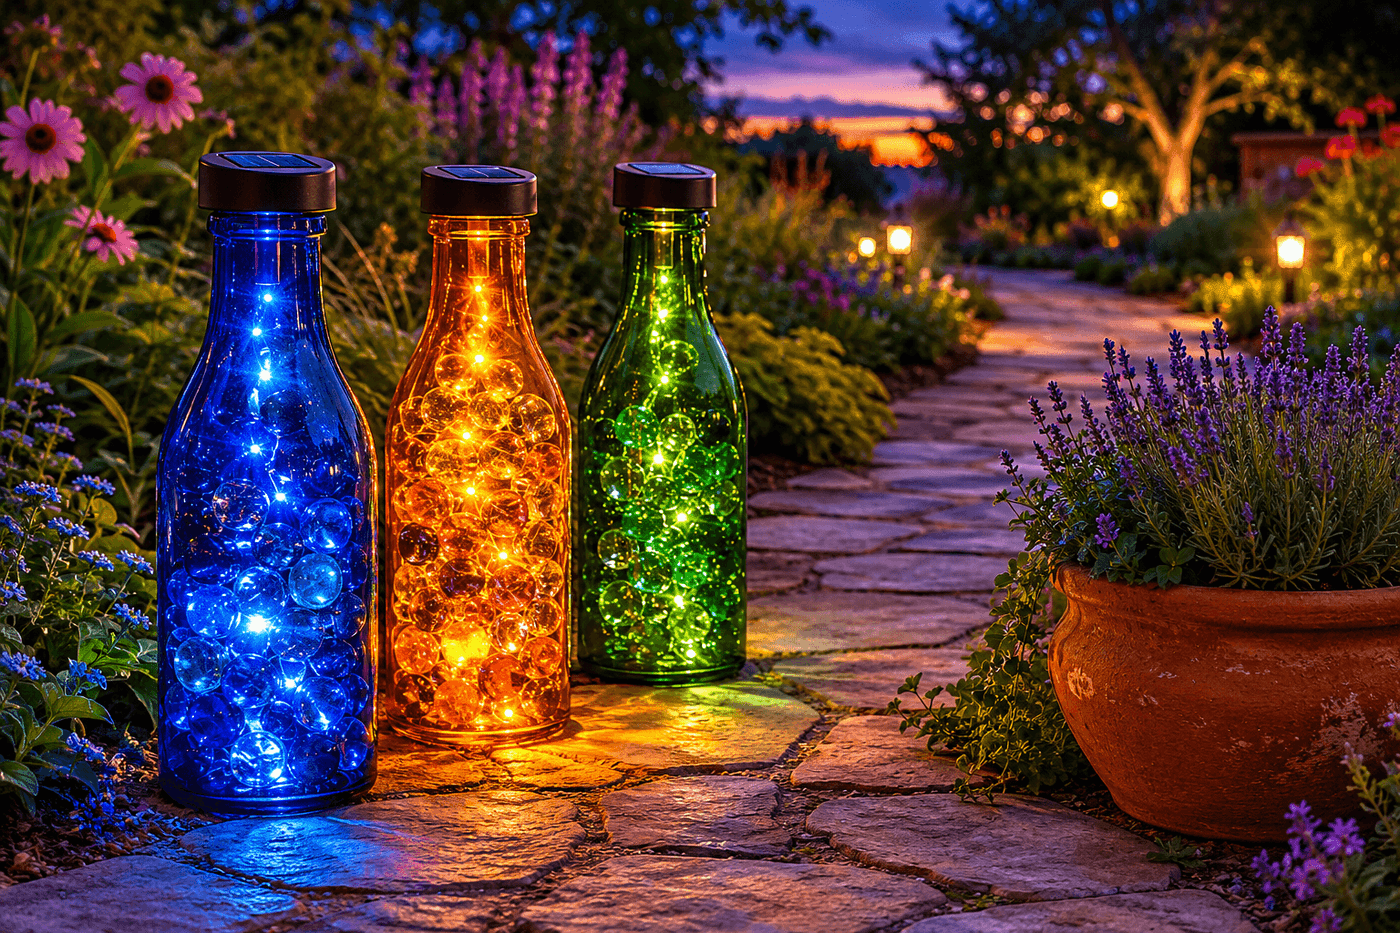
Somewhere in most homes there is a collection of beautiful glass bottles that got saved with no particular plan — wine bottles in deep amber and green, cobalt blue spirits bottles, clear glass with interesting shapes — waiting for a project worthy of them. This is that project. A pack of solar stake lights from the dollar store, a handful of glass marbles or decorative stones, and twenty minutes of assembly turns those bottles into the most genuinely magical garden lighting you've ever installed: glowing jeweled lanterns that activate automatically at dusk and illuminate a garden path or plant bed in warm, colored light that looks like it came from a high-end landscape designer. The cobalt blue especially — lit from within by a warm solar LED — produces a glow that stops people mid-conversation when they first see it in the dark. The whole thing costs about $10, uses materials you largely already have, and once it's in the ground it runs itself every night for free.
What You'll Need
- Colored glass bottles — cobalt blue, amber, and green produce the most distinct and beautiful nighttime glows; clear glass works but produces less color drama
- Solar stake lights — the simple single-LED stake style with a removable solar panel top; dollar stores and discount retailers carry packs of 4–6 for $6–8, and the stake needs to fit through the bottle neck
- Glass marbles or decorative stones — for filling bottles to add weight, stability, and the jeweled interior light effect; flat glass gems from craft stores ($2–3) catch light beautifully
- Warm water and dish soap — for cleaning bottles thoroughly before assembly; soap residue inside the bottle diffuses light unevenly
- Bottle brush — for scrubbing label adhesive and interior residue from wine or spirits bottles
- Rubbing alcohol and a rag — for removing stubborn label adhesive from bottle exteriors without scratching the glass
- Garden stakes or skewers — optional backup anchoring for bottles in loose or sandy soil where the solar stake alone may not hold upright
How to Make Them
- Clean each bottle thoroughly inside and out — wash with warm soapy water and a bottle brush to remove any residue, then remove exterior labels by soaking in warm water for 10 minutes and peeling, followed by rubbing alcohol on a rag for any remaining adhesive. A clean interior is what allows light to travel unobstructed through the glass and marbles; any cloudy residue noticeably dims the glow effect.
- Test your solar stake through the bottle neck before filling — the stake shaft needs to slide through the neck opening with the solar panel cap sitting at or just above the rim. Most standard wine and spirits bottles accommodate typical dollar store solar stakes, but neck diameter varies enough that a quick test before filling saves frustration; if the stake won't fit, a narrower bottle or a thinner stake resolves the mismatch.
- Fill each bottle with glass marbles, decorative stones, or flat glass gems to about two-thirds full — enough to weight the bottle for stability and create dense visual interest throughout the glass body, but not so full that inserting the solar stake becomes difficult. Pour slowly to avoid cracking the glass with impact, especially with heavier river stones.
- Slide the solar stake down through the bottle neck until the solar panel cap rests at the rim — the LED light element sits inside the bottle neck where it can illuminate the marbles and colored glass below, while the solar panel faces upward to charge throughout the day. The fit should be snug at the rim; if the cap sits too high above the neck, the light disperses into the air rather than into the bottle.
- Select your placement by spending a few minutes in the garden during daytime identifying spots that receive direct sun for at least six hours — solar panels charge poorly in shade, and a bottle positioned beautifully under a shrub canopy will produce a dim, short-duration glow no matter how good the light itself is. Path edges, open garden bed borders, and spots just beyond tree canopy are ideal.
- Push the assembled bottle and stake firmly into the garden soil at your chosen location, pressing straight down with even pressure until the bottle base sits just above soil level. In loose or sandy soil, press a separate garden stake into the ground immediately behind the bottle and lean the bottle against it for secondary support — a tipped bottle after the first rain is the most common failure point of this project.
- Arrange multiple bottles for maximum visual impact by varying heights using bottles of different sizes, and varying the spacing — clusters of three bottles placed close together among plants read as intentional and designed, while bottles spaced evenly at identical intervals along a path look more formal and structured. Both work; the choice depends on your garden's existing aesthetic.
- Check the charge on the first evening by covering the solar panel briefly with your hand to trigger the light and confirm the LED is functioning before dark — solar lights sometimes ship with a pull tab over the battery that must be removed before first use, and discovering this after sunset means waiting another full day for the first charge cycle to complete.
Landscape lighting designers who create nighttime garden experiences for high-end residential installations use one color-layering principle that translates directly to bottle light arrangements: never mix warm and cool light sources in the same visual zone. Standard solar stake LEDs emit a warm amber-white light that works beautifully through amber, green, and cobalt glass — but mixing these with solar lights that emit cool blue-white LEDs (common in newer solar products) in the same garden bed creates a jarring, unresolved quality that makes the space feel unsettled rather than magical after dark. When buying solar stakes for this project, hold the package next to another in the store and compare the LED color if visible, or buy all stakes from the same pack to guarantee consistent light temperature across your installation. A garden path lit entirely in warm-toned glowing bottles reads as intentional and romantic; the same path with two cool-white lights mixed in reads as unfinished.














