Blanket Ladder: Flea Market Find for $15
An $8 flea market ladder, a coat of chalk paint, and five throws draped at different depths — and the overflowing basket problem becomes the most complimented thing in the living room.
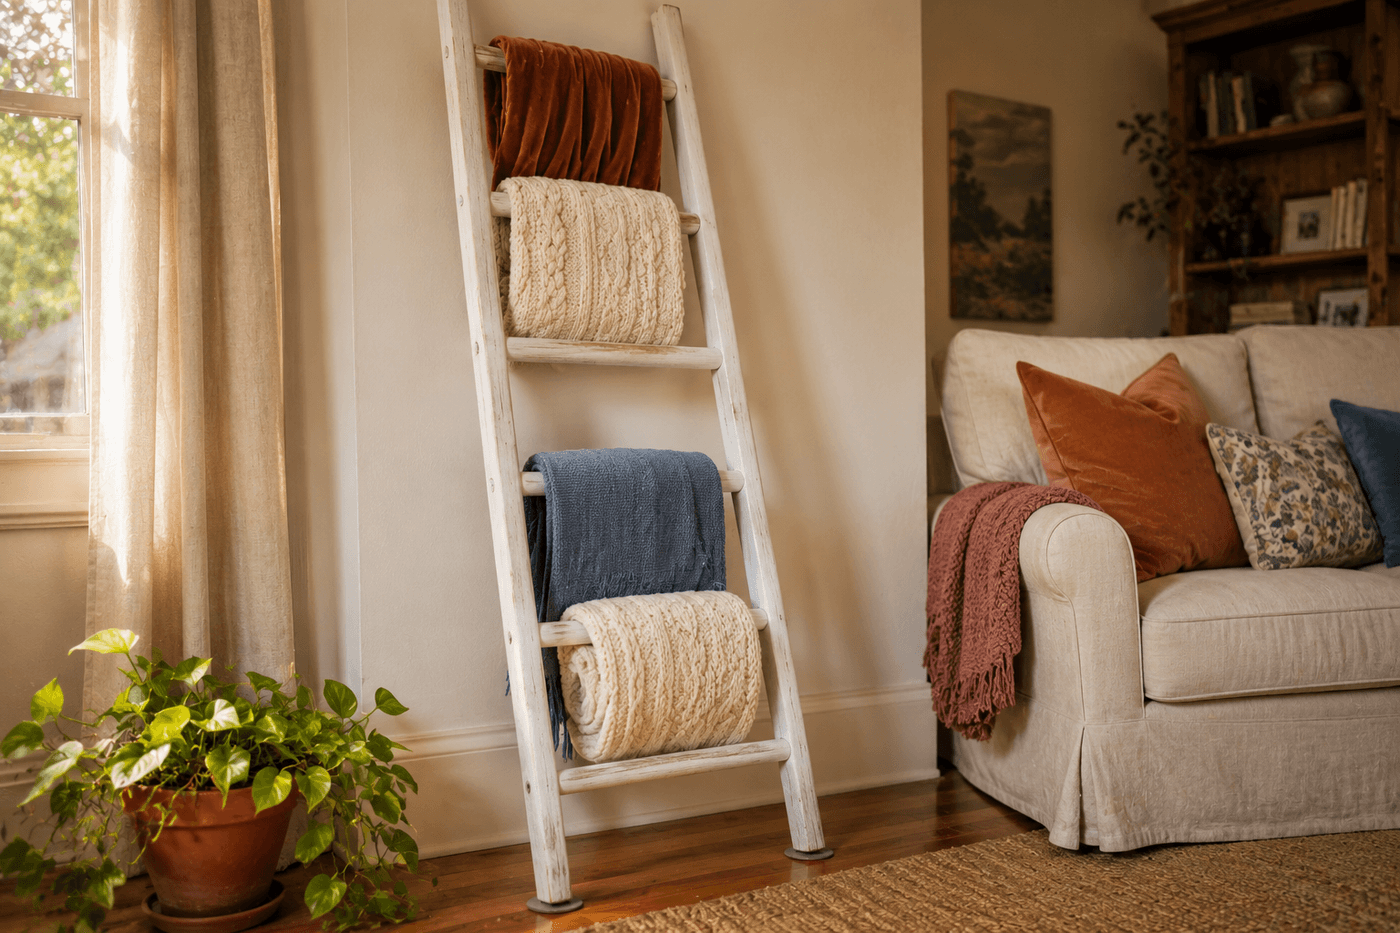
The throw blanket storage problem is a specific kind of domestic frustration — the basket is always overflowing, the blankets at the bottom are never the one you want, and reaching in to find anything disturbs the arrangement enough that it never refolds neatly. A painted wooden ladder leaning against the living room wall solves all of this while simultaneously becoming the decorative element that gets the most attention from every person who visits, which is not a typical outcome from a storage solution. An $8 flea market ladder sanded smooth and coated in creamy white chalk paint takes about an hour to prepare and another fifteen minutes to style, and the result reads as something that required significant design skill and budget to achieve because the layered textures of the draped blankets against the rustic painted wood creates exactly the cozy-meets-intentional aesthetic that interior designers charge considerably more than $15 to produce. The styling decisions — varying the fold style across rungs so textures show rather than hide, cascading the drape depths so each rung hangs at a different length, and deliberately leaving one rung empty near the top to break the composition — are the specific details that separate a ladder with blankets on it from a styled blanket ladder that earns its place in the room as a design feature rather than a storage workaround.
What You'll Need
- Wooden ladder — flea markets, thrift stores, barn sales, and Facebook Marketplace; orchard ladders and old painters' ladders are the most commonly available and both have the rung spacing and proportions ideal for blanket display; confirm all rungs are firmly attached before purchasing; a ladder with some weathering and character looks more intentional as a décor piece than a pristine one (~$5–15)
- Chalk paint in creamy white or your chosen color — chalk paint adheres to most wood surfaces without primer and dries to the flat, slightly chalky finish that reads most beautifully as a décor piece against textile textures; creamy white is the most versatile and most frequently complimented finish; matte black reads as modern, sage green as botanical, and warm terracotta as maximalist (~$8–12 for a small pot that covers a ladder with two coats)
- Clear furniture wax or matte sealer — one coat over the dried chalk paint protects the finish from the transfer and friction of blankets being draped and removed repeatedly; without sealer chalk paint rubs off onto light-colored blankets over time (~$6–8 for a small tin that lasts many projects)
- Sandpaper, 120- and 220-grit — 120-grit for removing splinters and roughness from all rung surfaces where blankets contact the wood; 220-grit for the final smoothing pass before painting; thoroughly sanded rungs prevent blanket fibers from catching and pulling during removal
- Chip brush or wide foam brush — for applying chalk paint; chalk paint is thick and brushes on easily with a chip brush; foam brushes produce a slightly smoother finish; both work well on a ladder that will have a slightly textured intentional aesthetic
- Adhesive felt pads — for the ladder feet and the two wall contact points at the top; floor pads prevent scratching on hardwood and tile; wall pads prevent the painted ladder from marking the wall surface at the lean point (~$3–5 per pack)
- Small wall hook or Command strip — optional but recommended; a single hook at the top of the ladder secured to a wall stud or with a Command strip rated for the ladder weight prevents tipping under the weight of multiple heavy blankets or an accidental bump (~$3–6)
- Wood glue and clamps — for reinforcing any loose rungs before sanding or painting; a rung loose before display will fail under blanket weight; apply wood glue, clamp overnight, and confirm rigidity before proceeding
How to Transform It
- Inspect the ladder structurally before purchasing or beginning any work — press firmly down on each rung to test for any flex or give that indicates a failing joint; look for gaps between the rung ends and the rails that suggest the glue bond has failed; and confirm the rails themselves are straight rather than bowed, which affects the lean angle once the ladder is in position. Address any loose rungs with wood glue and clamping before proceeding; a rung that fails after the ladder is styled and in position is significantly more disruptive to repair than one addressed during the transformation.
- Sand all rung surfaces thoroughly with 120-grit followed by 220-grit — every surface where blanket fabric will contact the wood repeatedly needs to be completely smooth with no raised grain, splinters, or rough spots that catch fibers. Work the folded sandpaper around the curved underside of round rungs where splinters are most likely to be found, and run a bare hand slowly along each rung after the final sanding pass to identify any remaining roughness that the eye misses but the blankets will find immediately.
- Apply chalk paint in two thin coats — chalk paint is thick enough that the instinct is to apply it heavily, but two thin coats produce a smoother, more consistent finish than one heavy coat that sags on the vertical rail surfaces and pools in the rung-to-rail joints. Allow the first coat to dry fully — typically 30–60 minutes for chalk paint — before applying the second; chalk paint that is not fully dry between coats pulls and lifts rather than covering smoothly.
- Distress the finished paint lightly with 220-grit sandpaper on the rung edges and rail corners if a more aged, worn aesthetic suits the room — light sanding at the natural wear points where real ladders would show wear reads as authentic patina rather than deliberate distressing. Leave the flat rail and rung faces fully painted and sand only at the edges where wood corners would naturally be exposed through use over time.
- Apply clear furniture wax or matte sealer over the fully dried chalk paint — work the wax into the surface with a clean cloth in circular motions, allow to haze for five minutes, and buff to a soft sheen. The wax coat is the protection that allows blankets to be draped, removed, rearranged, and handled daily without the chalk paint gradually transferring onto light-colored wool and cotton throws.
- Attach felt pads to the four contact points — both ladder feet that rest on the floor and both rail faces that contact the wall at the lean point. The wall contact pads are the specific addition that allows the ladder to be leaned against a freshly painted or wallpapered wall without leaving marks, and the floor pads are what allow repositioning without scratching the floor during the inevitable adjustments to the lean angle that happen during the styling phase.
- Position the ladder at a slight angle from the wall rather than leaning it flush — a lean of approximately 15–20 degrees from vertical produces the proportionally correct lean that photographs well, allows the blanket drapes to fall freely rather than pressing against the wall, and makes the structure feel casual and organic rather than rigidly placed. Test the position by stepping back to the primary seating area and assessing from the actual viewing angle rather than from directly beside the ladder.
- Style the blankets with deliberate variation rather than uniform draping — fold the first blanket in thirds lengthwise and drape with a long cascade on one side and a short end on the other; fold the next in half and drape centered with equal ends; roll the third loosely and lay it across a rung so the texture of the fabric is visible from the front; leave the fourth rung empty; and drape the fifth with one end pulled through the rung and looped back over the top for a more casual, gathered look. This variation in fold style is the specific styling decision that separates a ladder that looks like a storage solution from one that looks like a considered interior vignette.
Interior stylists who dress blanket ladders for residential photography and model home staging use one textile selection principle that produces a display significantly more visually compelling than most homeowners achieve by using whatever throws are already in the house: limit the blanket palette to three coordinating colors and deliberately vary the texture across all three rather than coordinating texture within the color palette. Three throws in cream, dusty blue, and warm rust that are respectively a chunky cable knit, a woven cotton, and a velvet or sherpa produce a display with color cohesion and textural depth simultaneously — the eye reads the color story as designed and the texture variation as richly layered. Three throws in similar textures even in beautiful colors read as flat and one-dimensional from across the room. Stylists who dress ladders for editorial shoots enforce this three-color, varied-texture rule as non-negotiable precisely because it is the combination that makes the arrangement photograph as an expensive, curated vignette rather than a practical storage solution — which is the exact perceptual shift that makes guests get up to touch the ladder and ask where it came from.