
DIY Projects

Recent Content

Shoe Bench Build: The Cubby Depth That Keeps Pairs Upright

Shoe Bench Build: The Cubby Depth That Keeps Pairs Upright

Build a wooden entryway shoe bench for $35—the cubby depth is what keeps boots standing instead of toppling into a pile every morning.

Style a Layered Nightstand Vignette in 1 Hour for $35

Style a Layered Nightstand Vignette in 1 Hour for $35

Turn a cluttered nightstand into a cozy styled vignette with the height-rule trick—1 hour, $35, instant bedroom upgrade.

The Cafe Rod Trick for a Fake Built-In Vanity

The Cafe Rod Trick for a Fake Built-In Vanity

Fake a built-in bathroom vanity shelf with a tiny cafe rod and basket—zero drilling, zero suction cups, full deposit intact.

Tension Rod Shelf: The Rod Width That Won't Slip

Tension Rod Shelf: The Rod Width That Won't Slip

Build a hidden double-decker shelf under your sink for $6—the rod tension width is what keeps it from crashing down on cleaning day.

Mulch Perennial Beds for Winter in 1 Hour for $25

Mulch Perennial Beds for Winter in 1 Hour for $25

Tuck your perennials in right! A 3-inch mulch blanket now saves roots from winter heave for about $25.

logo
  • Home Improvement
  • DIY Projects
  • Interior Design
  • Gardening & Outdoor
  • Real Estate
  • Home Improvement
  • DIY Projects
  • Interior Design
  • Gardening & Outdoor
  • Real Estate
  • ​

Simple Wooden Bench: Build Sturdy Seating in One Afternoon

Craft beginner-friendly entryway seating with built-in shoe storage using basic lumber
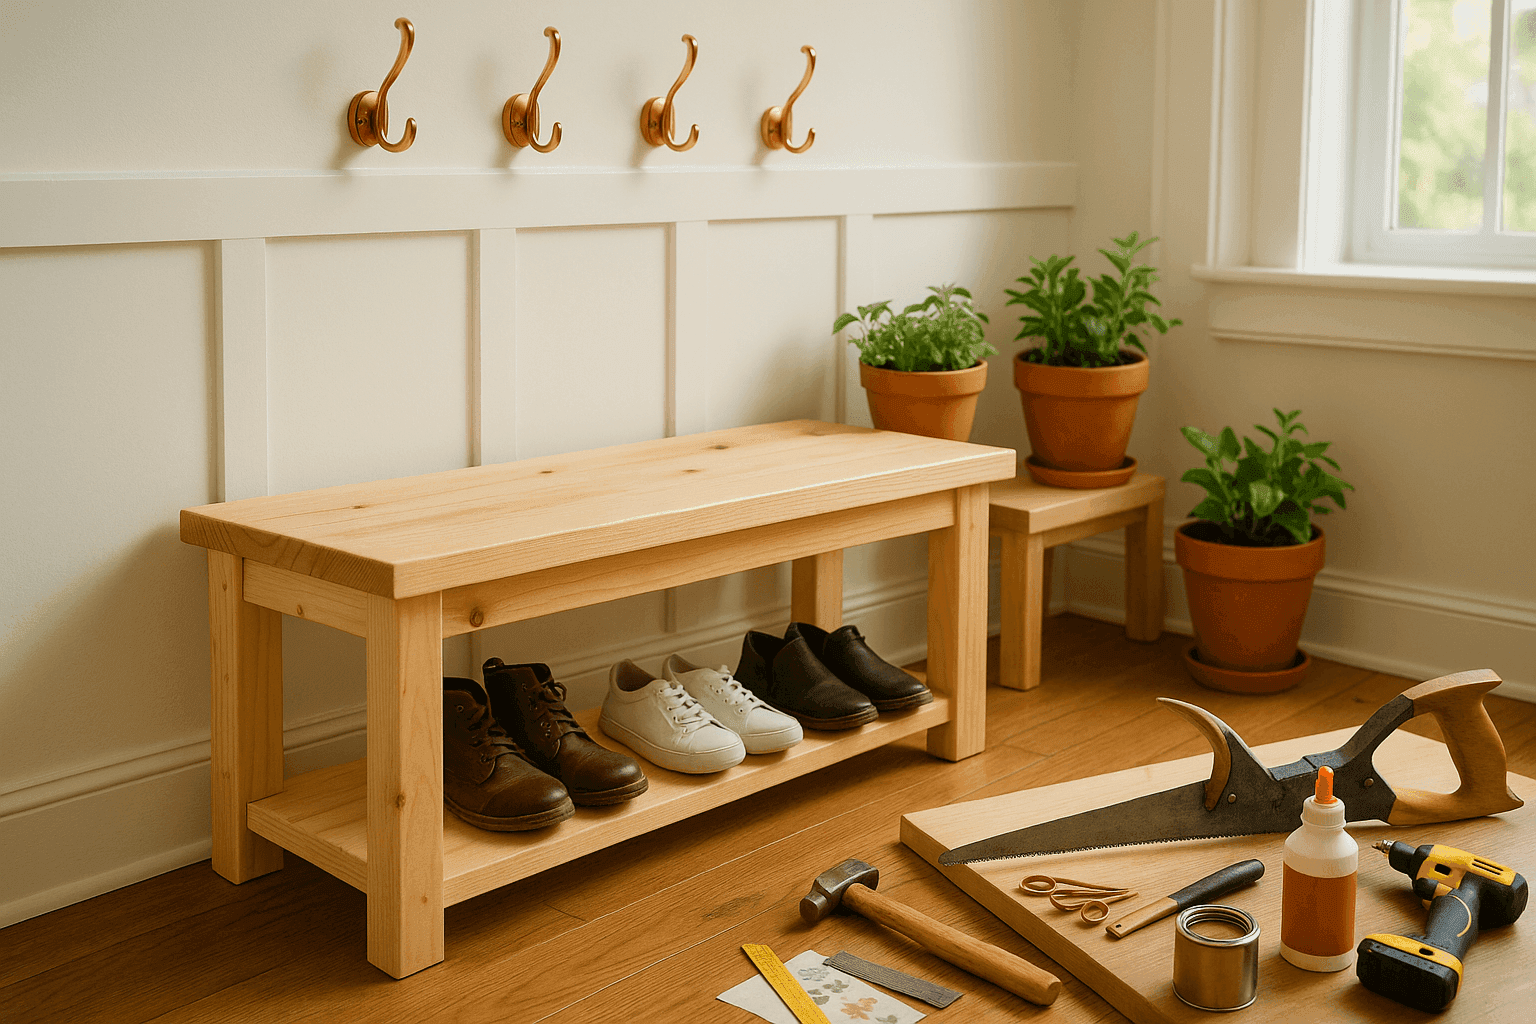
Handcrafted wooden entryway bench made from 2x4 frame with solid board top and lower shelf storing shoes in welcoming home entrance
DIY PROJECTS

Every home needs that perfect spot near the entrance where you can sit to put on shoes, drop your bag, and transition between outside chaos and indoor calm, yet quality entryway benches often cost hundreds of dollars for something you can build yourself in a single afternoon. A simple wooden bench constructed from standard 2x4 lumber for the frame and a solid board for the top creates sturdy, dependable seating that handles daily family use while costing a fraction of store-bought options. Adding a lower shelf transforms basic seating into functional storage that keeps shoes organized and off the floor, solving two common entryway problems with one straightforward project. The beauty of this beginner-friendly build is that it requires only basic tools and fundamental woodworking skills, making it the perfect confidence-building project that delivers immediately useful results you'll appreciate every single day.

Building Materials

  • Lumber Requirements: Six 8-foot 2x4 boards for frame and legs, one 1x12 board (48 inches) for seat top, one 1x10 board (48 inches) for lower shelf
  • Hardware: 2.5-inch wood screws, 3-inch wood screws for structure, wood glue, sandpaper (80 and 120 grit)
  • Tools Needed: Miter saw or circular saw, drill with bits, measuring tape, square, pencil
  • Finishing Supplies: Wood stain or paint in desired color, polyurethane sealer, brushes or rags for application
  • Safety Equipment: Safety glasses, hearing protection, work gloves, dust mask for sanding

Construction Process

  1. Cut four legs at 18 inches each from 2x4s, ensuring all cuts are perfectly square for stability
  2. Create front and back frames using 2x4s cut to 45 inches, connecting legs with wood glue and screws
  3. Connect front and back frames with side rails at desired bench depth (typically 12-14 inches)
  4. Install lower shelf supports 6 inches from floor using 2x4 cross pieces between front and back frames
  5. Attach lower shelf board to support pieces, securing with screws from underneath for clean appearance
  6. Mount top seat board to frame, centering it with equal overhang on all sides for finished look
  7. Sand entire bench thoroughly, starting with 80-grit then finishing with 120-grit for smooth surface
  8. Apply stain or paint followed by protective sealer, allowing proper drying time between coats
DESIGNER TIP

Experienced woodworkers know that pre-drilling pilot holes prevents wood splitting and makes screw installation dramatically easier, especially near board ends where splitting risk is highest. For the sturdiest bench that won't wobble over years of use, apply wood glue to every joint before driving screws – the combination creates bonds stronger than either method alone. Consider customizing the bench height based on your family's needs: standard 18-inch height works for most adults, but lowering to 15 inches makes it more accessible for children, while 20 inches creates comfortable seating for taller individuals.


Related Content

DIY Projects

04 November 2026

Post

Shoe Bench Build: The Cubby Depth That Keeps Pairs Upright

Build a wooden entryway shoe bench for $35—the cubby depth is what keeps boots standing instead of toppling into a pile every morning....

DIY Projects

03 November 2026

Post

Tension Rod Shelf: The Rod Width That Won't Slip

Build a hidden double-decker shelf under your sink for $6—the rod tension width is what keeps it from crashing down on cleaning day....

DIY Projects

01 November 2026

Post

Sew Flannel Pajama Pants in 3 Hours for $25

Ditch store PJs! Sew cozy flannel pajama pants with an elastic waist in 3 hours for about $25 — perfect for chilly November nights....

DIY Projects

31 October 2026

Post

Build a Trick-or-Treat Bucket Lantern in 1 Hour for $15

Light up Halloween night with a glowing trick-or-treat bucket lantern—1 hour, $15, and way safer than a candle in a pumpkin....

DIY Projects

30 October 2026

Post

Pour Pumpkin Spice Candles in 1 Hour for $15

Ditch the $28 mall candle—pour your own pumpkin spice soy candles at home for $15 and fill your house with fall in an hour....

DIY Projects

29 October 2026

Post

Tabletop Zen Garden: The Sand Depth That Holds Lines

Build a calming tabletop zen garden for $15—the sand depth is the one thing that decides if your rake lines actually hold or vanish....

DIY Projects

28 October 2026

Post

Wooden Dish Rack: The Dowel Angle That Drains Right

Build a slatted wood dish rack for $18—the dowel tilt angle is what actually drains water into the tray instead of pooling on your counter....

DIY Projects

27 October 2026

Post

Pool Noodle Knife Block: The Slice Depth That Stops Wobble

Turn a $1 pool noodle into a safe knife block—the slice depth is what keeps blades from wobbling loose or slicing through the foam....

DIY Projects

27 October 2026

Post

Build a Wooden Pie Carrier in 2 Hours for $25

Never smash a pie in the car again! Build a snug wooden pie carrier in 2 hours for $25—perfect timing for fall potlucks....

DIY Projects

26 October 2026

Post

Make Herb-Infused Honey in 30 Minutes for $12

Turn raw honey into a cold-season secret weapon—infuse it with thyme and ginger in 30 minutes for about $12, no fancy gear needed....

DIY Projects

25 October 2026

Post

Make Homemade Fire Cider in 20 Minutes for $15

Steep this spicy apple cider vinegar tonic now so it's ready to fight off fall colds in 4 weeks—20 minutes, $15, zero cooking skills....

DIY Projects

23 October 2026

Post

Build a Freestanding Coat Rack in 2 Hours for $35

Sick of coats piled on chairs? Build a sturdy freestanding coat rack in 2 hours for $35 — no wall drilling, just solid joinery....

DIY Projects

22 October 2026

Post

Window Frame to Pet Gate: The Hinge Set That Holds

Turn an old wooden window frame into a swinging pet gate for $22 — the hinge mortise depth is what keeps it from sagging open over time....

DIY Projects

22 October 2026

Post

Make Spiced Homemade Applesauce in 1 Hour for $12

Turn a bag of fall apples into silky spiced applesauce in an hour for $12 — no peeling required if you've got the right tool....

DIY Projects

21 October 2026

Post

Floating Nightstand: The Bracket Depth That Holds Weight

Build a wall-mounted wooden nightstand for $25 — the bracket depth inside the wood is what stops it from sagging under a lamp and books....
Terms and ConditionsDo Not Sell or Share My Personal InformationPrivacy PolicyPrivacy NoticeAccessibility NoticeUnsubscribe
Copyright © 2026 DIY HomeBoost












