
DIY Projects

Recent Content

Wooden Dish Rack: The Dowel Angle That Drains Right

Wooden Dish Rack: The Dowel Angle That Drains Right

Build a slatted wood dish rack for $18—the dowel tilt angle is what actually drains water into the tray instead of pooling on your counter.

Install a Fireplace Draft Stopper in 20 Minutes for $25

Install a Fireplace Draft Stopper in 20 Minutes for $25

Stop your chimney from sucking heat right out of the house—an inflatable draft stopper seals it in 20 minutes for about $25.

The Shower Rod Trick That Fakes a Walk-In Closet

The Shower Rod Trick That Fakes a Walk-In Closet

Steal spare closet space with a second shower-curtain rod—zero holes, zero fuss, and your full deposit stays safe.

Pool Noodle Knife Block: The Slice Depth That Stops Wobble

Pool Noodle Knife Block: The Slice Depth That Stops Wobble

Turn a $1 pool noodle into a safe knife block—the slice depth is what keeps blades from wobbling loose or slicing through the foam.

Build a Wooden Pie Carrier in 2 Hours for $25

Build a Wooden Pie Carrier in 2 Hours for $25

Never smash a pie in the car again! Build a snug wooden pie carrier in 2 hours for $25—perfect timing for fall potlucks.

logo
  • Home Improvement
  • DIY Projects
  • Interior Design
  • Gardening & Outdoor
  • Real Estate
  • Home Improvement
  • DIY Projects
  • Interior Design
  • Gardening & Outdoor
  • Real Estate
  • ​

Sew Lavender Sachets for Drawers & Closets for $8

Every drawer, every closet, every linen shelf — naturally scented and moth-free all year
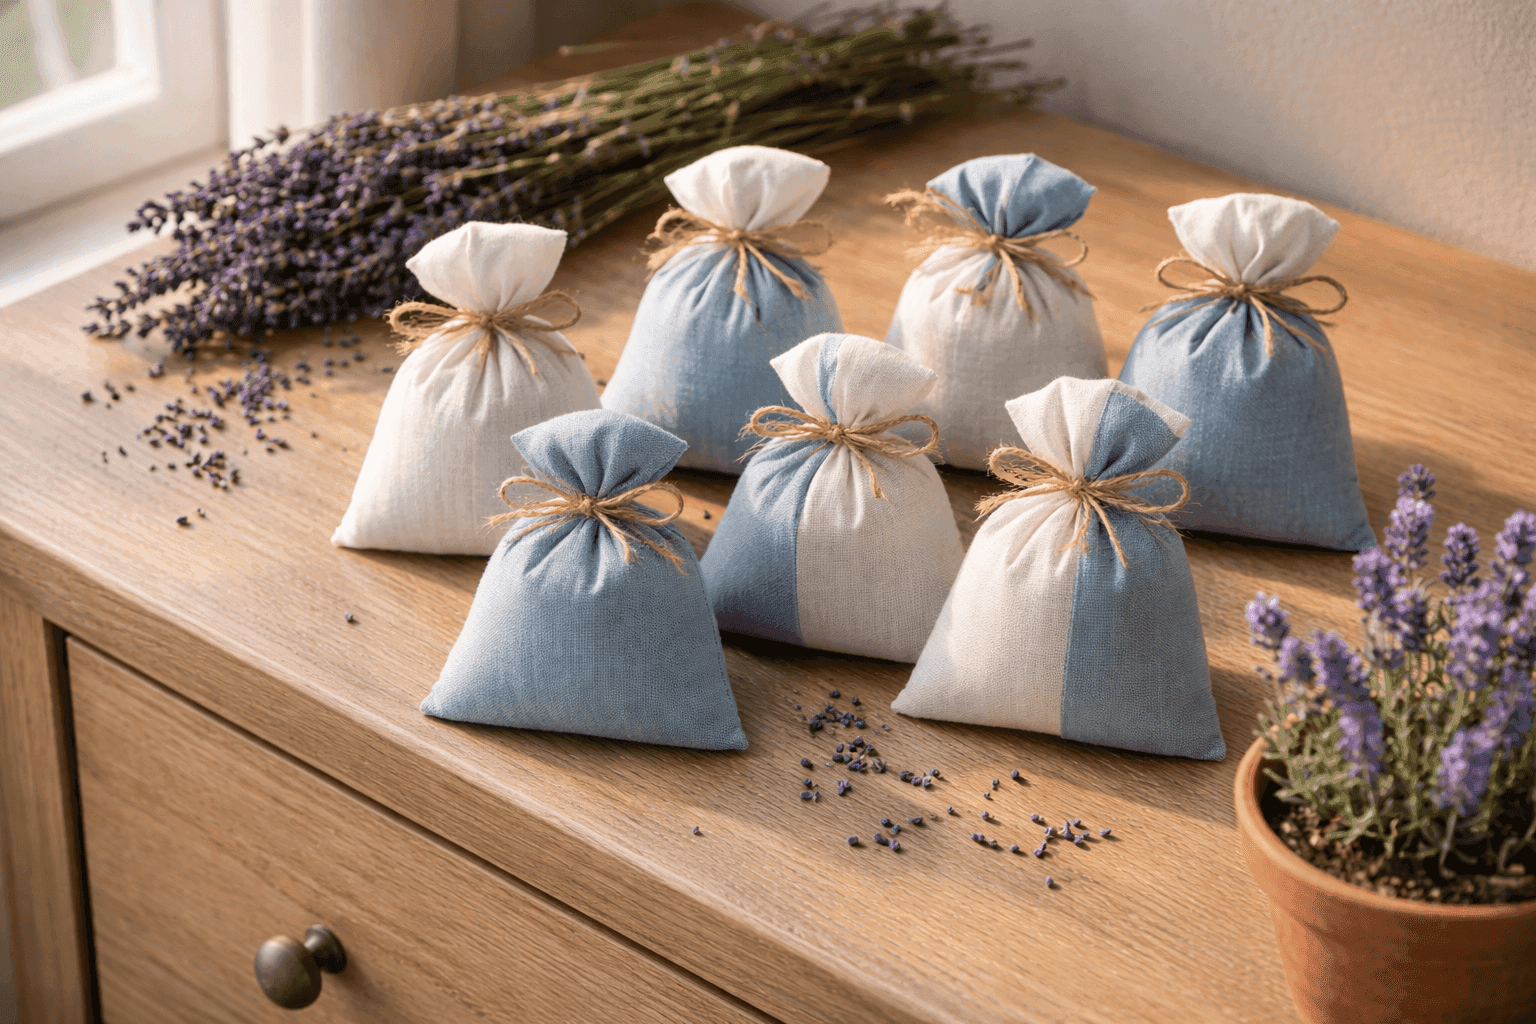
A collection of small linen lavender sachets tied with twine arranged on a wooden dresser beside a bundle of dried lavender stems
DIY Projects

If you have ever opened a drawer and been met with that flat, slightly stale fabric smell that no amount of laundry detergent quite fixes, lavender sachets are the permanent solution you didn't know existed. A single sachet tucked into a sweater drawer or hung from a closet rod transforms the whole space into something that smells genuinely luxurious — and the natural compounds in dried lavender that make it smell so good are the same ones that repel moths, which means your woolens get protection and your nose gets a treat at the same time. A bag of dried lavender buds from a craft store runs about $8 and makes enough sachets to scent your entire house, and the fabric can come from an old pillowcase or cotton shirt you were already planning to retire. This is an hour of quiet, satisfying handwork that pays you back in small sensory pleasures every single day for the better part of a year.

What You Need

  • Dried lavender buds — grow and dry your own by hanging bundles upside down for two weeks, or buy a ready-dried bag from a craft store (~$8 for a generous bag)
  • Lightweight cotton or linen fabric — an old pillowcase, cotton shirt, or muslin works perfectly; avoid synthetics, which trap scent rather than allowing it to breathe through
  • Thread in a complementary color — cotton thread is ideal for natural fabric sachets
  • Sewing machine — for the three machine-stitched sides; or needle and thread for a fully hand-sewn version
  • Hand-sewing needle — for closing the filled opening with a slip stitch
  • Scissors or rotary cutter and cutting mat — for cutting fabric squares cleanly
  • Fabric marker or tailor's chalk — for marking cutting lines
  • Ribbon, twine, or decorative cord — optional, for tying a bow at the top or creating a hanging loop for closet rod sachets (~$2–3)
  • Small funnel or folded paper cone — for filling sachets without spilling buds

How to Make Them

  1. Cut your fabric into squares or rectangles — 5×5 inches makes a drawer sachet with good visual presence, while 4×8 inches folded in half gives you a slightly larger pouch suitable for hanging. Cut all your pieces before you start sewing so the batch moves quickly.
  2. Fold each fabric piece in half with right sides facing inward, so the finished exterior faces itself and the seams will end up on the inside of the finished sachet. Pin the edges to keep layers aligned while sewing.
  3. Stitch three sides of the folded square on your sewing machine using a straight stitch and a ¼-inch seam allowance — two short sides and one long side, leaving the remaining long side open for filling. Backstitch at the beginning and end of each seam so the corners don't unravel over time.
  4. Trim the seam allowance at the two bottom corners diagonally, cutting close to but not through the stitch line. This removes the bulk that would otherwise create lumpy corners when the sachet is turned right-side out.
  5. Turn the sachet right-side out through the open top, pushing the corners out gently with a pencil or chopstick to get crisp points. Press flat with an iron if you want a tidy finished look before filling.
  6. Fill each sachet with two to three tablespoons of dried lavender buds using a small funnel or paper cone — this is the step most people rush and then regret, because overfilling makes the closing seam pucker and underfilling produces a flat, floppy sachet that loses its shape in the drawer. Aim for a sachet that feels plump but still has a little give.
  7. Fold the raw open edges inward by ¼ inch and pin the opening closed, then hand-stitch it shut with a slip stitch — small, even stitches that catch just a few threads of each folded edge so the seam is nearly invisible on the finished sachet.
  8. Finish each sachet with a length of ribbon or twine tied in a bow at the top if you like, or simply tuck them as-is into drawers, linen shelves, and closets. Refresh the scent each season by gently squeezing the sachet to release fresh oils from the buds — most sachets stay fragrant for six to twelve months before needing replacement.
DESIGNER TIP

Floral designers who work with dried botanicals always blend a tablespoon of dried orris root powder into their lavender fill before sewing the sachet closed — orris root is a natural fixative derived from iris rhizomes that has been used in perfumery for centuries, and it binds to the volatile oils in lavender and slows their evaporation significantly. A sachet made with orris root will stay fragrant two to three times longer than one filled with lavender alone, and a small bag of orris root powder from a craft or herbalist supplier costs about $5 and treats dozens of sachets. It has no scent of its own, so it extends the lavender without altering it.


Related Content

DIY Projects

28 October 2026

Post

Wooden Dish Rack: The Dowel Angle That Drains Right

Build a slatted wood dish rack for $18—the dowel tilt angle is what actually drains water into the tray instead of pooling on your counter....

DIY Projects

27 October 2026

Post

Pool Noodle Knife Block: The Slice Depth That Stops Wobble

Turn a $1 pool noodle into a safe knife block—the slice depth is what keeps blades from wobbling loose or slicing through the foam....

DIY Projects

27 October 2026

Post

Build a Wooden Pie Carrier in 2 Hours for $25

Never smash a pie in the car again! Build a snug wooden pie carrier in 2 hours for $25—perfect timing for fall potlucks....

DIY Projects

26 October 2026

Post

Make Herb-Infused Honey in 30 Minutes for $12

Turn raw honey into a cold-season secret weapon—infuse it with thyme and ginger in 30 minutes for about $12, no fancy gear needed....

DIY Projects

25 October 2026

Post

Make Homemade Fire Cider in 20 Minutes for $15

Steep this spicy apple cider vinegar tonic now so it's ready to fight off fall colds in 4 weeks—20 minutes, $15, zero cooking skills....

DIY Projects

23 October 2026

Post

Build a Freestanding Coat Rack in 2 Hours for $35

Sick of coats piled on chairs? Build a sturdy freestanding coat rack in 2 hours for $35 — no wall drilling, just solid joinery....

DIY Projects

22 October 2026

Post

Window Frame to Pet Gate: The Hinge Set That Holds

Turn an old wooden window frame into a swinging pet gate for $22 — the hinge mortise depth is what keeps it from sagging open over time....

DIY Projects

22 October 2026

Post

Make Spiced Homemade Applesauce in 1 Hour for $12

Turn a bag of fall apples into silky spiced applesauce in an hour for $12 — no peeling required if you've got the right tool....

DIY Projects

21 October 2026

Post

Floating Nightstand: The Bracket Depth That Holds Weight

Build a wall-mounted wooden nightstand for $25 — the bracket depth inside the wood is what stops it from sagging under a lamp and books....

DIY Projects

20 October 2026

Post

Foam Letter Wall Art: The Spacing Trick for $6

Turn dollar-store foam letters into custom nursery wall art for $6 — the spacing template is what keeps names looking store-bought, not crooked....

DIY Projects

19 October 2026

Post

Build a Tabletop Fire Bowl in 90 Minutes for $35

Turn a $35 metal bowl and lava rock into a tabletop fire feature perfect for crisp fall evenings and s'mores nights....

DIY Projects

16 October 2026

Post

Build a Pet Food Storage Bin in 1 Hour for $30

Stop losing the war against stale kibble and pantry moths—build an airtight pet food bin in an hour for $30....

DIY Projects

15 October 2026

Post

Whittling a Wooden Spoon

Try meditative spoon whittling for under $15—cutting with the grain (not against it) is the one rule that keeps your blank from splitting mid-carve....

DIY Projects

14 October 2026

Post

Wooden Pet Ramp: The Cleat Spacing That Stops Slips

Build a wooden pet ramp for $20 — the traction cleat spacing is what keeps your dog's paws from sliding on the incline....

DIY Projects

13 October 2026

Post

Build a Compost Sifter Box in 1 Hour for $18

Turn chunky compost into fine garden gold! Build a simple hardware-cloth sifter box in an hour for $18—no more rock-and-stick surprises....
Terms and ConditionsDo Not Sell or Share My Personal InformationPrivacy PolicyPrivacy NoticeAccessibility NoticeUnsubscribe
Copyright © 2026 DIY HomeBoost












