
DIY Projects

Recent Content

Wooden Dish Rack: The Dowel Angle That Drains Right

Wooden Dish Rack: The Dowel Angle That Drains Right

Build a slatted wood dish rack for $18—the dowel tilt angle is what actually drains water into the tray instead of pooling on your counter.

Install a Fireplace Draft Stopper in 20 Minutes for $25

Install a Fireplace Draft Stopper in 20 Minutes for $25

Stop your chimney from sucking heat right out of the house—an inflatable draft stopper seals it in 20 minutes for about $25.

The Shower Rod Trick That Fakes a Walk-In Closet

The Shower Rod Trick That Fakes a Walk-In Closet

Steal spare closet space with a second shower-curtain rod—zero holes, zero fuss, and your full deposit stays safe.

Pool Noodle Knife Block: The Slice Depth That Stops Wobble

Pool Noodle Knife Block: The Slice Depth That Stops Wobble

Turn a $1 pool noodle into a safe knife block—the slice depth is what keeps blades from wobbling loose or slicing through the foam.

Build a Wooden Pie Carrier in 2 Hours for $25

Build a Wooden Pie Carrier in 2 Hours for $25

Never smash a pie in the car again! Build a snug wooden pie carrier in 2 hours for $25—perfect timing for fall potlucks.

logo
  • Home Improvement
  • DIY Projects
  • Interior Design
  • Gardening & Outdoor
  • Real Estate
  • Home Improvement
  • DIY Projects
  • Interior Design
  • Gardening & Outdoor
  • Real Estate
  • ​

Million Dollar Look: Transform $1 Plates Into Luxe Chargers

Create an elegant table setting that looks like you spent hundreds, not pennies
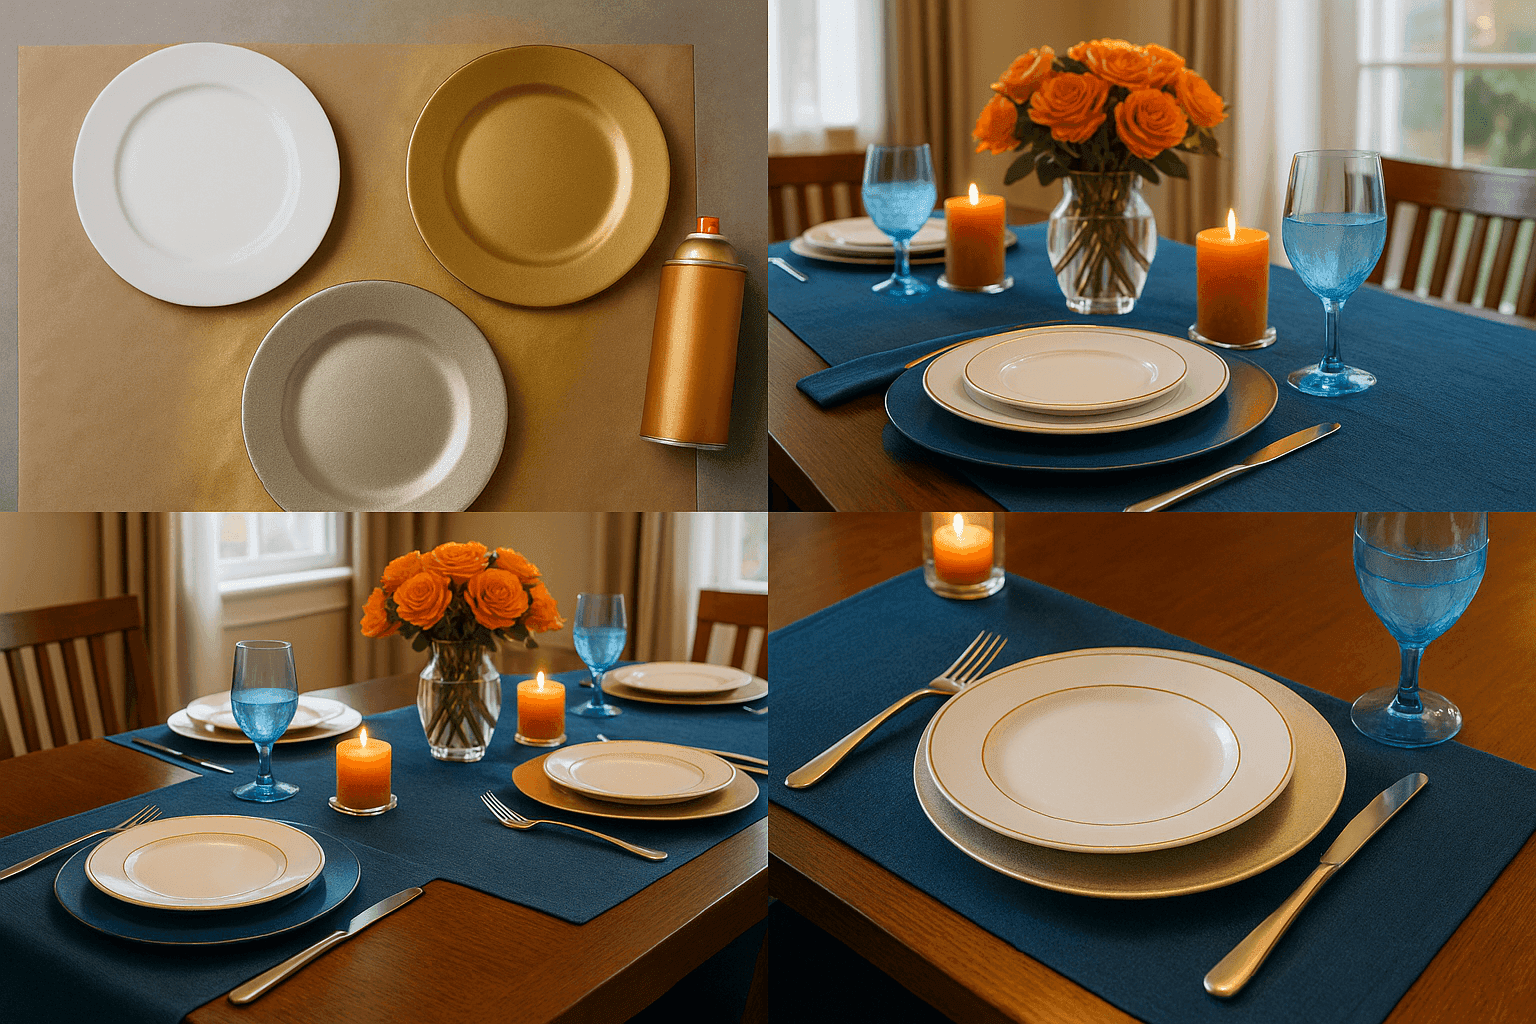
Elegant dining table with metallic gold spray-painted charger plates creating luxurious table setting on budget
DIY PROJECTS

The secret that fancy restaurants and high-end event planners don't want you to know is that those gorgeous metallic charger plates that make table settings look so expensive can be created for less than the cost of a single designer charger. Dollar store plastic plates, when transformed with the right metallic spray paint technique, become indistinguishable from luxury tableware that costs twenty times more. The magic lies in understanding that it's not about the base material – it's about the finish, the color, and the confidence with which you present your table. These DIY chargers add that layer of sophistication that elevates everything placed on top, from everyday dinnerware to special occasion china, creating the kind of polished table setting that makes guests feel truly pampered. The best part is that you can afford to have multiple sets in different metallic finishes, giving you the flexibility to match any theme or season without breaking the budget.

Budget Luxury Materials (Under $12)

  • Plastic plates - 6-8 large dinner plates from dollar store ($6-8)
  • Metallic spray paint - Gold, silver, or copper finish ($3-5)
  • Primer spray - Plastic-adhering primer for durability ($3-4)
  • Fine-grit sandpaper - 400 grit for surface preparation ($2-3)
  • Tack cloth - Remove dust between coats
  • Cardboard or newspapers - Protect spray area
  • Disposable gloves - Keep hands clean during process
  • Spray booth setup - Box or well-ventilated outdoor area

Luxury Transformation Steps

  1. Clean plates thoroughly with degreasing dish soap and dry completely
  2. Sand lightly with fine-grit sandpaper to create surface texture for paint adhesion
  3. Remove all dust with tack cloth before applying any primer or paint
  4. Apply plastic primer in thin, even coats allowing proper drying time
  5. Spray first metallic coat using light, overlapping strokes from 8-10 inches away
  6. Build color with 2-3 thin coats rather than one heavy application
  7. Check coverage in good lighting, touching up any missed spots carefully
  8. Cure for full 24 hours before handling to ensure maximum durability
DESIGNER TIP

Choose plates with interesting rim details or subtle texture – these design elements become much more pronounced and elegant once painted in metallics. For the most luxurious look, stick with warm gold or rich bronze rather than bright, brassy finishes. Create depth by lightly misting a slightly darker metallic shade around the rim edges after your base color is completely dry. Store your finished chargers between layers of tissue paper to prevent scratching, and hand-wash gently when needed. Remember, these are decorative chargers, not meant for direct food contact – always place dinner plates on top for serving.


Related Content

DIY Projects

28 October 2026

Post

Wooden Dish Rack: The Dowel Angle That Drains Right

Build a slatted wood dish rack for $18—the dowel tilt angle is what actually drains water into the tray instead of pooling on your counter....

DIY Projects

27 October 2026

Post

Pool Noodle Knife Block: The Slice Depth That Stops Wobble

Turn a $1 pool noodle into a safe knife block—the slice depth is what keeps blades from wobbling loose or slicing through the foam....

DIY Projects

27 October 2026

Post

Build a Wooden Pie Carrier in 2 Hours for $25

Never smash a pie in the car again! Build a snug wooden pie carrier in 2 hours for $25—perfect timing for fall potlucks....

DIY Projects

26 October 2026

Post

Make Herb-Infused Honey in 30 Minutes for $12

Turn raw honey into a cold-season secret weapon—infuse it with thyme and ginger in 30 minutes for about $12, no fancy gear needed....

DIY Projects

25 October 2026

Post

Make Homemade Fire Cider in 20 Minutes for $15

Steep this spicy apple cider vinegar tonic now so it's ready to fight off fall colds in 4 weeks—20 minutes, $15, zero cooking skills....

DIY Projects

23 October 2026

Post

Build a Freestanding Coat Rack in 2 Hours for $35

Sick of coats piled on chairs? Build a sturdy freestanding coat rack in 2 hours for $35 — no wall drilling, just solid joinery....

DIY Projects

22 October 2026

Post

Window Frame to Pet Gate: The Hinge Set That Holds

Turn an old wooden window frame into a swinging pet gate for $22 — the hinge mortise depth is what keeps it from sagging open over time....

DIY Projects

22 October 2026

Post

Make Spiced Homemade Applesauce in 1 Hour for $12

Turn a bag of fall apples into silky spiced applesauce in an hour for $12 — no peeling required if you've got the right tool....

DIY Projects

21 October 2026

Post

Floating Nightstand: The Bracket Depth That Holds Weight

Build a wall-mounted wooden nightstand for $25 — the bracket depth inside the wood is what stops it from sagging under a lamp and books....

DIY Projects

20 October 2026

Post

Foam Letter Wall Art: The Spacing Trick for $6

Turn dollar-store foam letters into custom nursery wall art for $6 — the spacing template is what keeps names looking store-bought, not crooked....

DIY Projects

19 October 2026

Post

Build a Tabletop Fire Bowl in 90 Minutes for $35

Turn a $35 metal bowl and lava rock into a tabletop fire feature perfect for crisp fall evenings and s'mores nights....

DIY Projects

16 October 2026

Post

Build a Pet Food Storage Bin in 1 Hour for $30

Stop losing the war against stale kibble and pantry moths—build an airtight pet food bin in an hour for $30....

DIY Projects

15 October 2026

Post

Whittling a Wooden Spoon

Try meditative spoon whittling for under $15—cutting with the grain (not against it) is the one rule that keeps your blank from splitting mid-carve....

DIY Projects

14 October 2026

Post

Wooden Pet Ramp: The Cleat Spacing That Stops Slips

Build a wooden pet ramp for $20 — the traction cleat spacing is what keeps your dog's paws from sliding on the incline....

DIY Projects

13 October 2026

Post

Build a Compost Sifter Box in 1 Hour for $18

Turn chunky compost into fine garden gold! Build a simple hardware-cloth sifter box in an hour for $18—no more rock-and-stick surprises....
Terms and ConditionsDo Not Sell or Share My Personal InformationPrivacy PolicyPrivacy NoticeAccessibility NoticeUnsubscribe
Copyright © 2026 DIY HomeBoost












