Guest Room Ready: Assemble Welcome Kits That Anticipate Every Need
Transform your spare room into hotel-level hospitality with one prepared basket

The difference between guests who feel awkward asking for basic necessities and guests who rave about your hospitality comes down to one simple solution: a pre-assembled welcome kit that anticipates needs before they arise, eliminating those midnight "do you have a phone charger?" conversations that make everyone uncomfortable. These thoughtfully stocked baskets transform spare rooms from "place to crash" into hotel-quality guest experiences that make visitors feel genuinely cared for rather than just accommodated. Creating these kits costs around $40-60 per room for supplies that last multiple visits, takes about an hour to assemble initially, and becomes your secret weapon for stress-free hosting because everything guests might need is already waiting in their room rather than requiring you to scramble at 11 PM. The genius is in the preparation—once you've assembled these kits, hosting overnight guests becomes as simple as placing a fresh basket in the room and making the bed, reducing your hosting stress dramatically while increasing guest comfort exponentially. Whether you're hosting one guest room or three, these welcome kits create that "someone really thought about my comfort" feeling that transforms ordinary hospitality into the kind people talk about long after they leave.
What You'll Need
- Basket Foundation:
- Decorative basket or bin, 12-16 inches ($12-20)
- Choose wipeable materials for easy maintenance
- Handles make moving basket easier
- Natural woven, wire, or plastic containers work
- Charging Essentials:
- Multi-port USB charging block ($10-15)
- iPhone lightning cable ($5-8)
- USB-C cable for Android phones ($5-8)
- Micro-USB cable for older devices ($3-5)
- Toiletry Supplies:
- Travel-size shampoo and conditioner ($3-5)
- Body wash or soap bars ($2-4)
- Toothbrush and toothpaste travel sets ($3-5)
- Disposable razors ($3-5)
- Feminine hygiene products ($5-8)
- Pain reliever packets ($3-5)
- Comfort Items:
- Fresh hand towels and washcloths ($8-12)
- Bottled water ($3-5)
- Small snacks (granola bars, mints) ($5-8)
- Tissues box ($2-3)
- Small notepad and pen ($2-3)
- Optional Enhancements:
- WiFi password card
- Local restaurant menus
- Flashlight or night light
- Sleep mask and earplugs
- Playing cards or reading material
Assembly Steps
- Choose your basket size based on available surface space in your guest room—nightstand, dresser top, or closet shelf all work as kit locations where guests will naturally discover them.
- Gather all supplies in one location before assembly, checking expiration dates on medications and toiletries, ensuring everything you're providing is fresh and usable rather than old products from your own failed travel plans.
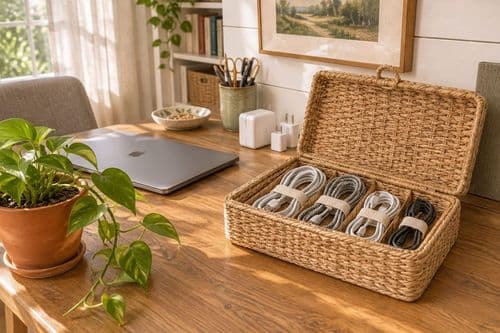
- Organize charging cables by wrapping them neatly with velcro ties or twist ties, preventing the tangled mess that makes tech supplies look careless rather than thoughtfully provided.
- Group similar items together using small zipper pouches or containers within the main basket—all toiletries in one section, charging gear in another, snacks grouped separately for easy identification.
- Layer items strategically with frequently needed items on top (phone chargers, towels) and less urgent supplies underneath (extra toiletries, medications), creating intuitive access without requiring guests to dig through everything.
- Label or create a small welcome card explaining what's available in the basket, giving guests explicit permission to use anything they need without feeling like they're imposing or taking things they shouldn't touch.
- Add fresh towels rolled or folded on top of the basket contents, creating an immediate visual cue that this basket contains things specifically meant for the current guest rather than random household storage.
- Position the completed kit prominently in the guest room where it's immediately visible upon entry—dresser top or nightstand works best, with the welcome card facing out so guests know it's for them.
- Restock after each guest's departure, replacing used items, laundering towels, and refreshing anything that's been opened or depleted, maintaining kit readiness for the next overnight visitor without last-minute scrambling.
Professional hoteliers maximize guest comfort by including a printed card with WiFi password, house alarm code (if relevant), breakfast timing, and coffee maker location, eliminating awkward middle-of-the-night questions about basics. For households with multiple guest rooms, create different basket aesthetics for each space rather than identical kits—this makes each room feel uniquely considered and helps you track which supplies belong where when restocking. The charging cable assortment is non-negotiable in modern hosting: iPhone, USB-C, and micro-USB covers approximately 95% of guest phone types, preventing the frustrated "does anyone have an iPhone charger?" questions that inevitably arise when someone's battery dies. Consider guest demographics when stocking toiletries—if you frequently host older relatives, include reading glasses in multiple strengths; if hosting families with kids, add children's pain reliever and kid-friendly snacks to a separate section. The bottles-versus-packets debate: travel-size bottles look more upscale but expire and get gross between uses, while individually-sealed packets stay fresh indefinitely and feel more hygienic to guests who appreciate single-use items. Store your assembled kits in a closet between hosting sessions, not in the actual guest room, so they stay fresh and ready rather than collecting dust or getting accidentally used by household members who forget these are guest supplies. The ultimate hospitality move is including a small local treat in the basket—artisan chocolate from a nearby shop, specialty coffee from a local roaster, or honey from a farmers market—giving guests a taste of your community while showing genuine thoughtfulness beyond generic hotel amenities. Remember that these kits eliminate 90% of guest requests: charging cables, toiletries, towels, and basic medications cover virtually every "do you have a..." question, letting you focus on actual conversation and quality time rather than constantly fetching forgotten items from various closets around your house.