Freezer Organization That Makes Holiday Cooking Seamless
Purge, organize, and create strategic space for make-ahead dishes and inevitable leftovers before the cooking chaos begins
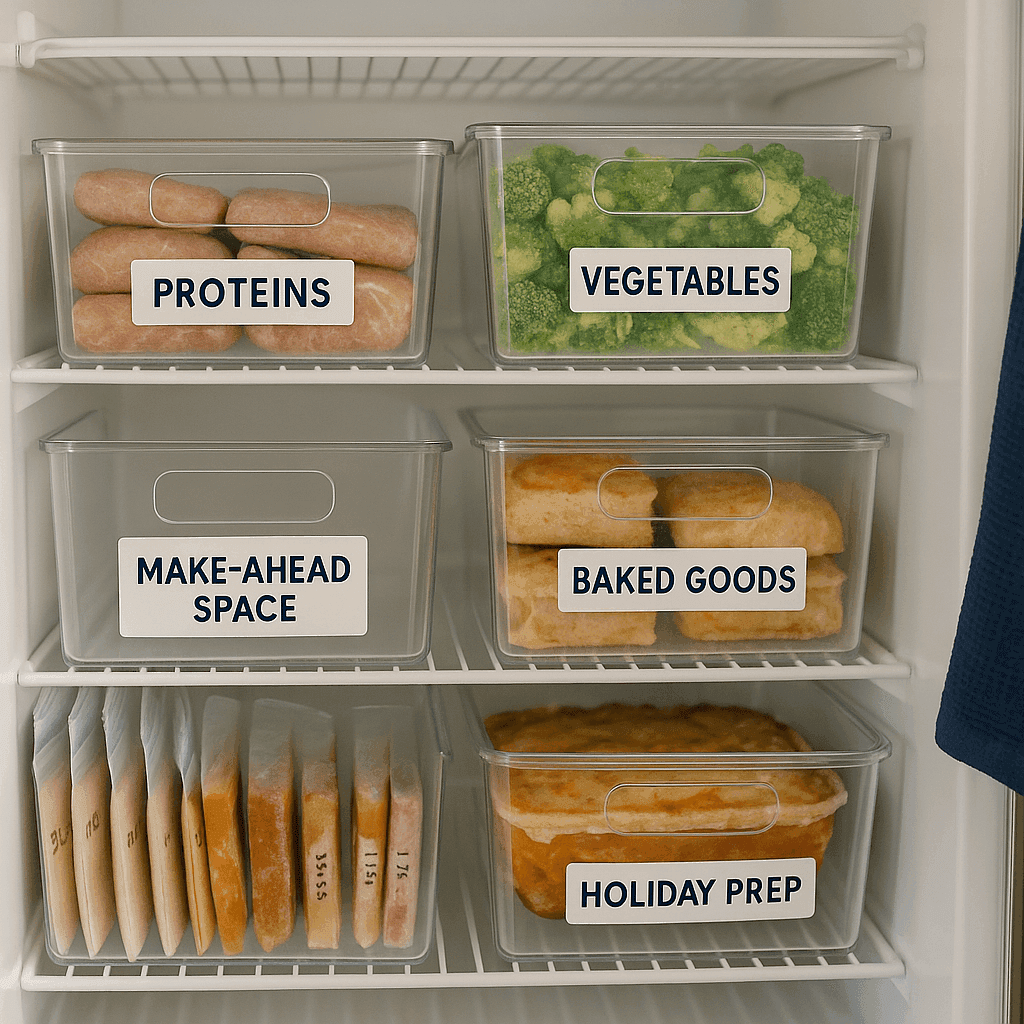
I used to approach holiday cooking with ambitious make-ahead plans only to discover my freezer was so crammed with mystery items from 2019 that I couldn't fit a single casserole dish, forcing frantic last-minute cooking instead of the calm, prepared hosting I'd envisioned. Organizing your freezer before holiday meal prep isn't just about tidiness—it's strategic planning that creates physical and mental space for the marathon cooking sessions ahead while eliminating the stress of searching through frozen chaos for ingredients you need right now. This purge-and-organize mission takes 2-3 hours including defrosting time if needed, costs maybe $20 for bins and labels, but delivers immediate dividends in reduced food waste, easier meal planning, and actual usable space for holiday dishes. I tackle this project the first weekend of December now, treating it like pre-season training for the cooking marathon ahead, and the difference in my stress levels and cooking efficiency is genuinely transformative. Beyond the practical benefits of knowing exactly what you have and where to find it, there's psychological satisfaction in starting holiday entertaining with truly organized systems rather than improvising around dysfunctional chaos. The timing is perfect right now before you start making pies, prepping casseroles, or buying ingredients—you need to know what space you actually have available and what's lurking in the back taking up valuable real estate.
What You'll Need
- Organization Tools:
- Clear plastic bins or baskets for categorizing
- Choose stackable sizes that fit your freezer
- Wire bins work for chest freezers
- Freezer-safe bags in multiple sizes
- Label maker or freezer tape and permanent marker
- Cleaning Supplies:
- Coolers or ice chests for temporary storage
- Ice packs to keep food frozen during cleaning
- All-purpose cleaner and warm water
- Microfiber cloths and paper towels
- Baking soda for odor absorption
- Sorting System:
- Large trash bags for discards
- Notepad for inventory list
- Sharpie for dating new items
- Timer for tracking how long food has been out
- Optional Upgrades:
- Freezer thermometer to verify temperature
- Shelf dividers for upright freezers
- Lazy Susan for corner access
- Whiteboard for door inventory tracking
- Total Cost: $15-30 for bins and labels
Organization Steps
- Empty completely by removing every single item from your freezer, working quickly to prevent thawing but thoroughly enough to see exactly what you have. Place items in coolers with ice packs or, if your timing is good, do this on a cold day when you can store food temporarily in a garage or porch.
- Check expiration dates ruthlessly by discarding anything from before this year, items with severe freezer burn, unidentifiable mystery packages, and foods you realistically won't eat despite good intentions. If you can't remember when you froze it or what it is, it's time to let go without guilt.
- Clean interior thoroughly by wiping down all surfaces, shelves, and drawers with warm soapy water, paying attention to sticky spots and spills that accumulated over time. For stubborn odors, wipe with baking soda solution and leave an open box of baking soda in the freezer to absorb smells going forward.
- Group by categories while items are still out by sorting into logical zones: proteins by type, vegetables, prepared meals, baked goods, ice cream and treats, holiday-specific items. This categorical thinking makes finding what you need infinitely faster than random placement based on wherever things fit.
- Assign zones strategically by placing frequently accessed items at eye level or in easiest-reach locations, relegating less-used specialty items to back corners or bottom drawers. Holiday-specific frozen ingredients should get prime real estate right now since you'll access them constantly over the next month.
- Use bins for containment by assigning one clear bin per category, which prevents small items from getting lost in back corners and makes pulling entire categories forward easy when you need access. Clear bins let you see contents at a glance without removing everything to check what's inside.
- Label everything clearly using waterproof labels on bins noting category and on individual packages noting contents and freeze date. The extra minute spent labeling saves countless minutes of frustrated searching later, and proper dating prevents keeping food past safe consumption windows.
- Create make-ahead space by designating one entire shelf or drawer for upcoming holiday dishes, leaving this zone completely empty now so you have guaranteed room when you start batch cooking. Knowing this space exists prevents the panic of making dishes with nowhere to store them.
- Reserve leftover capacity by leaving approximately 25% of your freezer empty to accommodate post-holiday storage when you'll frantically freeze extra portions to avoid waste. This breathing room also improves freezer efficiency since overpacked freezers work harder to maintain temperature.
- Create inventory system by photographing your organized freezer with phone, writing a quick list of contents by zone, or using a whiteboard on the freezer door to track what's inside. This external reference prevents opening the freezer repeatedly while deciding what to make, which wastes energy and causes temperature fluctuations.
Professional organizers and meal prep experts have insider knowledge about freezer organization that goes far beyond basic tidying to create truly functional systems. The most important principle is "FIFO"—First In, First Out—which means always placing newly frozen items behind older ones so you naturally use older inventory first and prevent waste from forgotten items languishing in back corners. Professional chefs swear by the "flat freeze" method for soups, sauces, and liquids: freeze them flat in labeled freezer bags, then store vertically like file folders in bins, which saves enormo