Bubbly Morning: Create a Festive Mimosa Bar for Christmas
Elevate breakfast into celebration with an elegant self-serve champagne station
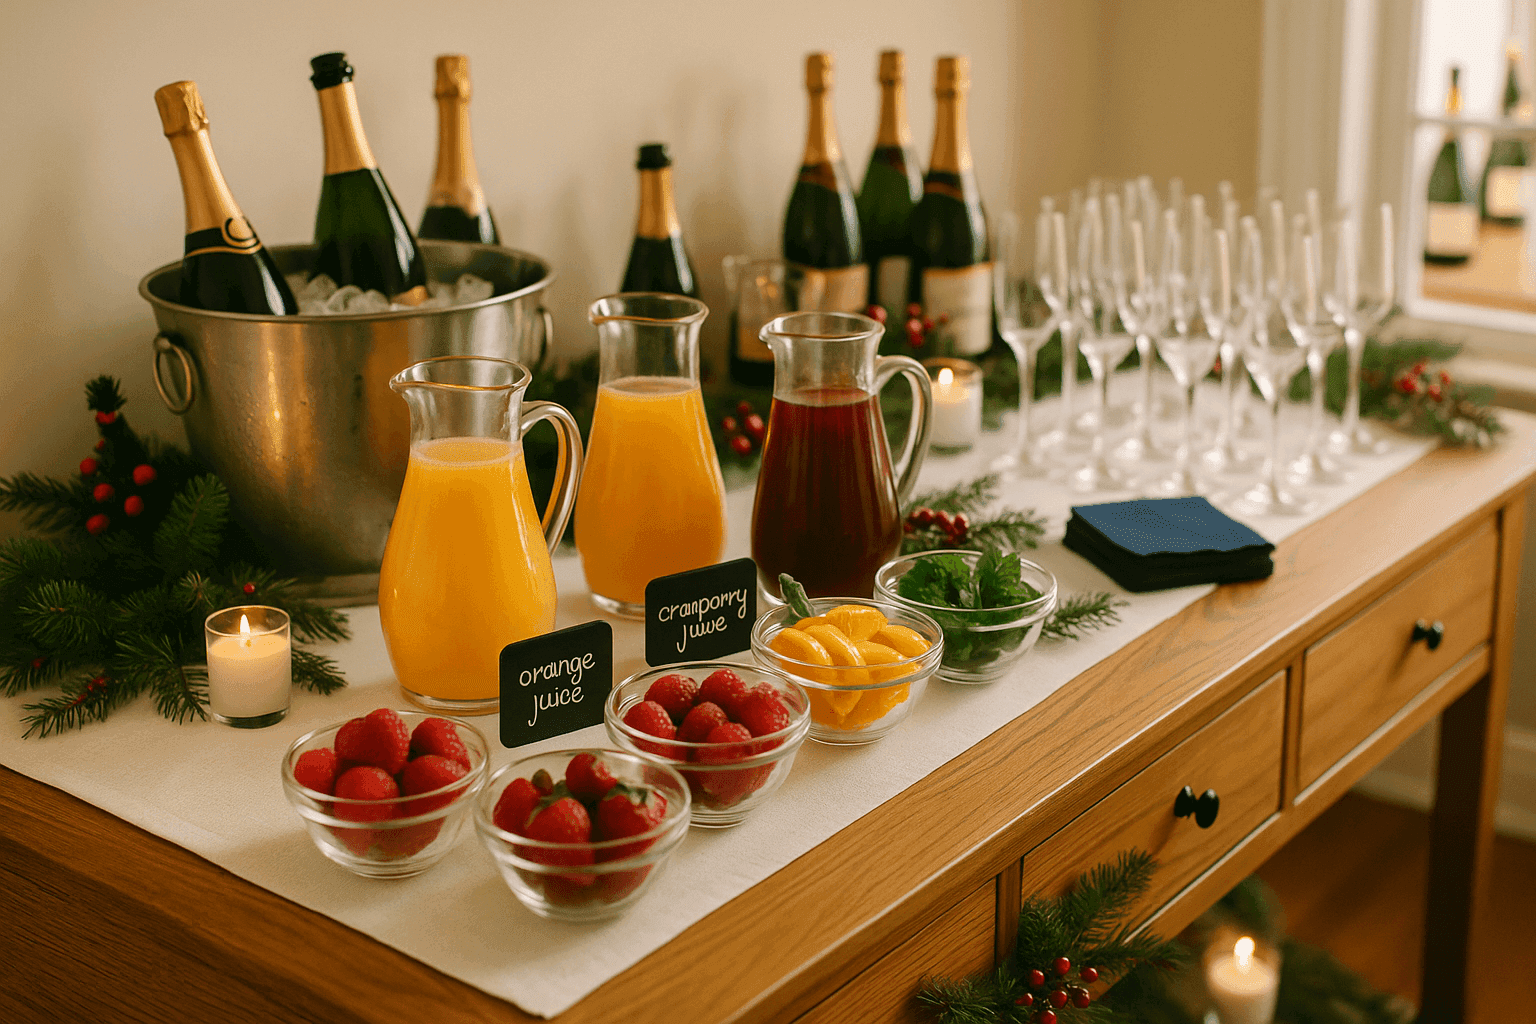
There's something inherently celebratory about champagne that transforms ordinary breakfast into special occasion territory—and a beautifully arranged mimosa bar station tells everyone that Christmas morning isn't just about gifts, it's about savoring unhurried time together with proper toasts and festive drinks that make the entire day feel like a party. This elegant setup takes about 30 minutes to arrange the evening before, costs around $40-60 for champagne and mixers depending on guest count and quality preferences, and creates that hotel brunch atmosphere that makes people feel genuinely pampered rather than just fed breakfast at your house. The genius is in the self-serve format—guests customize their own drinks to preferred champagne-to-juice ratios, you're not stuck playing bartender when you'd rather be opening presents, and the visual display of bottles, juices, and fresh fruit creates Instagram-worthy morning scenes that capture the festive spirit beautifully. Whether you're hosting adults-only Christmas or including teenagers and non-drinkers who can build their own fancy mocktails from the juice and fruit bar, this station approach accommodates everyone while establishing from the moment people wake up that today is special, today is celebration, and today deserves drinks that sparkle as much as the occasion itself.
What You'll Need
- Champagne & Sparkling Wine:
- 2-3 bottles champagne or prosecco ($10-20 per bottle)
- Plan 1 bottle per 4-5 guests
- Chill thoroughly the night before
- Prosecco offers budget-friendly sparkle
- Juice Selection:
- Fresh orange juice, 2-3 cartons ($6-10)
- Cranberry juice for color variation ($4-6)
- Pineapple juice for tropical twist ($4-6)
- Grapefruit juice for adults (optional, $4-6)
- Pomegranate juice for festive red color ($5-8)
- Fresh Fruit Garnishes:
- Fresh strawberries, sliced ($4-6)
- Fresh raspberries or blueberries ($5-8)
- Orange slices for classic garnish ($3-5)
- Pomegranate arils for jewel-like sparkle ($4-6)
- Fresh mint sprigs for aromatic garnish ($3-4)
- Serving Essentials:
- Champagne flutes or wine glasses
- Ice bucket or cooler for champagne
- Pretty pitchers for juices
- Small bowls for fruit garnishes
- Cocktail napkins
- Small serving spoons for fruit
- Display Elements:
- Table runner or festive tablecloth
- Small chalkboard signs for labeling juices
- Fresh greenery or holiday florals
- Candles for ambiance (unscented)
Setup Steps
- Select your station location on a sideboard, kitchen island, or dining table corner where guests can access easily without blocking main breakfast traffic flow or creating bottlenecks during busy morning moments.
- Layer your display surface with a festive table runner or cloth that protects furniture while creating elegant backdrop for bottles and glassware—holiday colors or crisp white both work beautifully.
- Chill champagne bottles thoroughly the evening before, storing them in refrigerator or cooler so they're perfectly cold when guests arrive rather than requiring last-minute ice bucket scrambles.
- Prep fresh fruit the night before by washing, slicing strawberries, removing mint stems, and storing everything in sealed containers so morning assembly involves only arranging rather than chopping and washing.
- Pour juices into attractive pitchers or carafes rather than leaving them in store cartons, which elevates the presentation from casual breakfast to elegant brunch instantly with minimal effort.
- Arrange champagne bottles in ice bucket or cooler positioned prominently on the station, ensuring they're easily accessible for self-service without requiring guests to dig through melting ice awkwardly.
- Display juice pitchers in descending size or color order, creating visual flow that guides guests through options naturally rather than random placement that feels chaotic and unintentional.
- Fill small decorative bowls with prepared fruit garnishes, positioning them near the end of the station so guests build drinks first then add finishing touches last in logical sequence.
- Stack champagne flutes or glasses at the beginning of the station where guests naturally start, making the flow intuitive: glass first, then champagne, then juice, then garnishes in that order.
- Label juice pitchers with small chalkboard signs or tent cards identifying flavors, which eliminates guessing games and helps guests make informed choices about their custom creations.
- Add final touches like fresh greenery tucked between bottles, small votive candles for ambiance, and a festive cocktail napkin stack that completes the elegant presentation and signals this isn't ordinary breakfast.
Professional event planners create more inclusive stations by offering sparkling water or ginger ale alongside champagne, giving non-drinkers, designated drivers, and those avoiding alcohol festive bubbly options that look identical to mimosas in glasses so nobody feels excluded from the celebration. The ratio that creates perfectly balanced mimosas: start with glass one-third full of juice, top with champagne, which provides enough fruit flavor without overwhelming the delicate bubbles or turning drinks into juice with a splash of sparkle. For crowd management during busy mornings, pre-pour champagne into a few glasses right before serving time, which jumpstarts the line and demonstrates proper proportions for guests unsure about mixing their own drinks. Consider dietary restrictions when selecting juices: choose 100% juice without added sugars for health-conscious guests, keep some juices pulp-free for texture preferences, and label anything with grapefruit which interacts with certain medications. The color strategy that photographs beautifully: arrange juices from lightest to darkest (orange, cranberry, pomegranate) creating visual gradient that looks intentional and magazine-worthy in morning light streaming through windows. Store backup juice bottles in the refrigerator rather than crowding the station, refilling pitchers as needed to maintain the elegant uncluttered display rather than creating visual chaos with too many containers competing for space. The toast timing that maximizes festive impact: once everyone has drinks, gather the group for a proper Christmas morning toast before presents begin, creating that intentional celebration moment that makes the mimosa bar about connection rather than just beverages. Remember that mimosas are morning drinks meant for sipping slowly throughout breakfast rather than rapid consumption—the station should remain active for 1-2 hours allowing guests to refill as desired while enjoying food and conversation at a leisurely holiday pace. For families with teenagers, the mocktail version that feels equally special: sparkling cider or ginger ale mixed with juices and garnished identically creates inclusive celebration where younger guests enjoy festive drinks without the alcohol, teaching that special occasions are about shared rituals rather than exclusively adult beverages.