
DIY Projects

Recent Content

Shoe Bench Build: The Cubby Depth That Keeps Pairs Upright

Shoe Bench Build: The Cubby Depth That Keeps Pairs Upright

Build a wooden entryway shoe bench for $35—the cubby depth is what keeps boots standing instead of toppling into a pile every morning.

Style a Layered Nightstand Vignette in 1 Hour for $35

Style a Layered Nightstand Vignette in 1 Hour for $35

Turn a cluttered nightstand into a cozy styled vignette with the height-rule trick—1 hour, $35, instant bedroom upgrade.

The Cafe Rod Trick for a Fake Built-In Vanity

The Cafe Rod Trick for a Fake Built-In Vanity

Fake a built-in bathroom vanity shelf with a tiny cafe rod and basket—zero drilling, zero suction cups, full deposit intact.

Tension Rod Shelf: The Rod Width That Won't Slip

Tension Rod Shelf: The Rod Width That Won't Slip

Build a hidden double-decker shelf under your sink for $6—the rod tension width is what keeps it from crashing down on cleaning day.

Mulch Perennial Beds for Winter in 1 Hour for $25

Mulch Perennial Beds for Winter in 1 Hour for $25

Tuck your perennials in right! A 3-inch mulch blanket now saves roots from winter heave for about $25.

logo
  • Home Improvement
  • DIY Projects
  • Interior Design
  • Gardening & Outdoor
  • Real Estate
  • Home Improvement
  • DIY Projects
  • Interior Design
  • Gardening & Outdoor
  • Real Estate
  • ​

Backyard Cinema: Create Your Own Outdoor Movie Screen

Transform your yard into the neighborhood's favorite movie destination
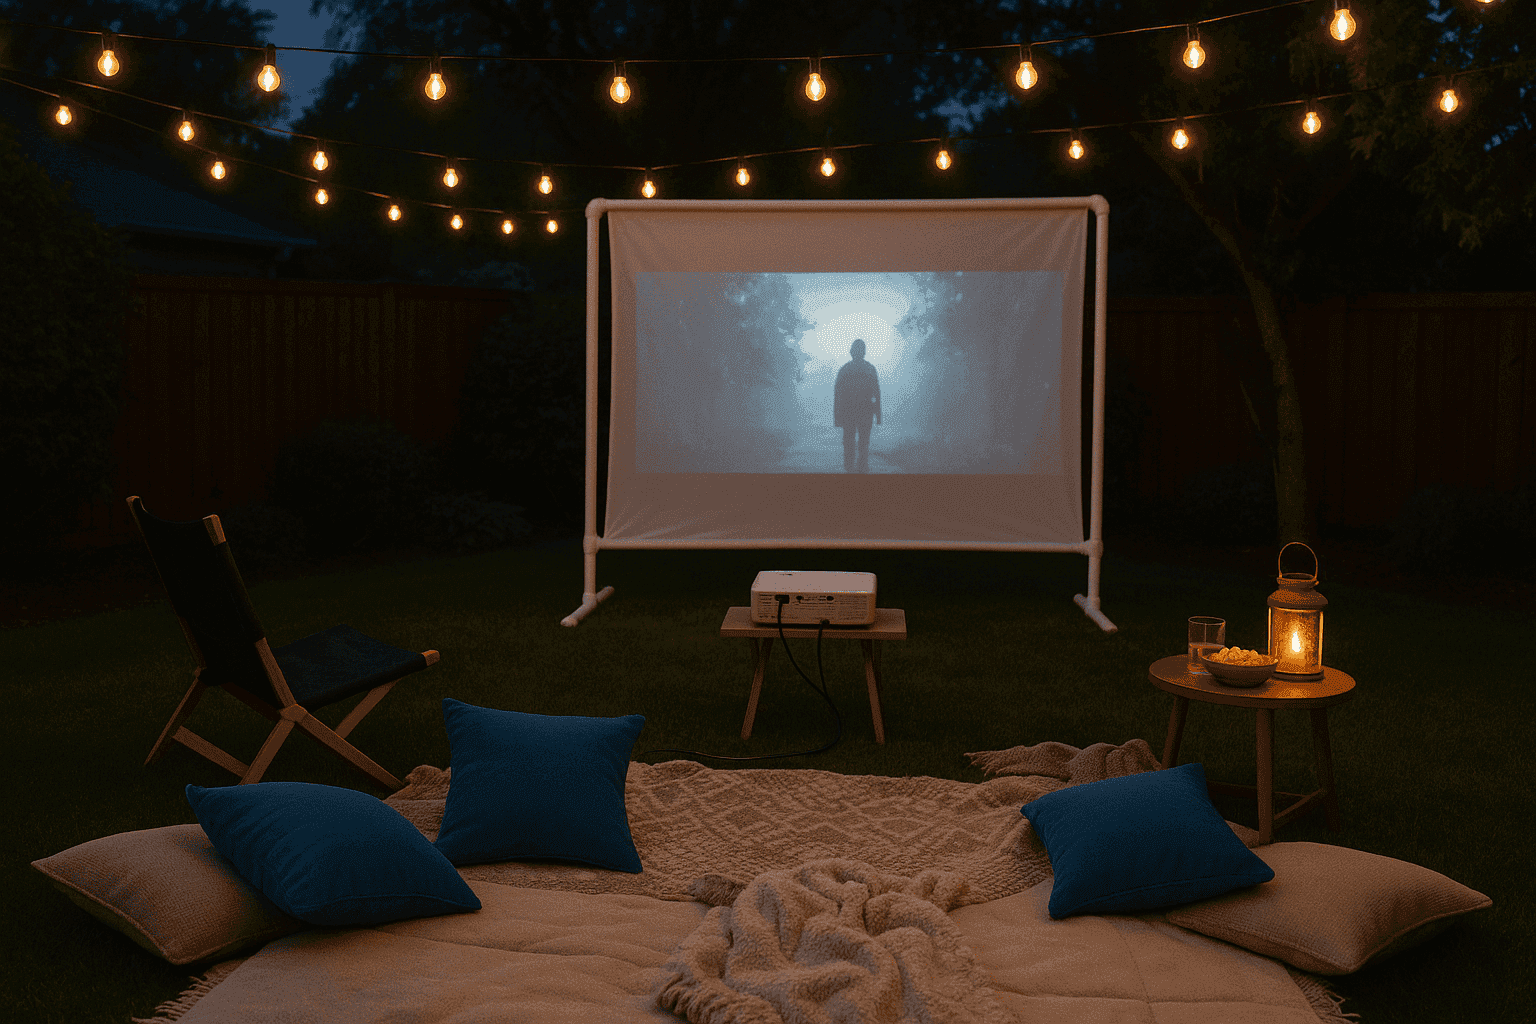
Backyard movie night setup with DIY screen and cozy seating area
DIY PROJECTS

There's something magical about gathering friends and family under the stars for an outdoor movie night. With a DIY outdoor movie screen, you can create memorable evenings in your own backyard without the expense of professional installation. Whether you're planning a one-time special event or a regular summer tradition, this simple weekend project delivers big entertainment value with minimal materials and moderate effort.

Materials & Equipment

• Screen Material: White blackout cloth or canvas drop cloth
• Frame Options: PVC pipes or 2x4 lumber
• Fasteners: Grommets, zip ties, bungee cords
• Tools: Scissors, drill, saw, measuring tape
• Projector: Standard home projector
• Audio: Bluetooth speaker or portable sound system
• Power Source: Extension cords, surge protector
• Comfort Elements: Blankets, pillows, outdoor seating
• Ambiance: String lights, lanterns, citronella candles

Construction Process

  1. Determine screen size. Consider your viewing distance and projector capabilities. A standard 16:9 aspect ratio works well for most movies. For 4-6 viewers, aim for a screen approximately 8 feet wide by 4.5 feet tall.
  2. Choose your frame type. For a portable PVC frame, use 1-inch diameter pipes and connectors to create a rectangle slightly larger than your screen dimensions. For a sturdier wooden frame, construct a simple rectangle using 2x4s with corner braces.
  3. Prepare your screen material. Iron blackout cloth to remove wrinkles. For added durability, fold and sew a 2-inch hem around all edges or use fabric glue if you don't have a sewing machine.
  4. Attach screen to frame. For PVC frame: Install grommets around the edges of your fabric and use zip ties or bungee cords to secure it to the frame, pulling taut for a smooth surface. For wooden frame: Staple fabric directly to the back side of the frame, stretching as you go.
  5. Create a stable base. For freestanding designs, add "feet" to your frame using T-connectors and additional PVC pipes, or wooden legs with diagonal supports. Alternatively, design your frame with ground stakes for lawn installation.
  6. Consider mounting options. For semi-permanent installation, mount sturdy hooks to exterior walls, fence posts, or trees to hang your screen using rope or bungee cords. Ensure all mounting points can support the weight of your screen.
  7. Set up your tech. Position your projector on a stable surface at the proper distance from the screen. Connect to your media source and audio system. Run extension cords along the ground and secure with tape to prevent tripping hazards.
  8. Create comfortable viewing areas. Arrange weather-resistant seating at an appropriate distance from the screen. Add extra blankets, pillows, and perhaps low tables for snacks and drinks.
  9. Add ambient lighting. String lights along pathways or around the viewing area provide enough illumination for safety without interfering with screen visibility.
DESIGNER TIP

For the ultimate outdoor cinema experience, create defined "theater zones" in your yard. Establish a concession stand using a bar cart stocked with movie snacks, a popcorn maker, and drinks in a cooler. Set up a "ticket booth" where guests can pick up custom movie tickets and program guides for the evening's feature. For multi-level seating, position low chairs and blankets in front, with taller adirondack chairs or bar-height seating behind. Remember that sound carries outdoors, so consider using wireless headphones for late-night screenings to maintain neighborly relations!


Related Content

DIY Projects

04 November 2026

Post

Shoe Bench Build: The Cubby Depth That Keeps Pairs Upright

Build a wooden entryway shoe bench for $35—the cubby depth is what keeps boots standing instead of toppling into a pile every morning....

DIY Projects

03 November 2026

Post

Tension Rod Shelf: The Rod Width That Won't Slip

Build a hidden double-decker shelf under your sink for $6—the rod tension width is what keeps it from crashing down on cleaning day....

DIY Projects

01 November 2026

Post

Sew Flannel Pajama Pants in 3 Hours for $25

Ditch store PJs! Sew cozy flannel pajama pants with an elastic waist in 3 hours for about $25 — perfect for chilly November nights....

DIY Projects

31 October 2026

Post

Build a Trick-or-Treat Bucket Lantern in 1 Hour for $15

Light up Halloween night with a glowing trick-or-treat bucket lantern—1 hour, $15, and way safer than a candle in a pumpkin....

DIY Projects

30 October 2026

Post

Pour Pumpkin Spice Candles in 1 Hour for $15

Ditch the $28 mall candle—pour your own pumpkin spice soy candles at home for $15 and fill your house with fall in an hour....

DIY Projects

29 October 2026

Post

Tabletop Zen Garden: The Sand Depth That Holds Lines

Build a calming tabletop zen garden for $15—the sand depth is the one thing that decides if your rake lines actually hold or vanish....

DIY Projects

28 October 2026

Post

Wooden Dish Rack: The Dowel Angle That Drains Right

Build a slatted wood dish rack for $18—the dowel tilt angle is what actually drains water into the tray instead of pooling on your counter....

DIY Projects

27 October 2026

Post

Pool Noodle Knife Block: The Slice Depth That Stops Wobble

Turn a $1 pool noodle into a safe knife block—the slice depth is what keeps blades from wobbling loose or slicing through the foam....

DIY Projects

27 October 2026

Post

Build a Wooden Pie Carrier in 2 Hours for $25

Never smash a pie in the car again! Build a snug wooden pie carrier in 2 hours for $25—perfect timing for fall potlucks....

DIY Projects

26 October 2026

Post

Make Herb-Infused Honey in 30 Minutes for $12

Turn raw honey into a cold-season secret weapon—infuse it with thyme and ginger in 30 minutes for about $12, no fancy gear needed....

DIY Projects

25 October 2026

Post

Make Homemade Fire Cider in 20 Minutes for $15

Steep this spicy apple cider vinegar tonic now so it's ready to fight off fall colds in 4 weeks—20 minutes, $15, zero cooking skills....

DIY Projects

23 October 2026

Post

Build a Freestanding Coat Rack in 2 Hours for $35

Sick of coats piled on chairs? Build a sturdy freestanding coat rack in 2 hours for $35 — no wall drilling, just solid joinery....

DIY Projects

22 October 2026

Post

Window Frame to Pet Gate: The Hinge Set That Holds

Turn an old wooden window frame into a swinging pet gate for $22 — the hinge mortise depth is what keeps it from sagging open over time....

DIY Projects

22 October 2026

Post

Make Spiced Homemade Applesauce in 1 Hour for $12

Turn a bag of fall apples into silky spiced applesauce in an hour for $12 — no peeling required if you've got the right tool....

DIY Projects

21 October 2026

Post

Floating Nightstand: The Bracket Depth That Holds Weight

Build a wall-mounted wooden nightstand for $25 — the bracket depth inside the wood is what stops it from sagging under a lamp and books....
Terms and ConditionsDo Not Sell or Share My Personal InformationPrivacy PolicyPrivacy NoticeAccessibility NoticeUnsubscribe
Copyright © 2026 DIY HomeBoost












